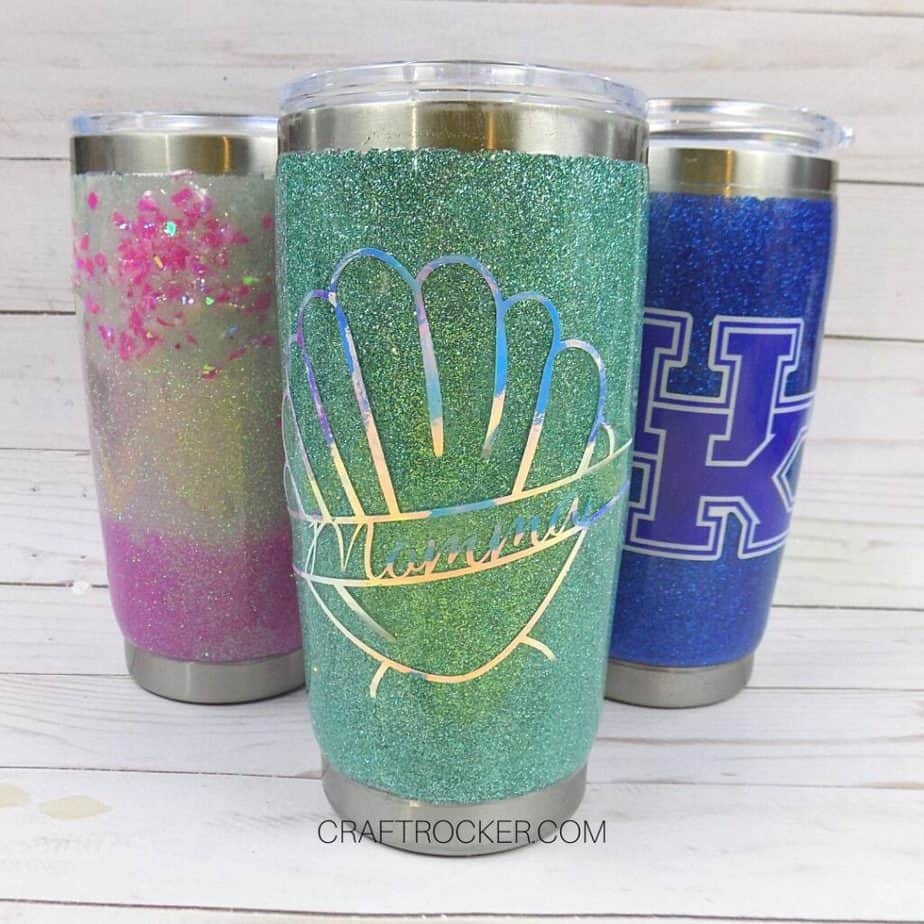
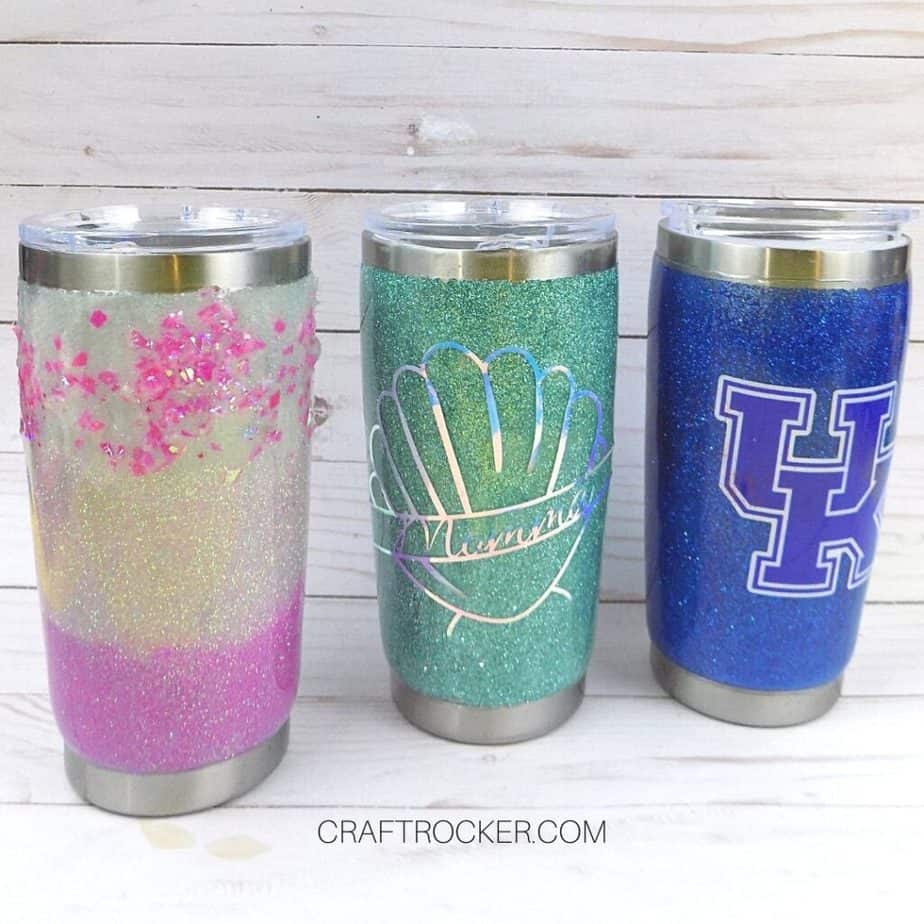
If you have wondered how to make glitter tumblers then this is the tutorial for you! I’m sharing 3 different ways from adding an image without a Cricut to how to make ombre with glitter!
Affiliate links may be used in this post. Ordering a product through these links may result in a commission at no extra cost to you. Read the full disclosure here.
Jump to What You Want


It’s amazing that I am such a glitter fanatic and it took me so long to make one of these. What’s more, they are so easy once you make a couple of them.
I truly enjoy making these and look forward to experimenting more and sharing the results with you. Until then, here are all the basics to get you started making your own glitter tumblers at home!
How to Set Up Your Cup Turner
I highly recommend this cup turner from Amazon. It’s super easy to set up, use, and understand. However, most cup turner kits that you buy will be set up similarly so these instructions will still help.

Step 1
First, open your box and make sure all of the components, tools, and instructions are there.
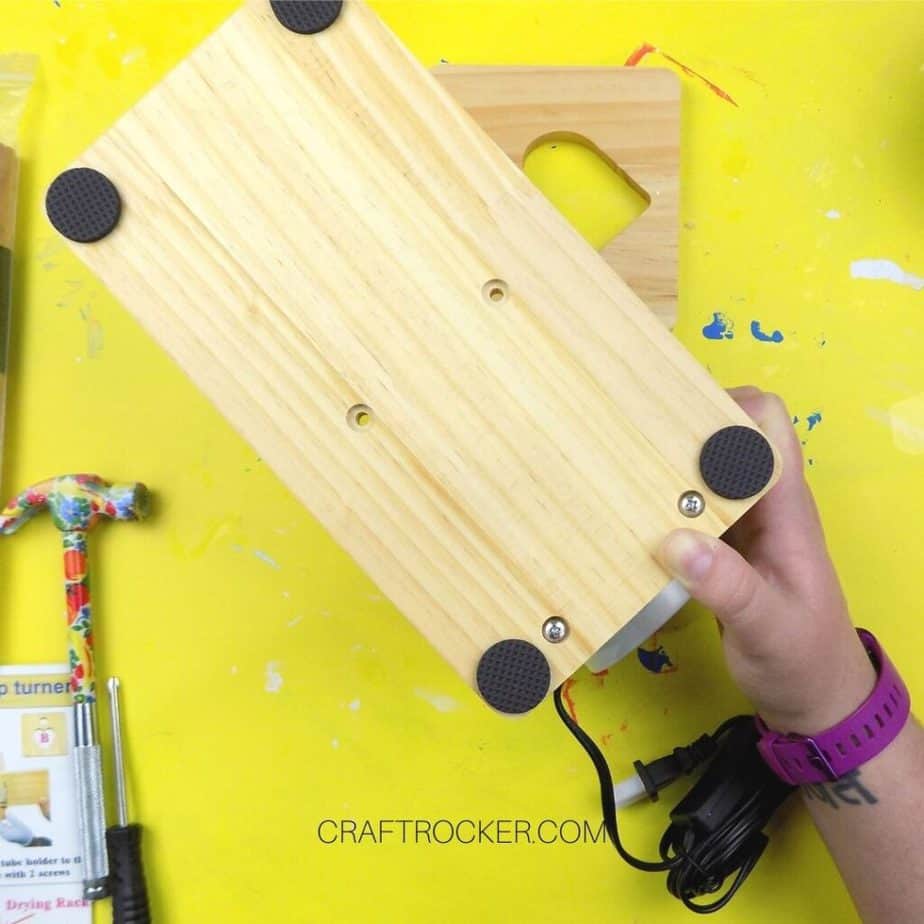
Step 2
Then, screw the wooden piece with the motor attach to the back of your wood base.
The kit I recommend above came with the screwdriver needed, but it’s a simple Phillips-head screwdriver that can be found in any basic tool set.
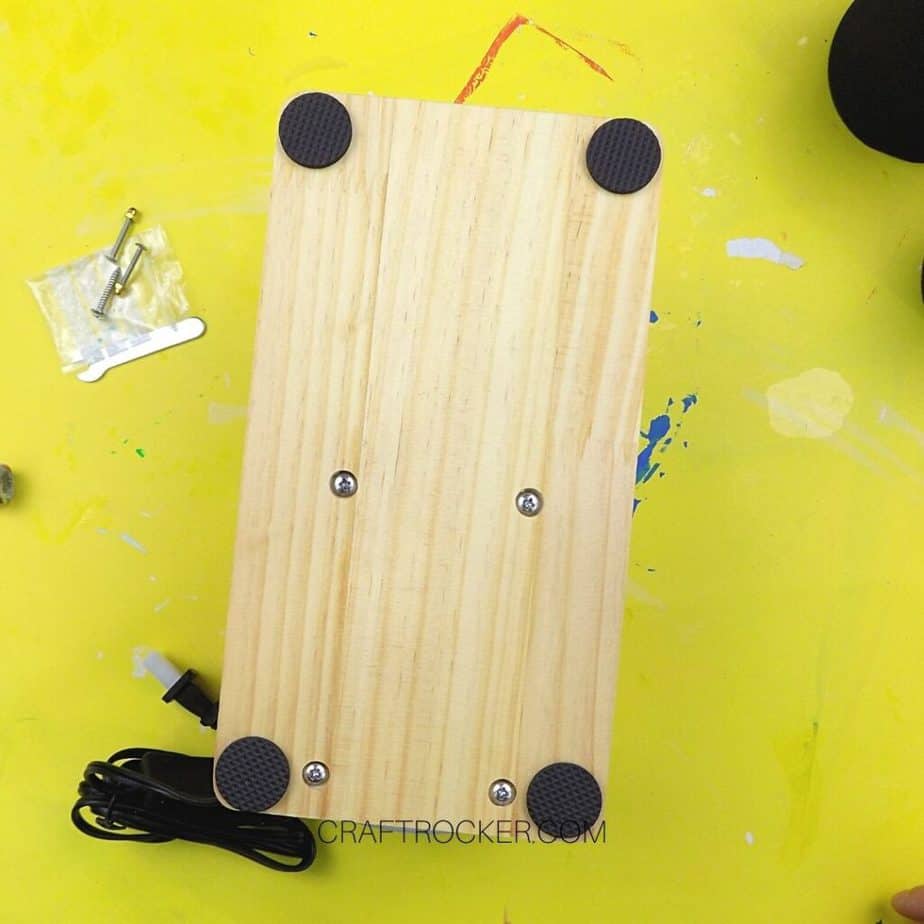
Step 3
Next screw on the second wooden piece to your base. This piece does not have a motor attached to it and instead has a circular opening in the center of it.
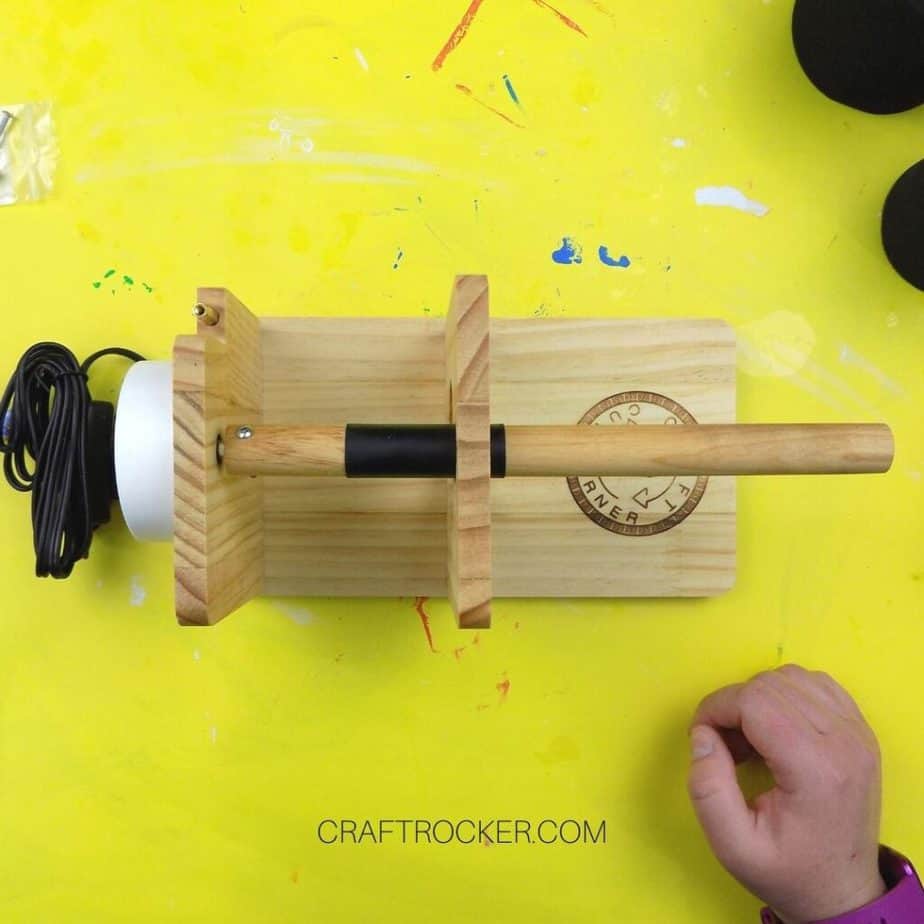
Step 4
Lastly, attach your dowel rod by threading it through the hole in the first wood piece and onto the connector on the motorized piece. Secure it in place with a small screw so that it turns when you turn on your motor.
That’s it. Like I said, this cup turner was super simple to set up. The second dowel rod can be placed upright on the metal piece on the wood section with the motor for continuing to dry/cure your tumblers with turning.
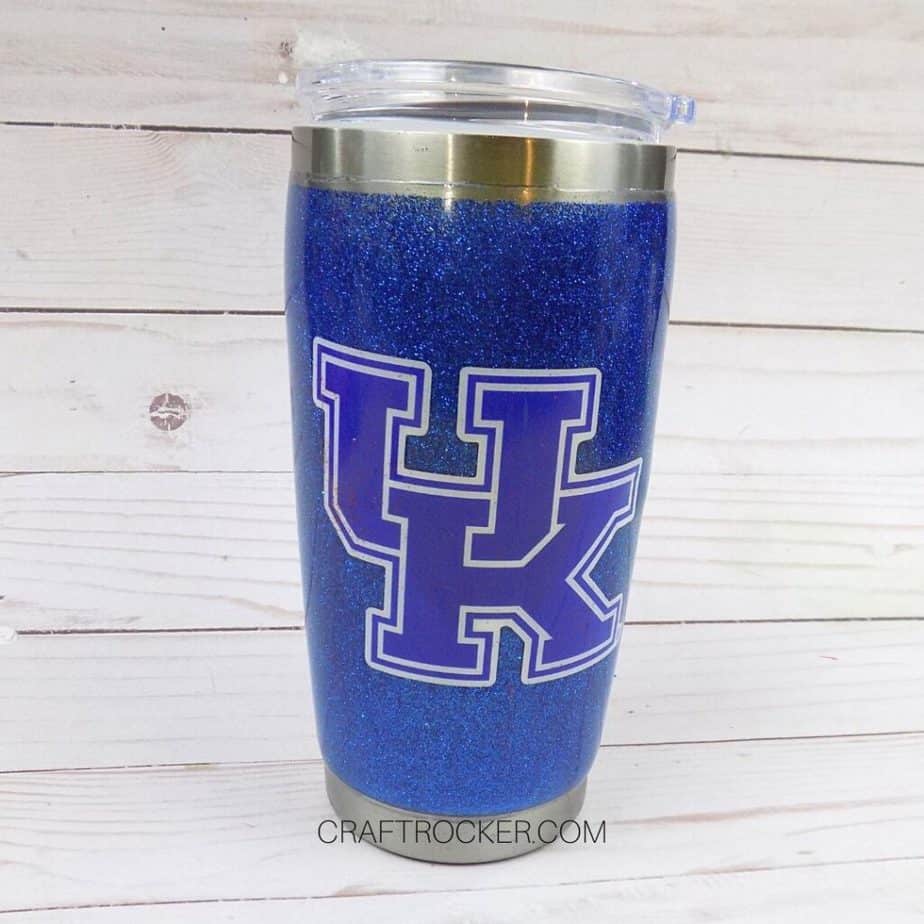
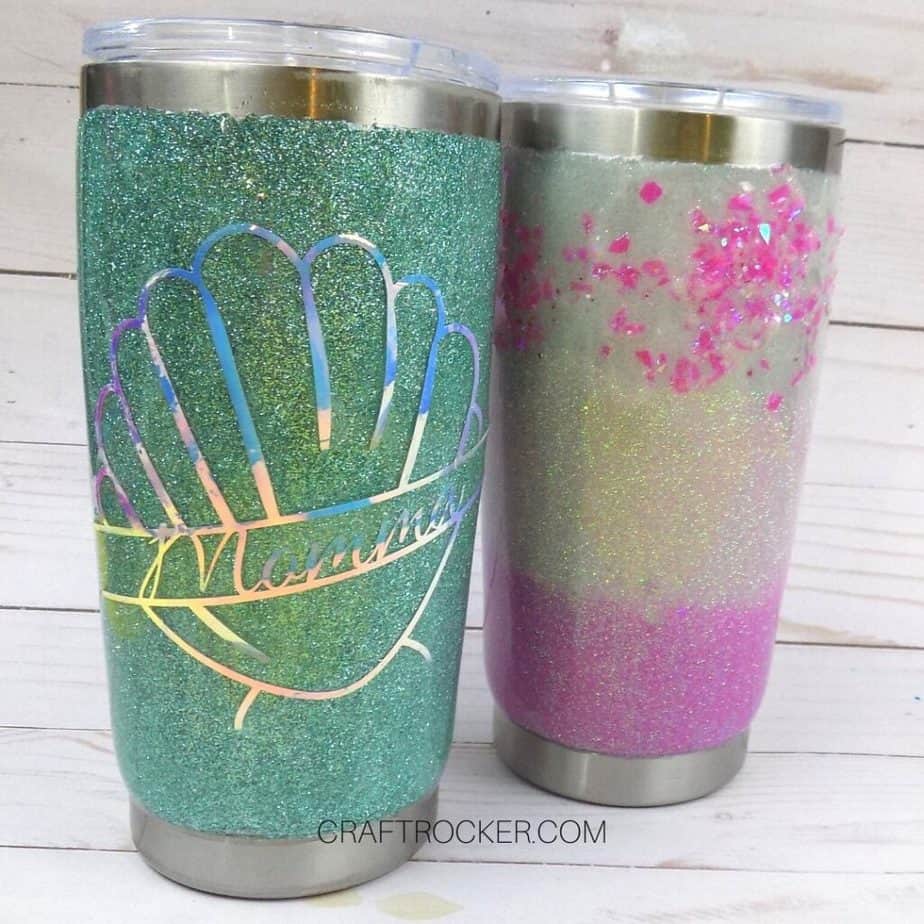
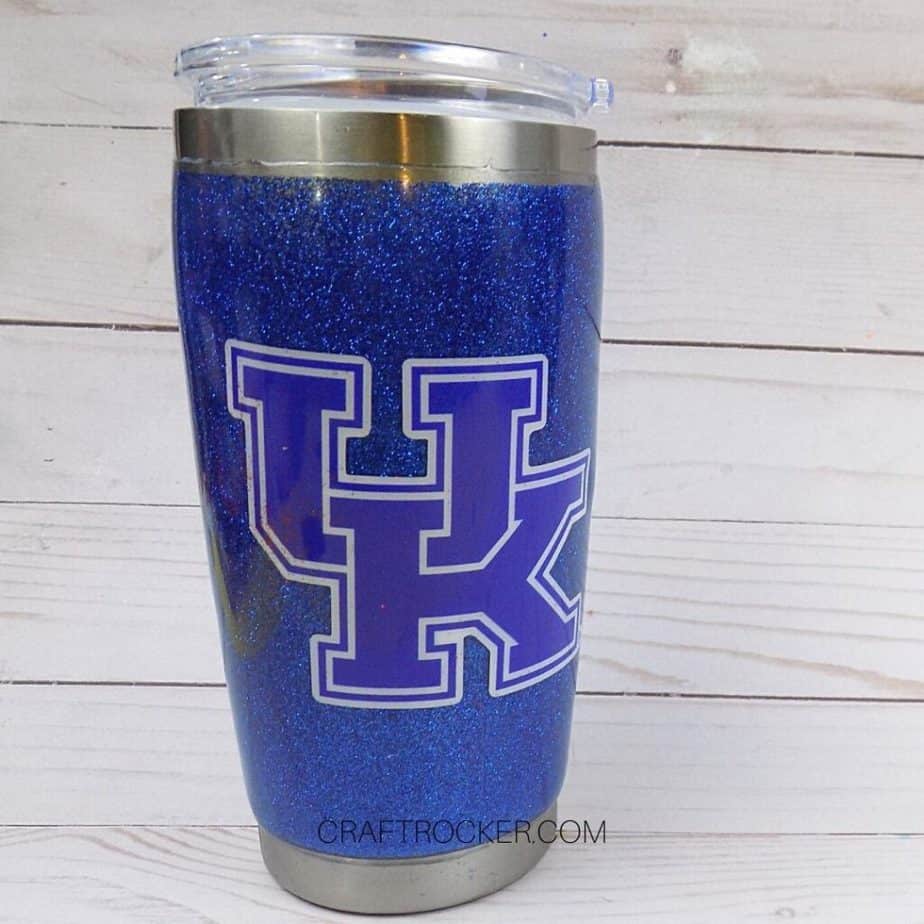
How to Make a Glitter Tumbler with Images
I made this glitter tumbler with spray adhesive for the glitter. There were pros and cons to this which you can read about in the FAQ section of this post.
It’s important to note that you do not want to brush the excess glitter off with this after it has dried because you can end up pulling a lot of the glitter off.
The same goes for sanding. I found that it didn’t sand as well as the Mod Podge and glitter. That’s why this tumbler requires 2 layers of epoxy which obviously affects the total process time.
Materials Needed
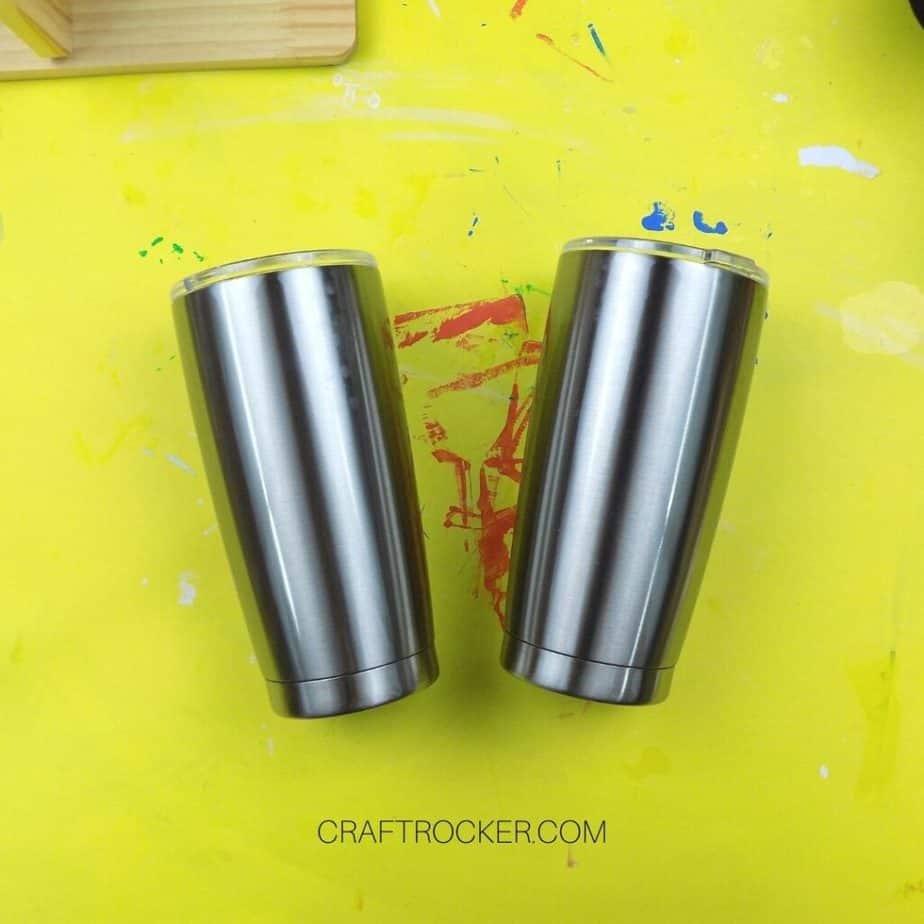
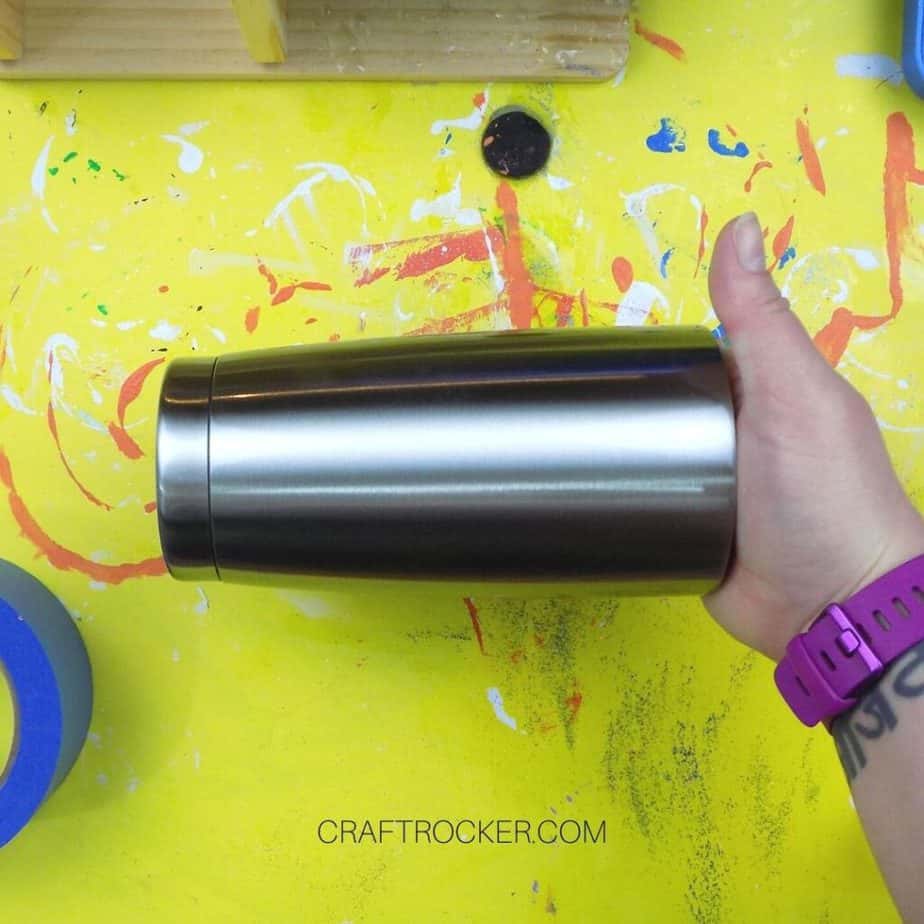
Stainless Steel Tumbler (I used this set)
Measuring Cup for Measuring and Mixing Epoxy
Wood Stick (also for mixing epoxy)
Protective Gloves
1/2 Inch to 1 Inch Wide Painters Tape
Glitter in Color of Choice
Vinyl Sticker Image (I used these)
Note:
You will need 2 each of the epoxy tools for this one because you have to coat your tumbler 2 times.
Step 1
First, I recommend cleaning your tumbler with rubbing alcohol so that your glitter sticks well.
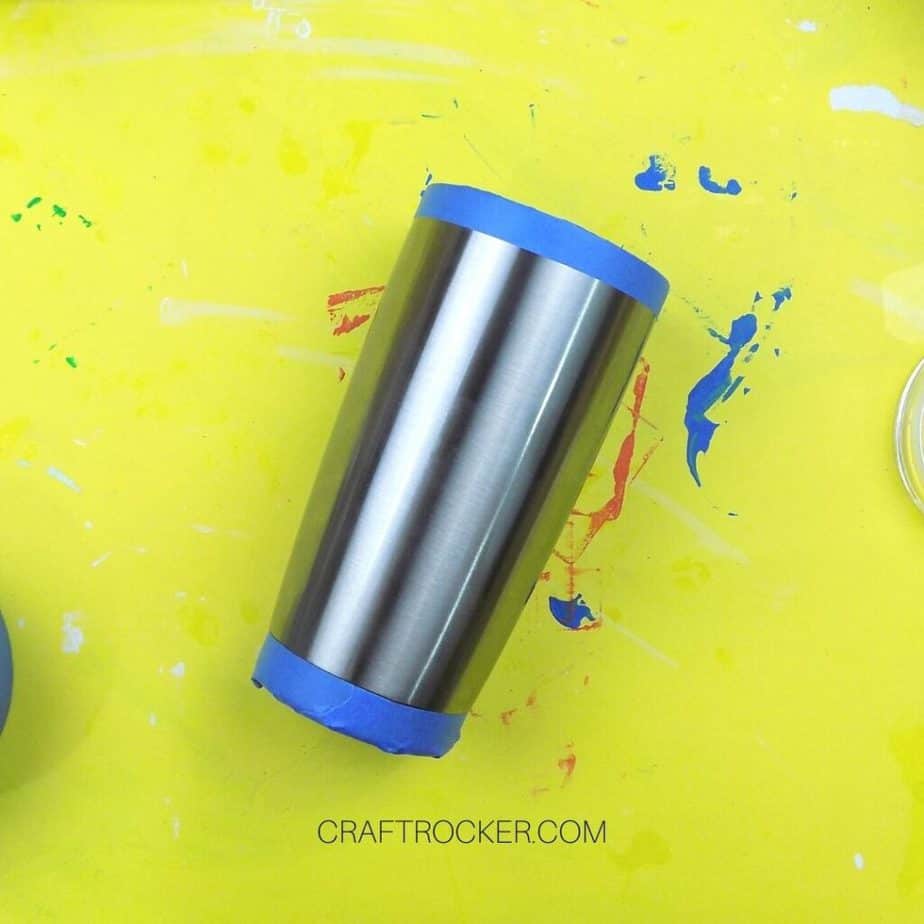
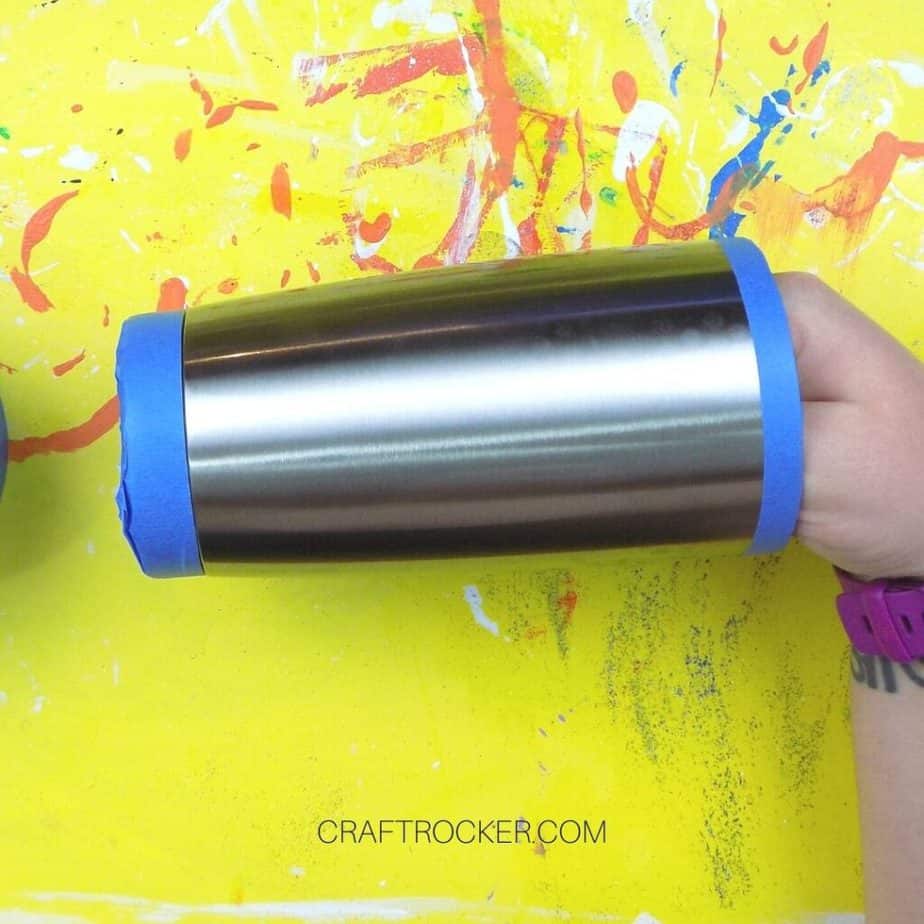
Step 2
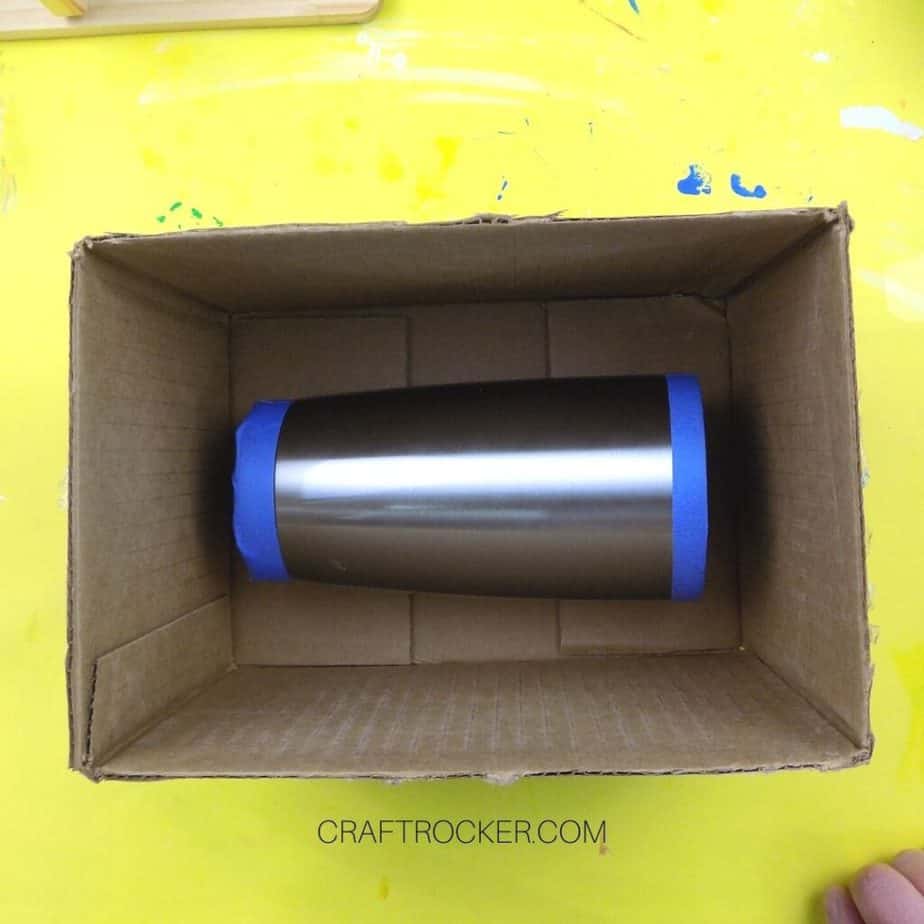
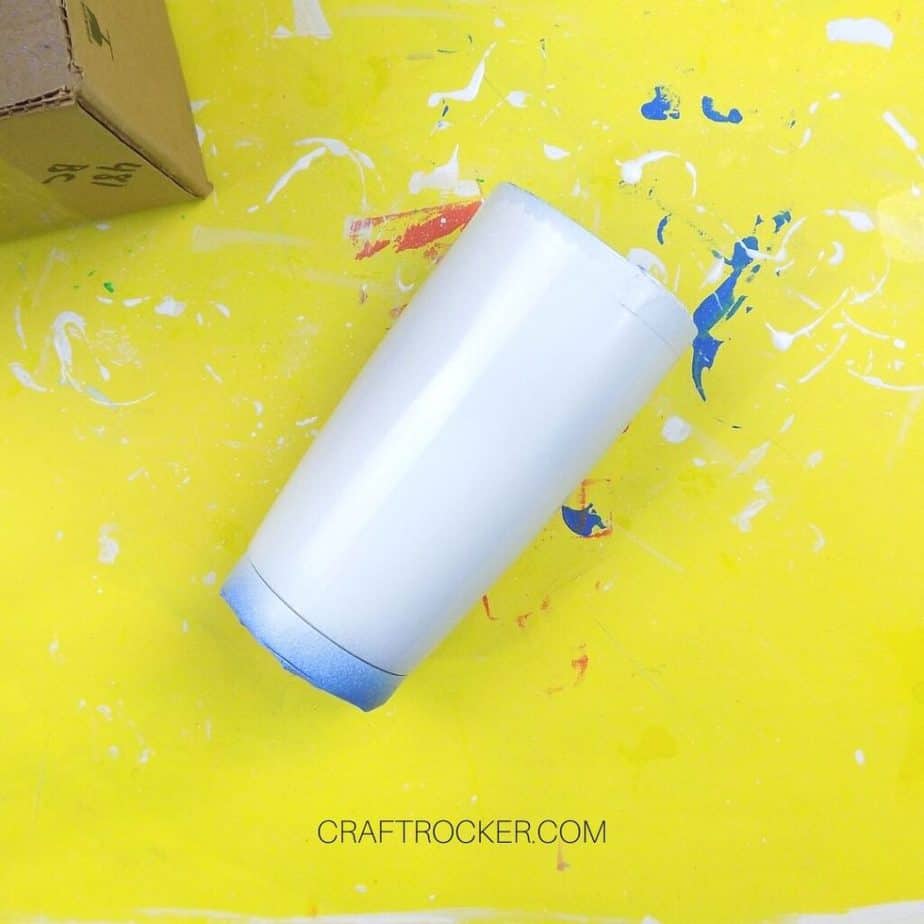
Next, tape the top and bottom of your cup. You don’t need to tape more than 1/2 inch from the lip and base of the cup. See the photo for reference.
Step 3
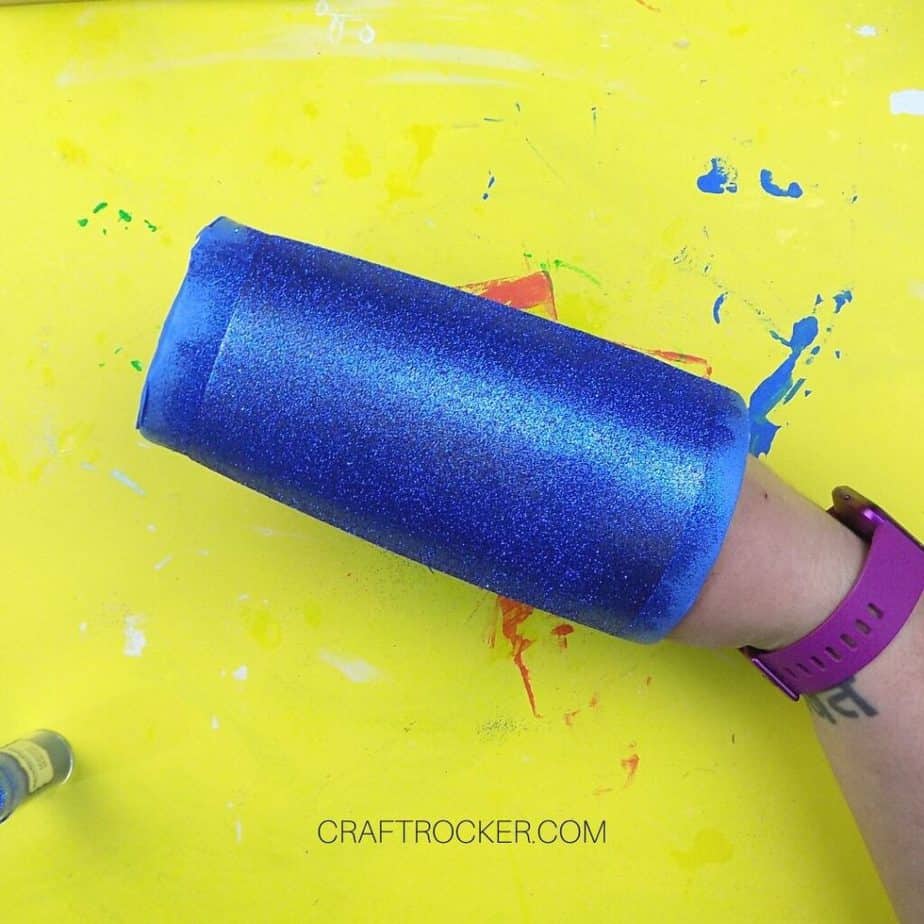
Then place your taped cup in a cardboard box or similarly protected area and spray with a healthy coat of Loctite. Then cover it in glitter and shake off the excess.
Step 4
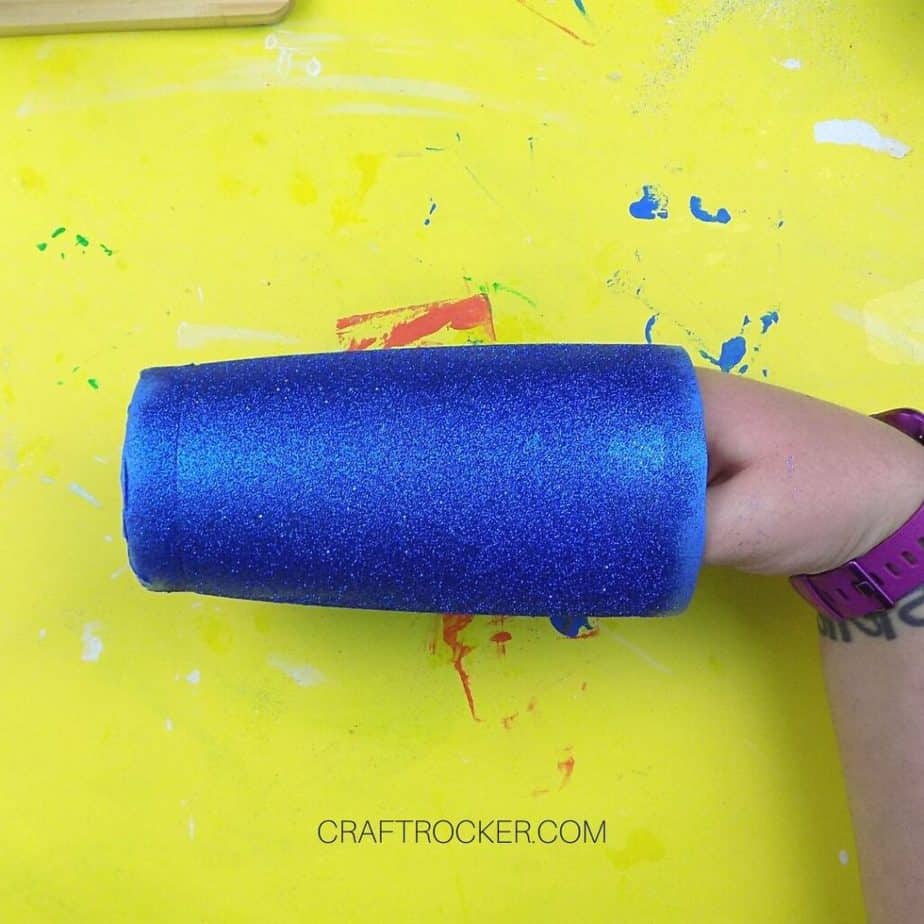
Continue to spray and cover with glitter until the entire cup is covered. Then all the adhesive to dry completely before moving on.
Step 5
After your adhesive is dry, repeat steps 3 and 4 with a second coat of glitter. Again, allow the adhesive to dry completely before moving on.
Step 6
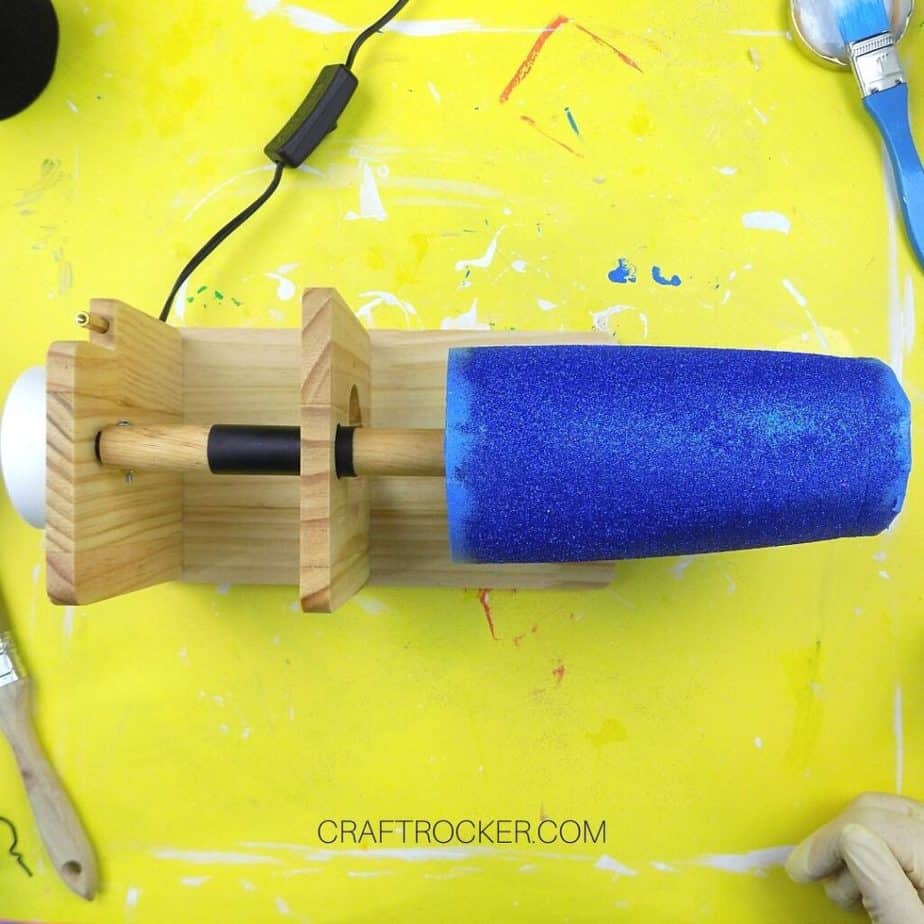
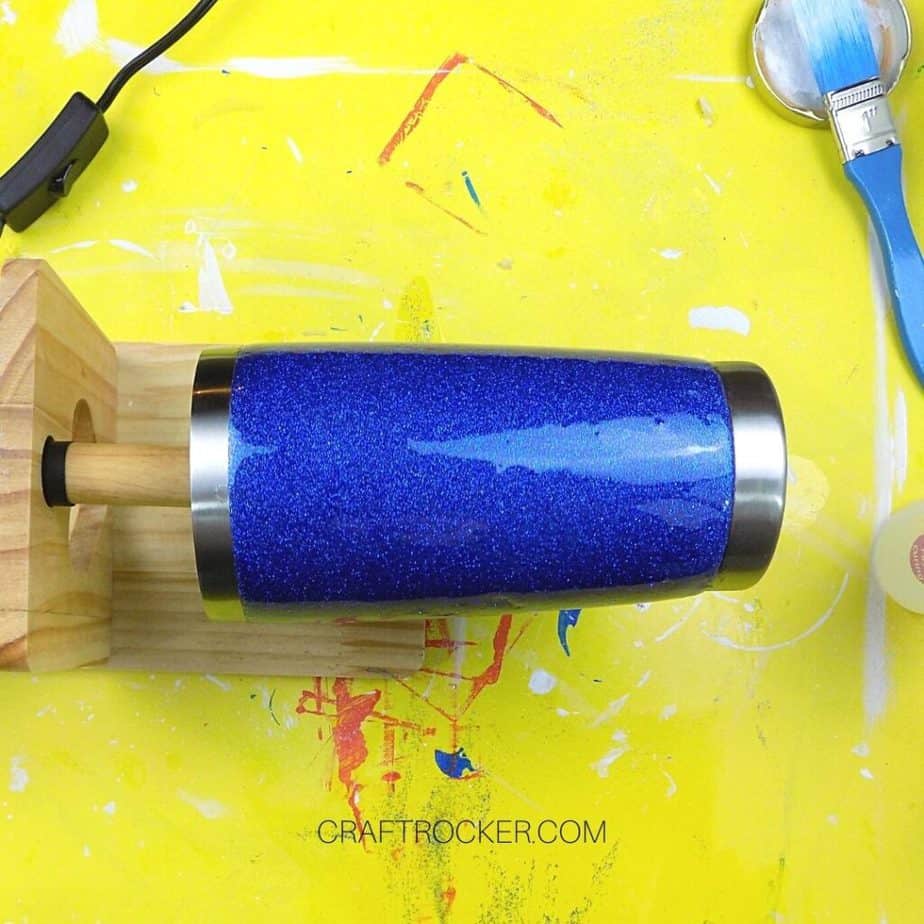
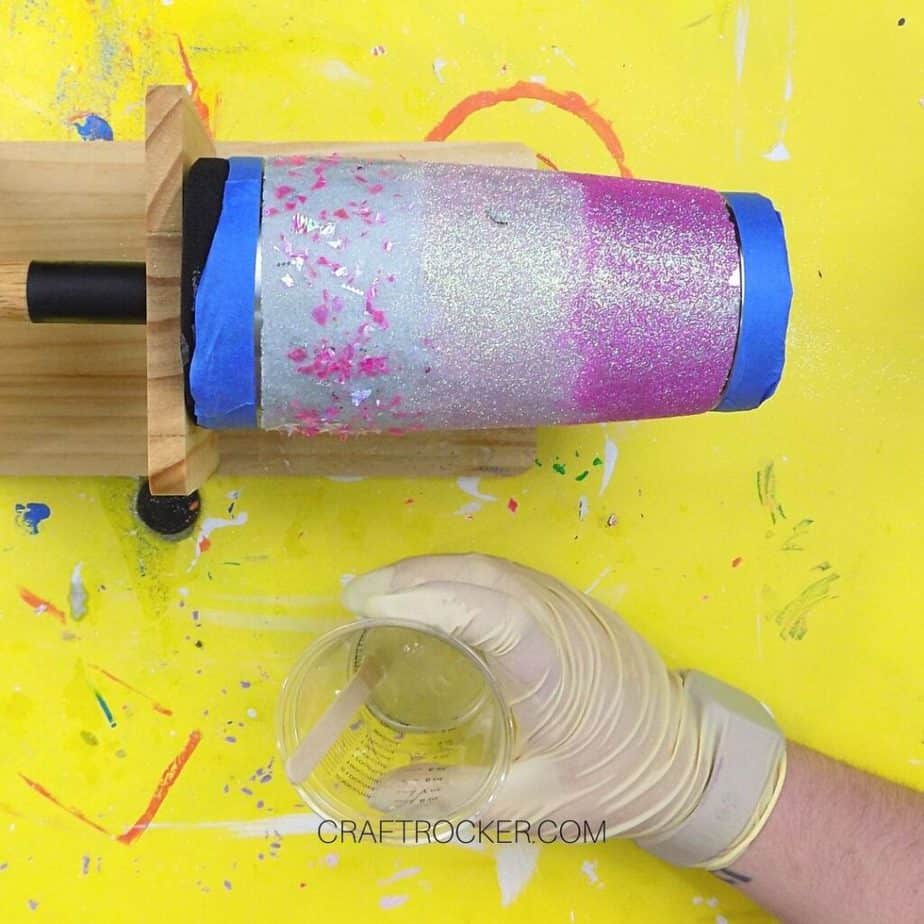
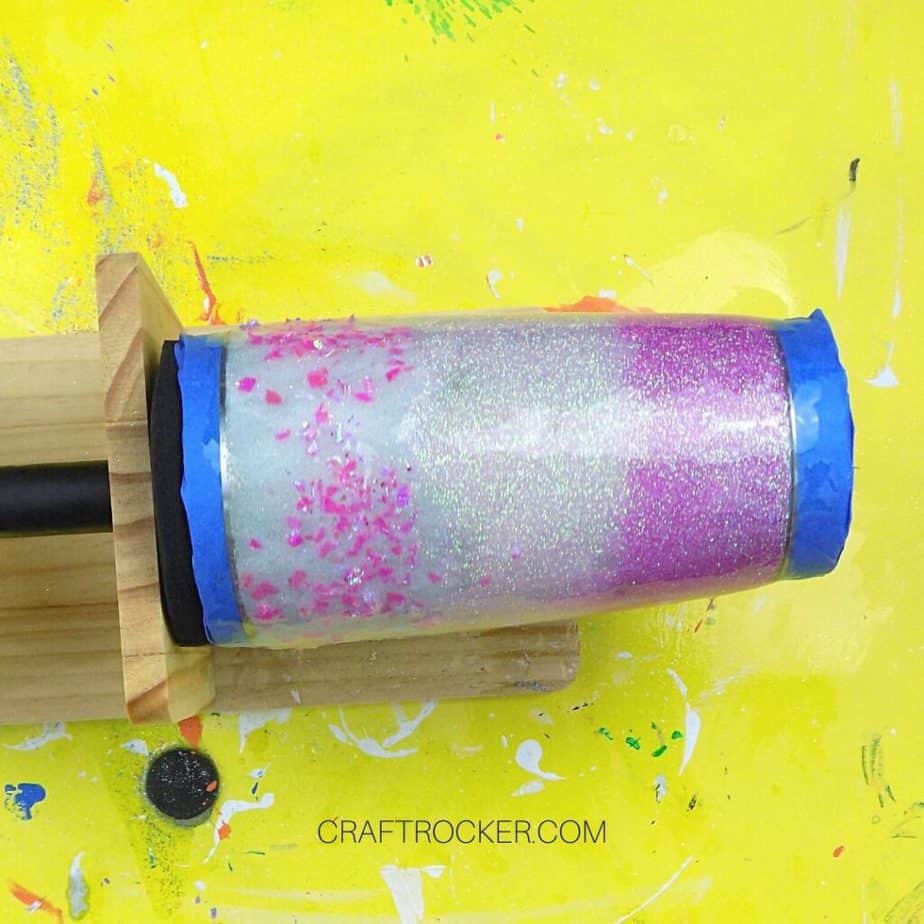
Next, place the foam piece that came with your cup turner inside of your tumbler and firmly slide it onto the dowel rod of your cup turner.
Note:
Make sure the edges of the tape are easily accessible. You don’t want to have to dig them out of the cup later with epoxy all over it.
Step 7
Now mix 1 ounce each of your casting resin parts A and B in your measuring cup. Then cover your entire tumbler with a thin coat of resin.
You will have to turn your cup periodically as you go (and it will be messy so make sure that you do it on a protected surface).
Note:
Be sure to wear gloves any time you are working with epoxy.
Step 8
After your tumbler is coated in resin, turn on your cup turner and set a timer for 40 minutes.

Step 9
When 40 minutes is up, remove the tape around the top and bottom. Continue leaving turner running for at least 8 hours.
Step 10
After 8 hours you can move the tumbler to the upright dowel rod on your cup turner to continue curing for another 15 hours.
Step 11
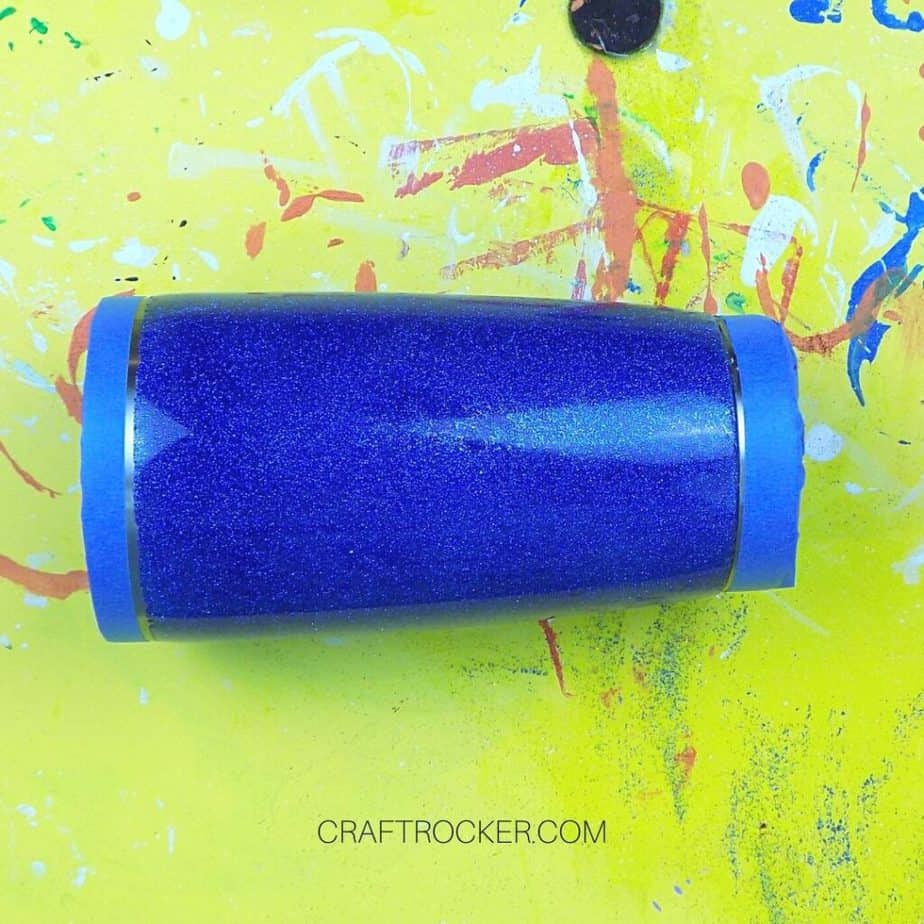
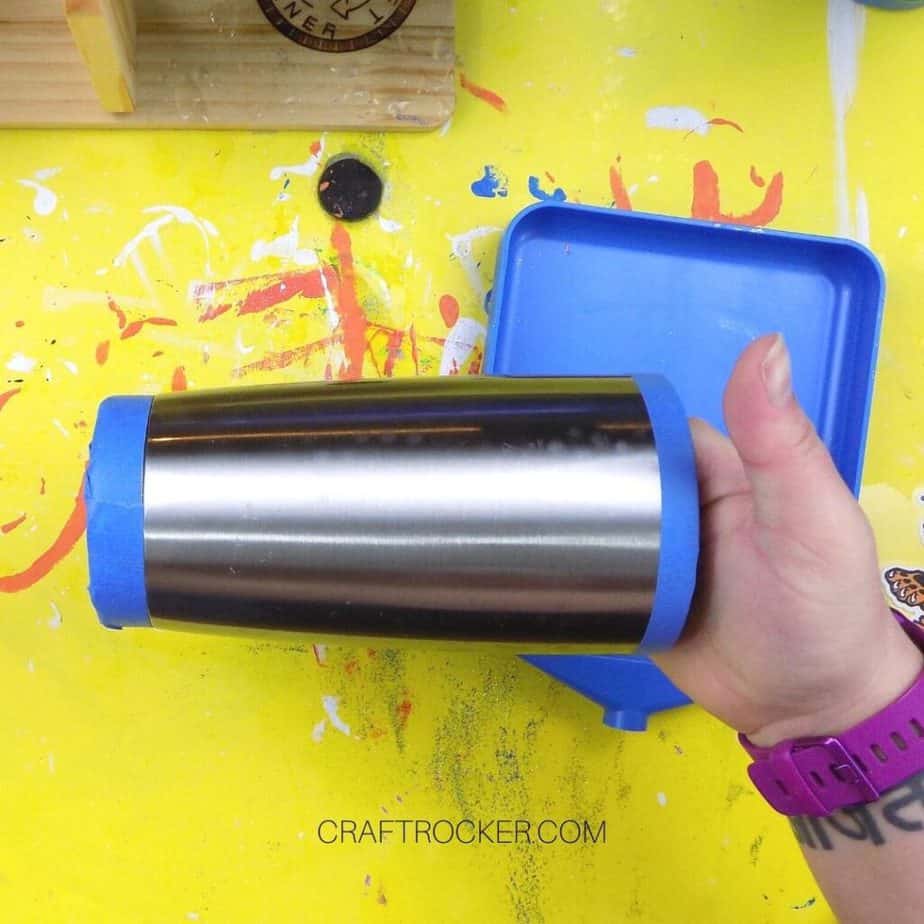
Once the tumbler is finished curing, again tape the top and bottom but this time leave a small gap between the tape edge and the glitter edge.
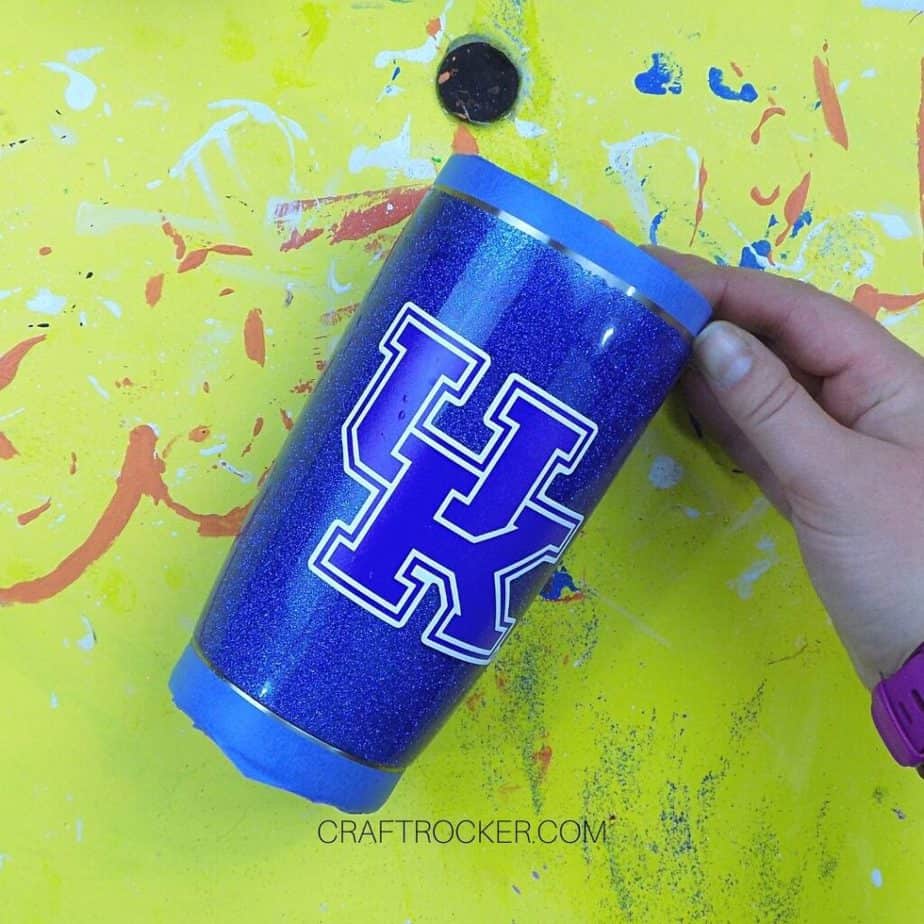
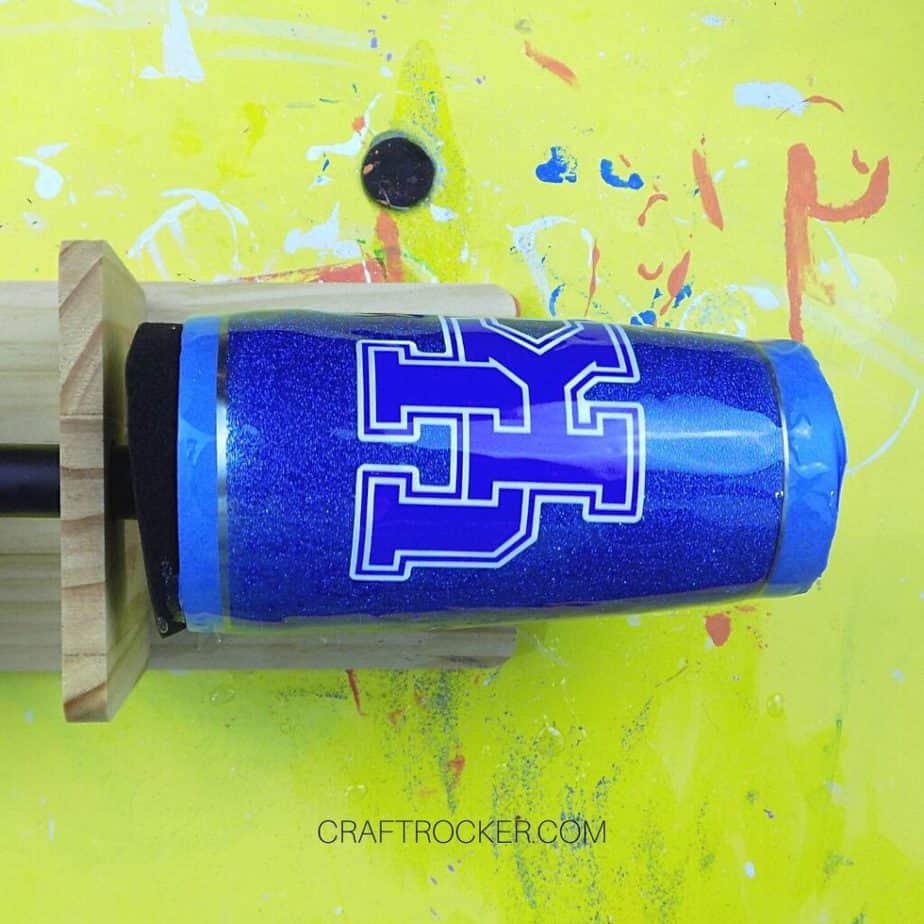
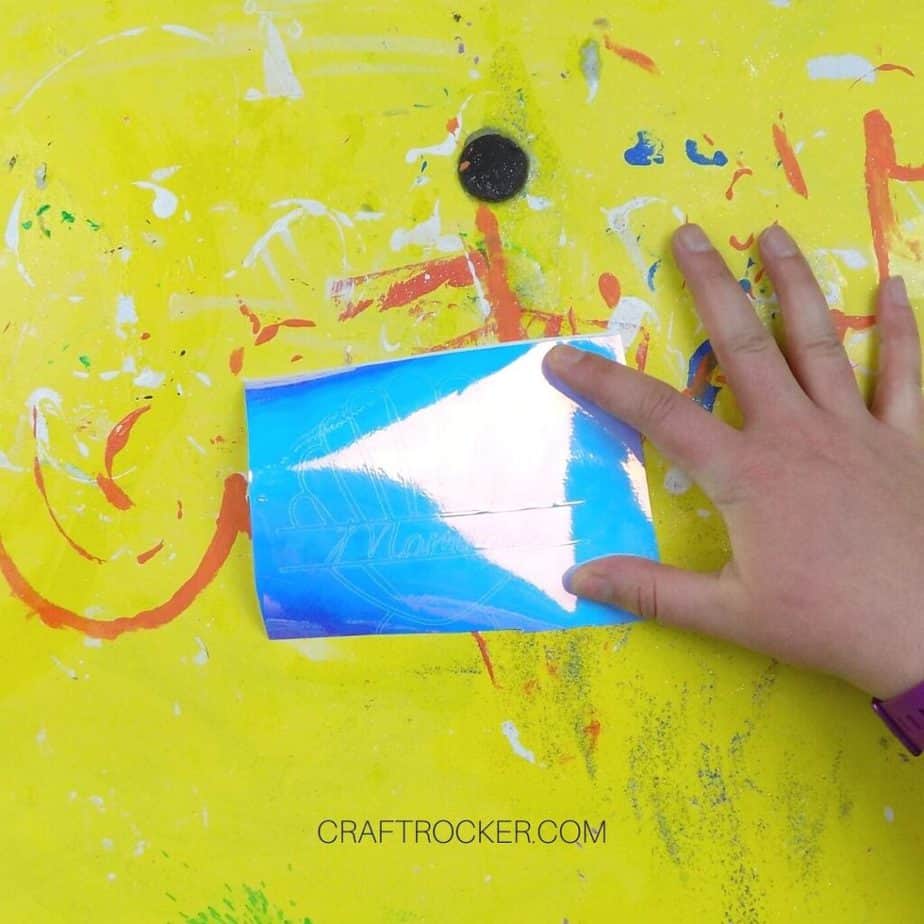
Step 12
Next, add your vinyl sticker (or stickers) to the mug. I recommend using a brayer or similar tool to smooth out any air bubbles in the images before moving on.
Step 13
Again, place your tumbler on the cup turner but do not turn it on yet.
Step 14
Mix up a second batch of resin as you did in step 7 and cover your tumbler in a second coat of epoxy.
Step 15
Then set another timer for 40 minutes.
Step 16
When your timer goes off, carefully remove the tape from the top and bottom of your tumbler and allow it to continue turning.
Step 17
You can leave your tumbler on the turner for 23 hours or you can take it off after 8 and allow it to finish curing on the upright, second dowel rod.
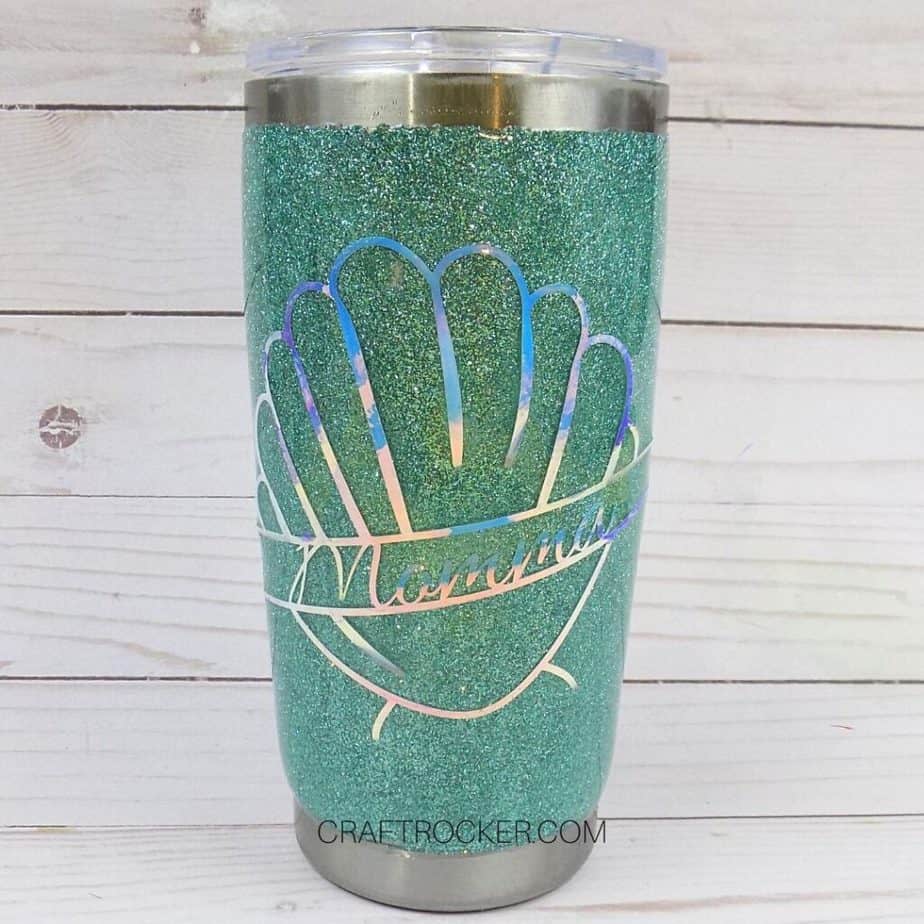
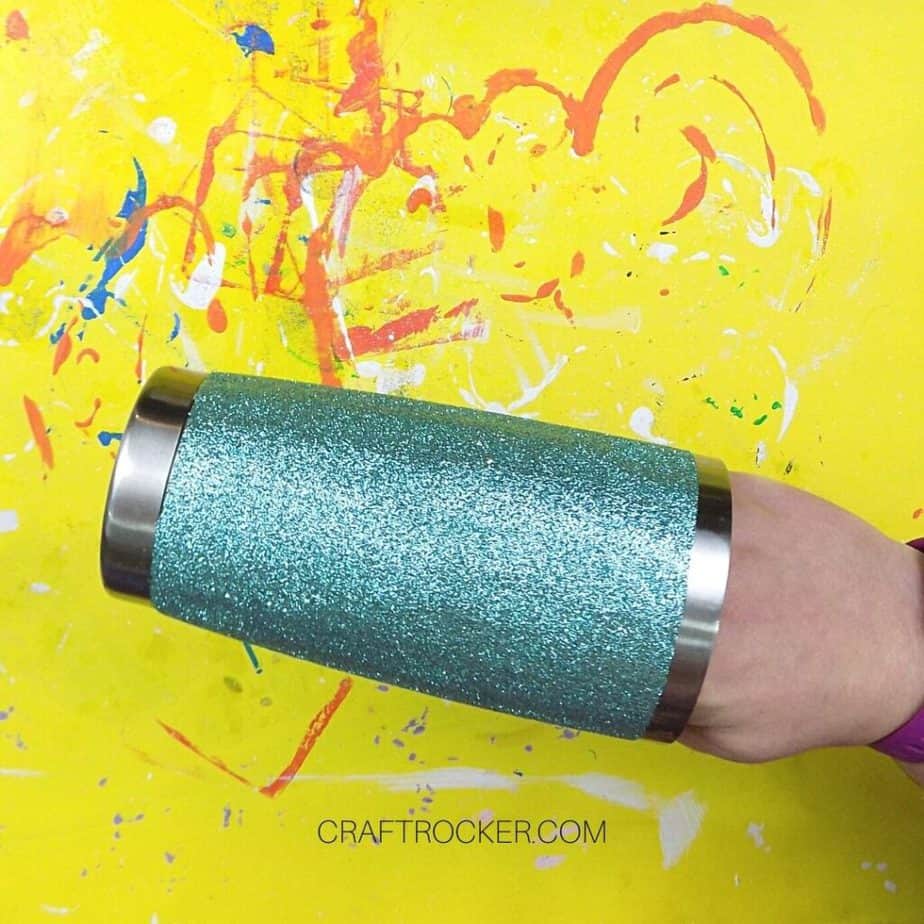
How to Make a Personalized Glitter Tumbler
You can also make personalized glitter tumblers using vinyl and your Cricut cutting machine.
You want to be sure to use permanent vinyl and because you have to sand this one, I also recommend using Mod Podge to adhere your glitter to the cup instead of spray adhesive.
Materials Needed
Rubbing Alcohol
Mod Podge Adhesive (I used glossy)
Small Flat Paint Brush
Measuring Cup for Measuring and Mixing Epoxy
Wood Stick (also for mixing epoxy)
Protective Gloves
1/2 Inch to 1 Inch Wide Painters Tape
Glitter in Color of Choice
SVG or Cut File of Choice
Permanent Vinyl
Weeding Tool
Step 1
First, clean your tumbler with rubbing alcohol so that your glitter sticks well.
Step 2
Next, tape the top and bottom of your cup. Again, you don’t need to tape more than 1/2 inch from the lip and base of the cup.
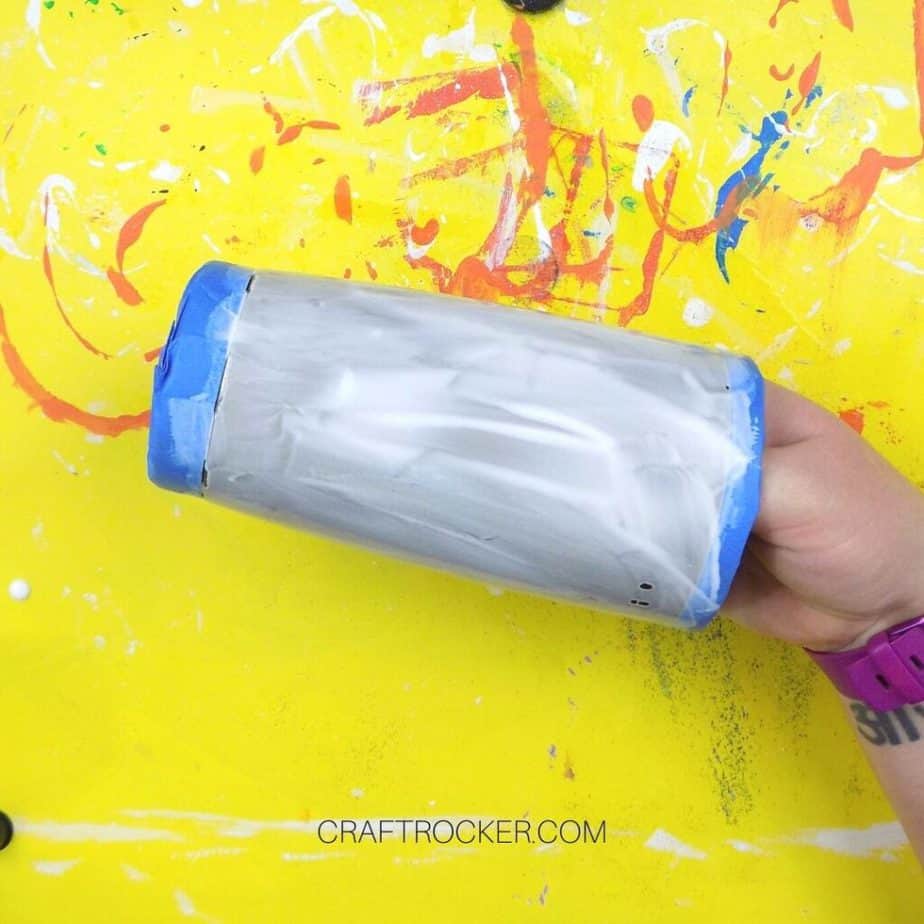
Step 3
Once your tumbler is taped, use your paint brush to cover it in Mod Podge.
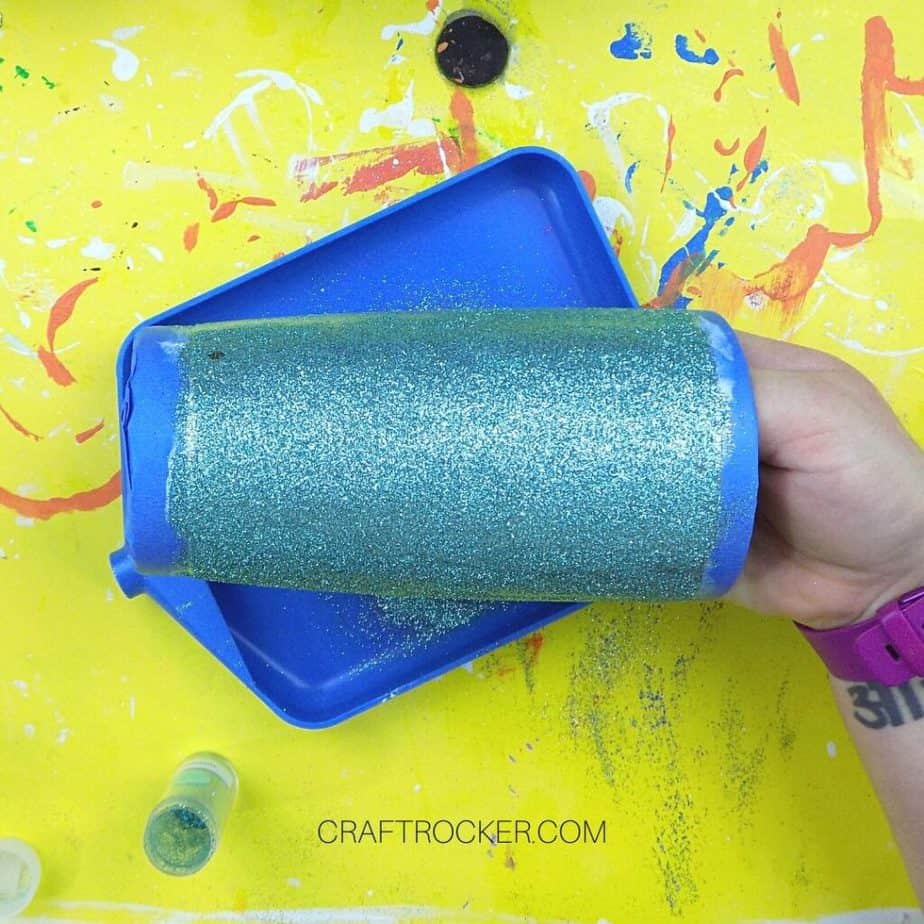
Step 4
Then hold your tumbler over your glitter tray and cover the entire thing with glitter, shaking off the excess as you go.
Step 5
After your tumbler is covered in glitter, set it aside to dry. Return the excess glitter in your tray to the container.
Step 6
When your Mod Podge is dry, add a second coat of it to your tumbler and again cover it in glitter.
Step 7
Allow the Mod Podge to dry a second time.
Step 8
While your tumbler dries, pull out your Cricut machine and open up Design Space.
Step 9
Add your vinyl face up to your cutting mat and load it into the machine.
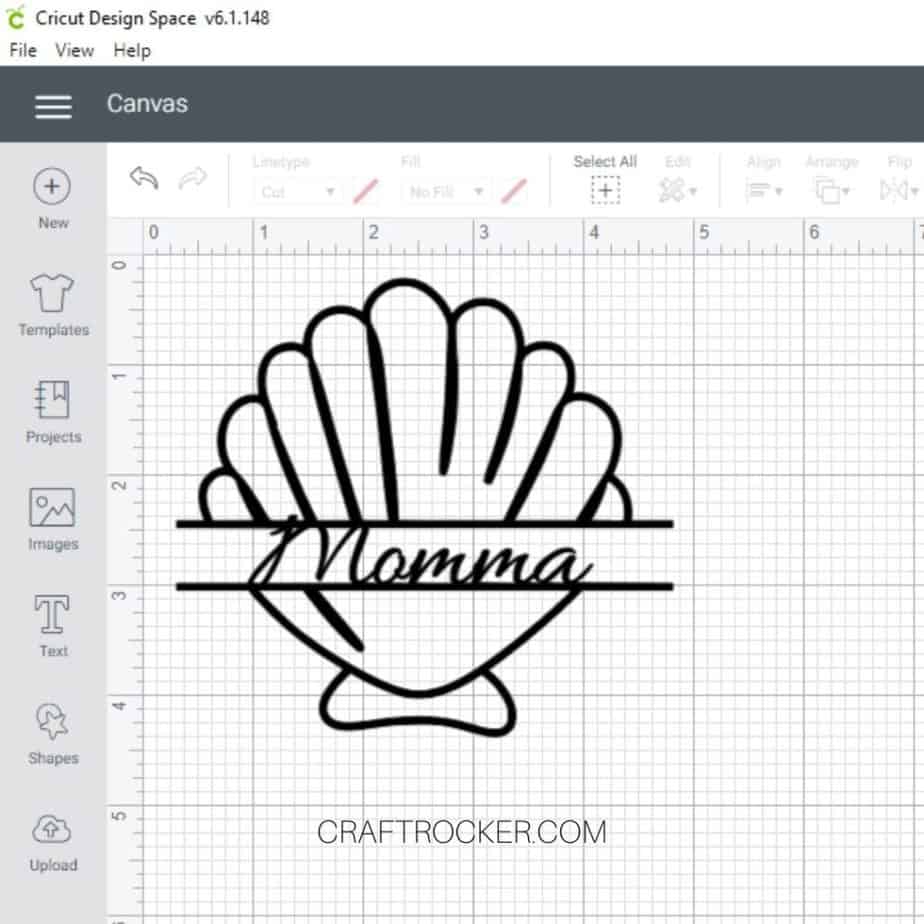
Step 10
Then upload or open your cut file in a new project. Resize it to fit on your tumbler on the canvas and hit the “Make It” button.
Be sure to select the correct material on the cut screen or on the dial of your Cricut depending on which machine you use. Then cut out your design.
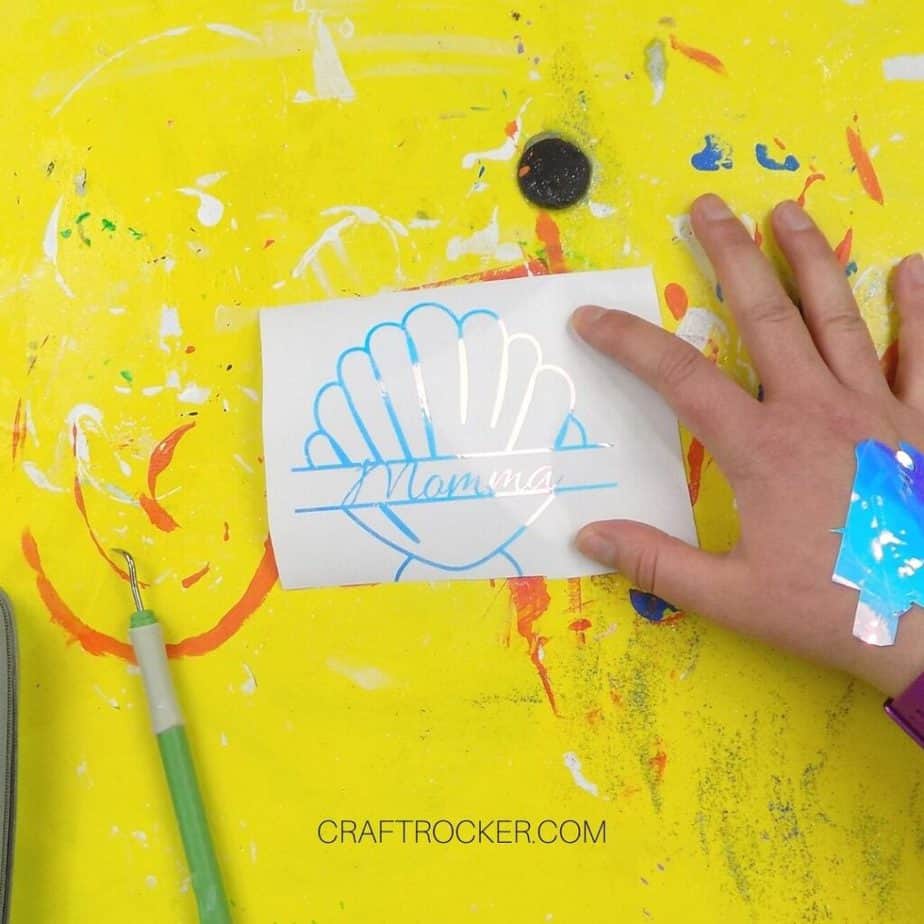
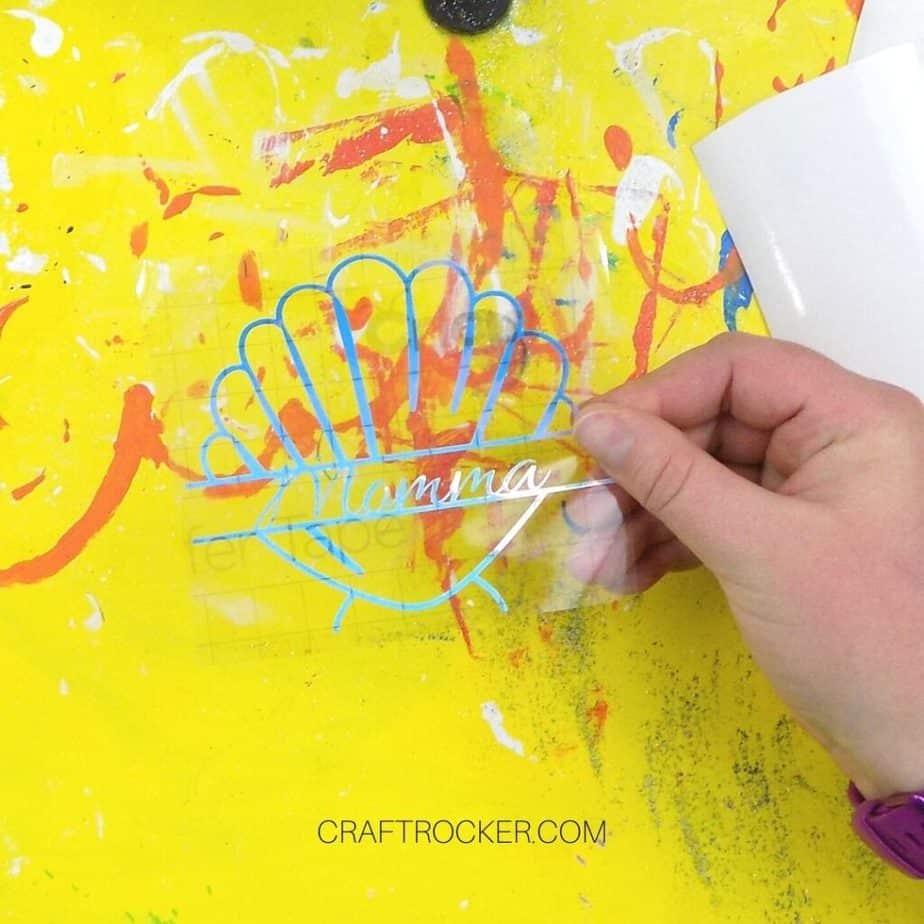
Step 11
After your design is cut, unload your cutting mat from the machine and weed your design.
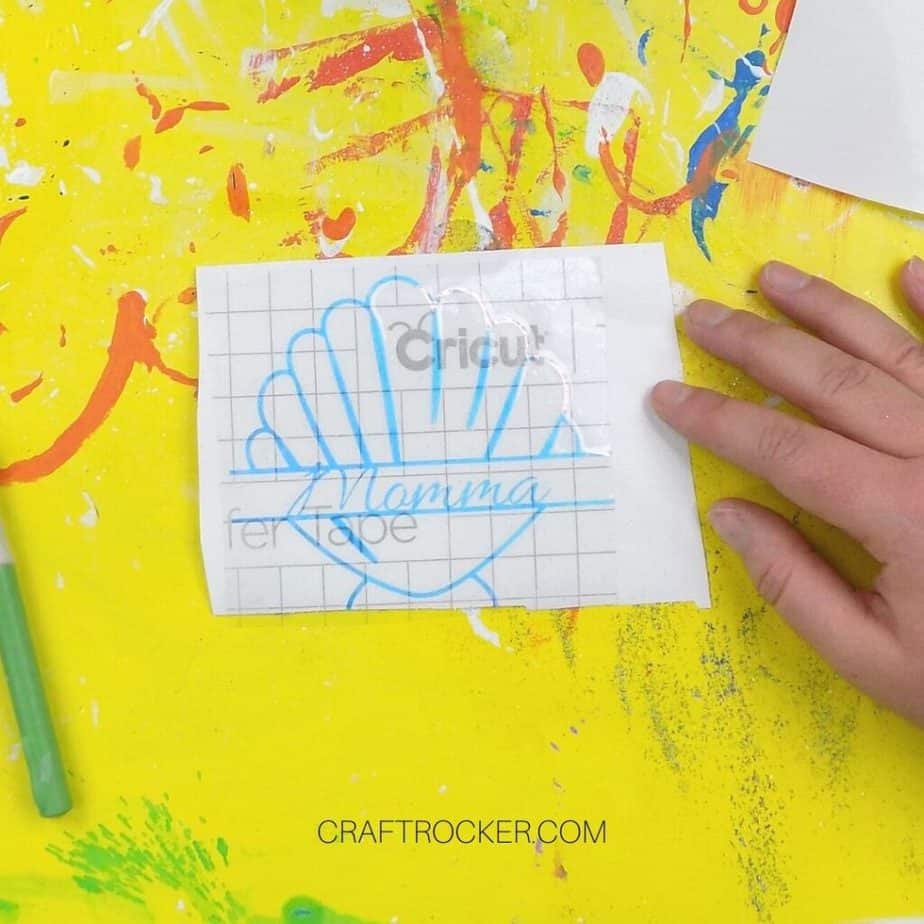
Step 12
Then cover your clean design with transfer tape and set it aside for now.
Step 13
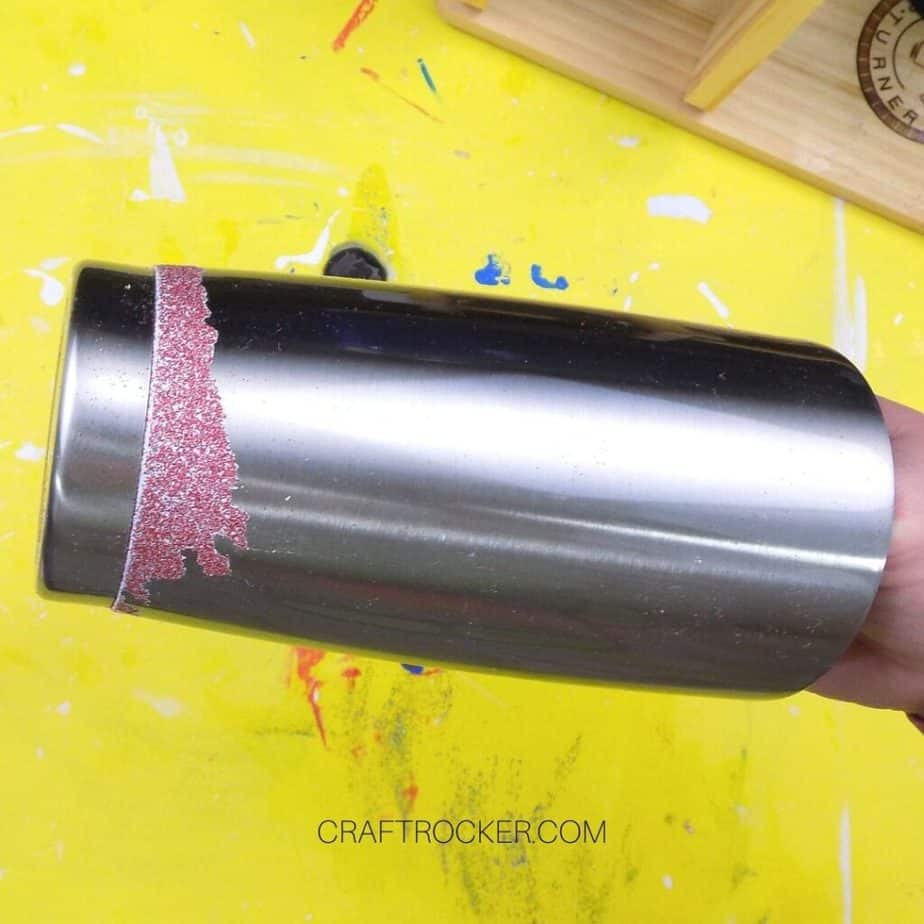
After your Mod Podge is dry, remove your painters tape. If it is pulling up your glitter and Mod Podge, go over the seam with an XActo knife as you pull so that you have a clean edge.

Step 14
Next, sand your tumbler with a fine grit sand paper. Then gently wipe away any excess dust or glitter from your tumbler.
Step 15
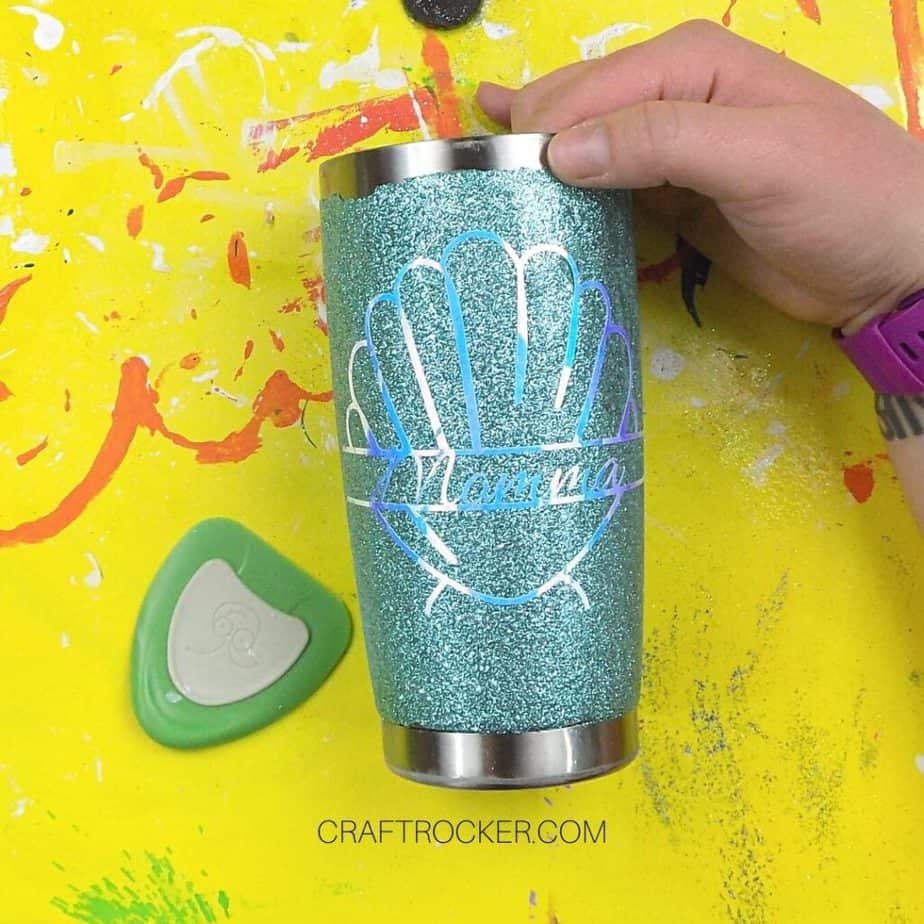
Once your tumbler is sanded and wiped, grab your vinyl design and attach it to the tumbler. Make sure it is firmly pressed onto the glitter surface.
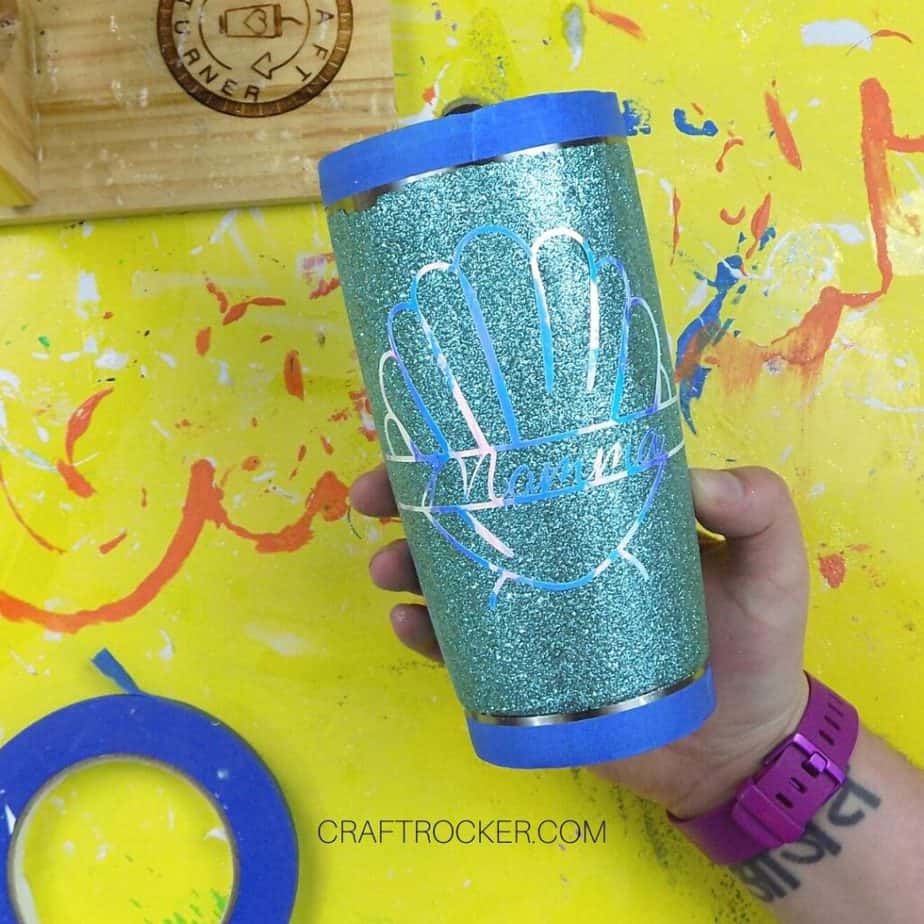
Step 16
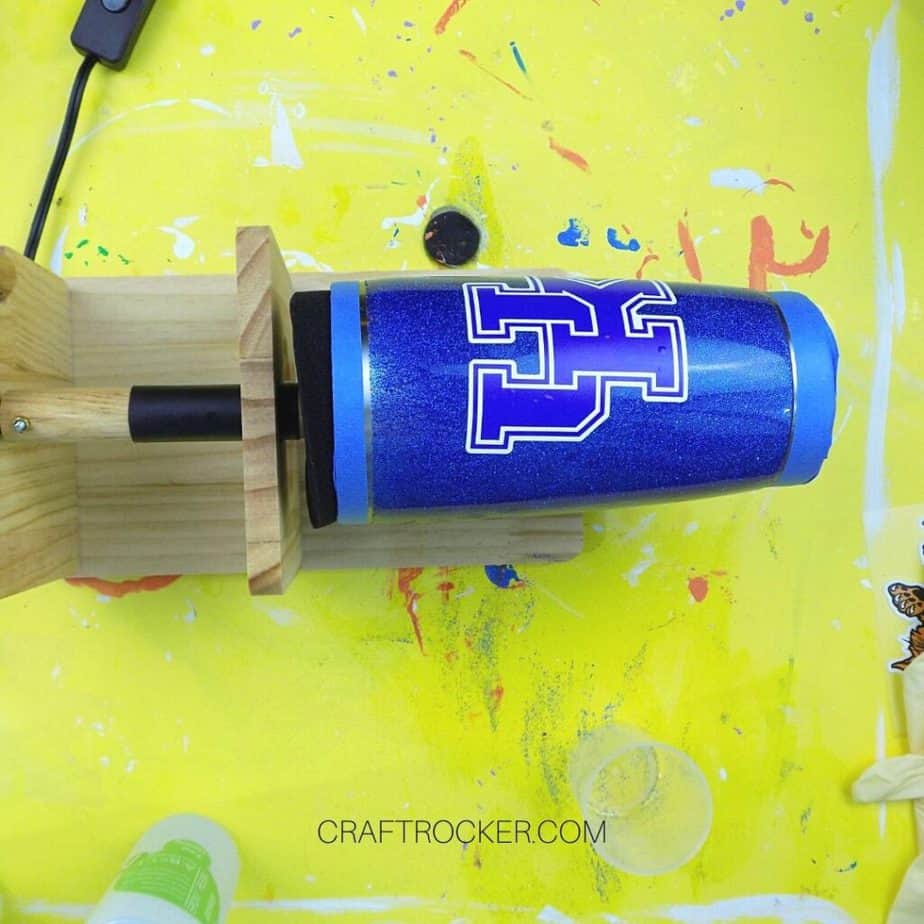
Then, re-tape your tumbler with the a small gap between the tape’s edge and the glitter edge. Then place the foam cylinder inside of your tumbler and place your tumbler on your cup turner.
Note:
Again, make sure the edges of the tape are easily accessible. You don’t want to have to dig them out of the cup later with epoxy all over it.
Step 17
Now mix 1 ounce each of your casting resin parts A and B in your measuring cup. Then cover your entire tumbler with a coat of resin.
You will have to turn your cup periodically as you go and it will be messy. Make sure that you do it on a protected surface, preferably a non-stick mat of some sort.
Note:
It’s important to wear gloves any time you are working with epoxy.
Step 18
After your tumbler is coated in resin, turn on your cup turner and set a timer for 40 minutes.
Step 19
When your timer goes off, very carefully remove the tape from your tumbler. Continue turning your tumbler for at least 8 hours before removing from your cup turner.
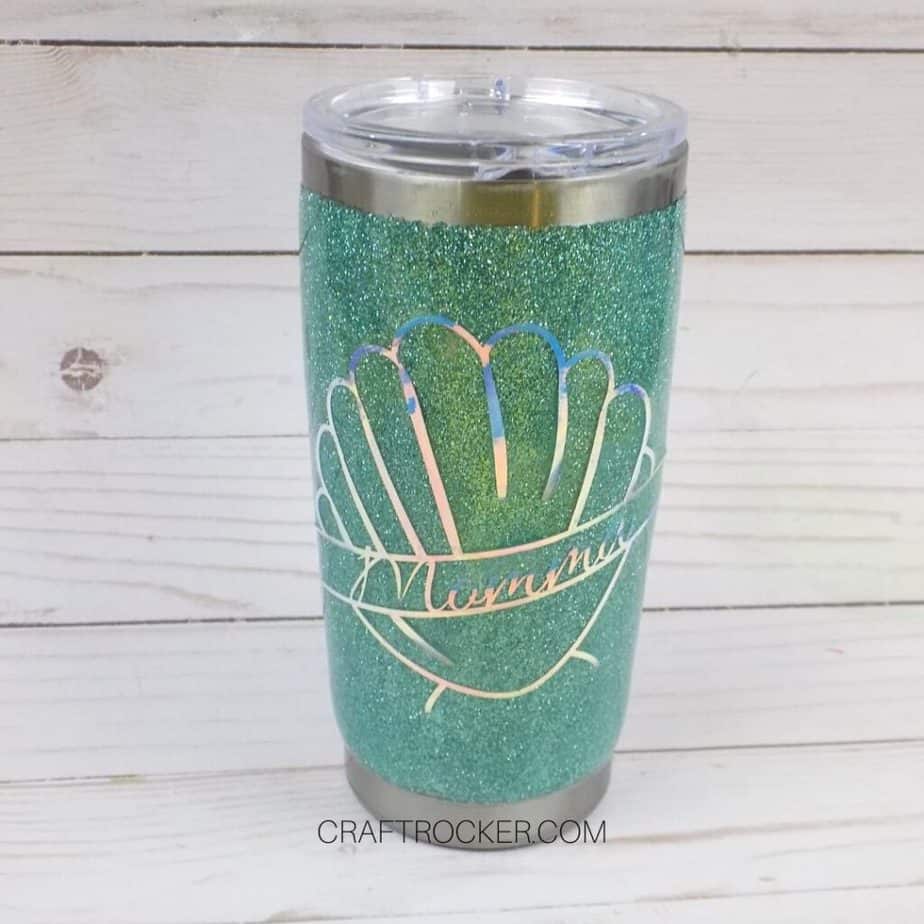
Step 20
Allow your tumbler to completely cure (at least 24 hours total) before washing and using.
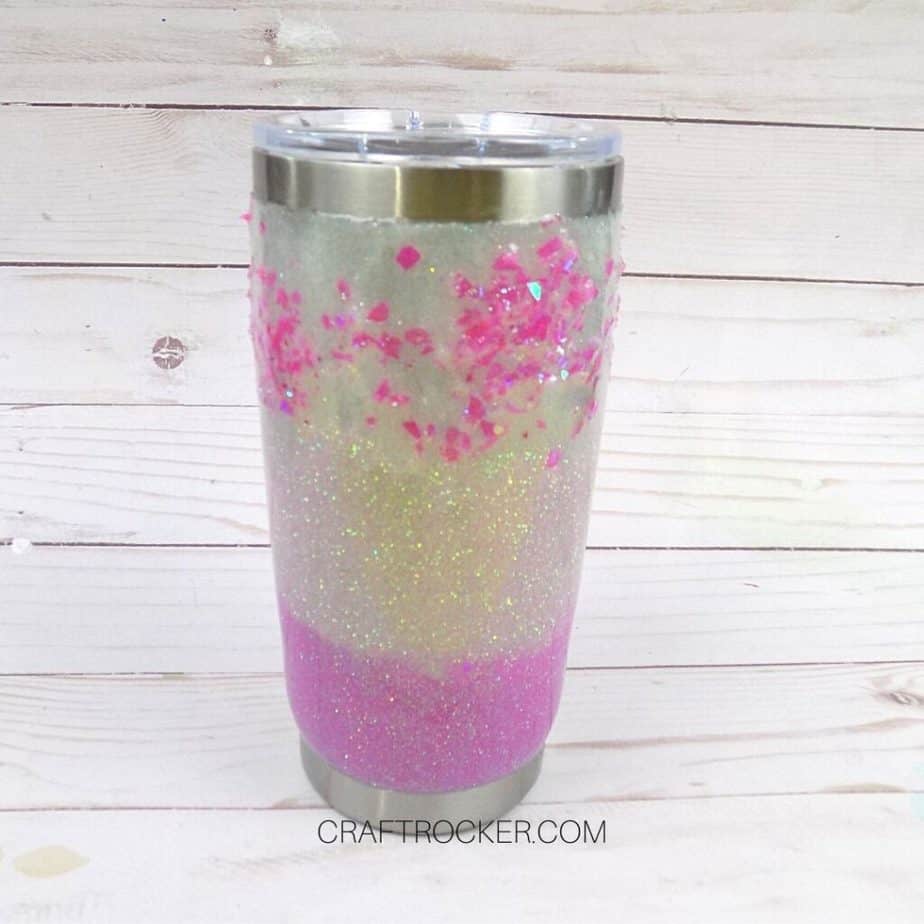
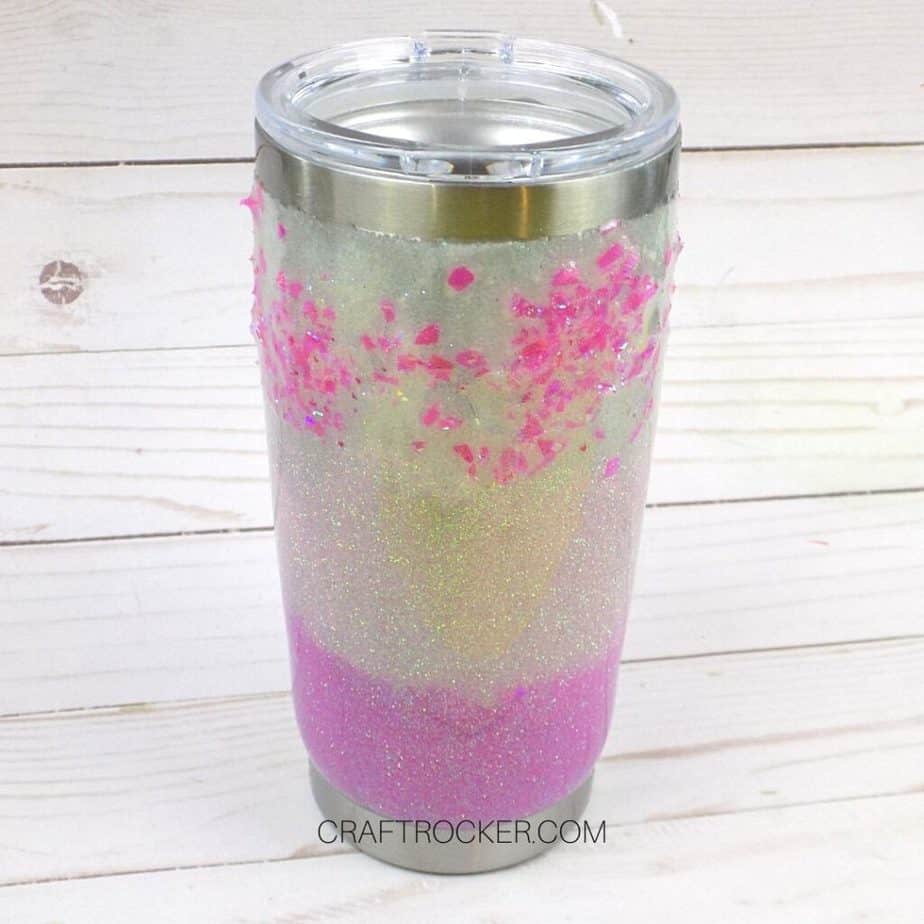
How to Make an Ombre Glitter Tumbler
Once you know the basics of how to make glitter tumblers, it’s fun to start experimenting. Find out how to make an ombre glitter tumbler easily with these step-by-step instructions!
Materials Needed
Rubbing Alcohol
Mod Podge Adhesive (I used glossy)
Small Flat Paint Brush
Measuring Cup for Measuring and Mixing Epoxy
Wood Stick (also for mixing epoxy)
Protective Gloves
1/2 Inch to 1 Inch Wide Painters Tape
3 Different Shades of Glitter in the Same Color (I used White, Light Pink, and Dark Pink)
Chunky Glitter in the Darkest Shade of Your Above Colors
Step 1
Start by cleaning your tumbler with rubbing alcohol so that your glitter sticks well.
Step 2
Then, tape the top and bottom of your cup with painters tape. You only need to tape about 1/2 inch from the lip and base of the cup. See the photo for reference.
Step 3
After your tumbler is taped, use your paint brush to cover it in a coat Mod Podge.
Step 4
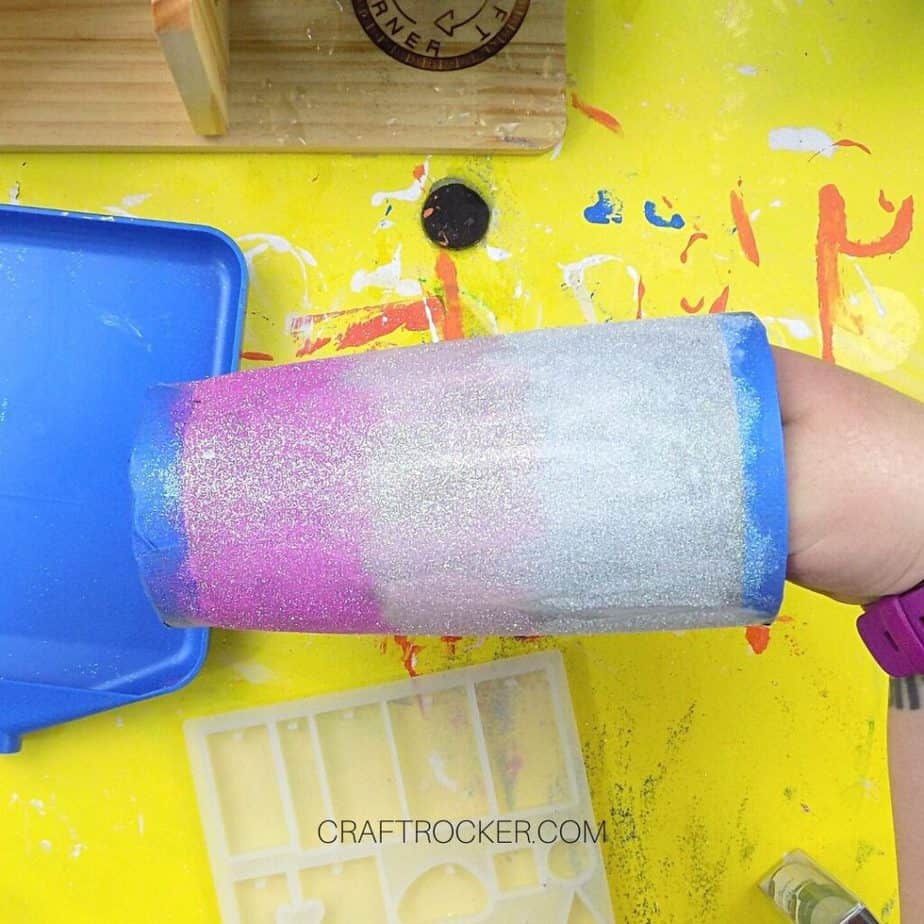
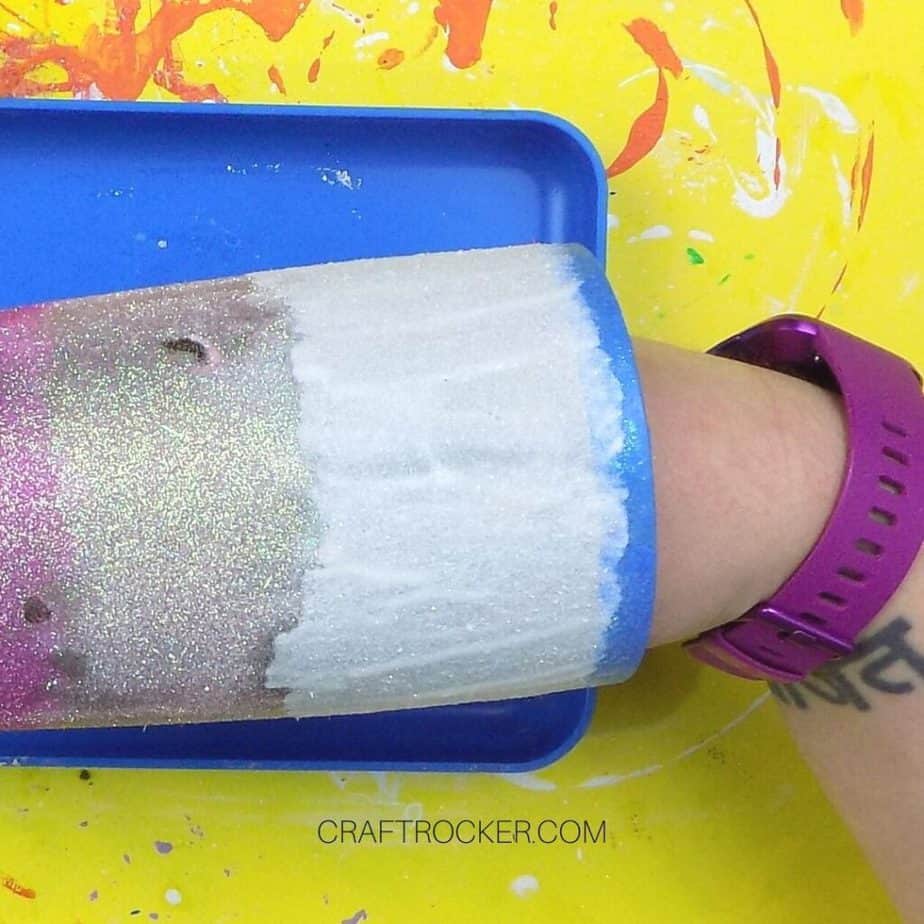
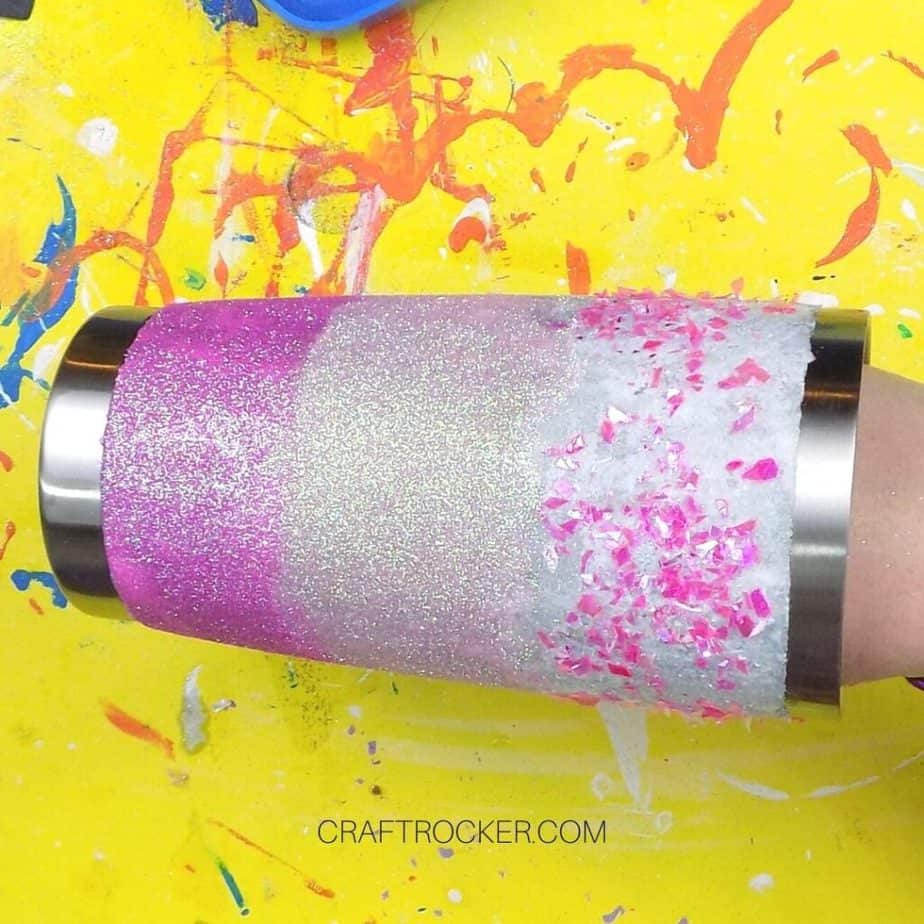
Then hold your tumbler over your glitter tray and cover the top 1/3 of your tumbler with the lightest shade of glitter (for me, white).
Shake off the excess glitter into the glitter tray as you go. After it is covered, return the excess glitter in your tray to the container.
Step 5
Next cover the middle 1/3 of the cup in the second lightest shade of glitter (mine was light pink). Again, shake off the excess glitter as your go and return it to the container when you’re done.
Step 6
Lastly, cover the bottom 1/3 of your tumbler in the darkest shade of glitter (dark pink for me) and shake off the excess glitter. Return the excess glitter in the tray to your container when you finish.
Step 7
After your tumbler is covered in glitter, set it aside to dry completely.
Step 8
When your Mod Podge is dry, add a second coat of it to your tumbler and again cover it in glitter as you did in step 4 through 7.
Step 9
Allow the Mod Podge to dry a second time.
Step 10
Next, add a 3rd layer of Mod Podge just to the top 1/3 of your tumbler. Then sprinkle on some chunky, holographic glitter.
Again, allow your tumbler to dry completely before moving on.
Step 11
After your Mod Podge is dry, carefully remove your painters tape.
Tip:
If the tape is pulling up your glitter and Mod Podge, go over the seam with an XActo knife as you pull so that you have a clean edge.
Step 14
Then sand your tumbler with a fine grit sand paper paying close attention to the chunky glitter area. Afterward, gently wipe away any excess dust or glitter from your tumbler.
Step 15
Next, re-tape your tumbler with painters tape. Be sure to leave a small gap between the tape’s edge and the glitter edge on both ends.
Then place the foam cylinder inside of your tumbler and put your tumbler on your cup turner.
Note:
As always, make sure the edges of the tape are easily accessible so you don’t have to dig them out of the cup later with epoxy all over it.
Step 17
Now mix 1 ounce each of your casting resin parts A and B in your measuring cup. Then cover your entire tumbler with resin.
Turn your cup periodically as needed to make sure it is completely covered. This step is messy so do it on a protected surface, preferably a non-stick mat of some sort.
Note:
Remember to wear protective gloves any time you are working with epoxy.
Step 18
After your tumbler is coated in resin, turn on your cup turner and set a timer for 40 minutes.
Step 19
When the 40 minute timer goes off, carefully remove the tape from your tumbler. Continue turning it for at least 8 hours before removing from your cup turner.
Step 20
Allow your tumbler to completely cure (at least 24 hours total) before washing and using.
FAQ’s and Tips for Success
How many layers of glitter does a tumbler need?
There is no hard and fast rule for how many layers of glitter a tumbler needs. I found that the adhesive you use will also alter the number of layers needed.
For example, the tumblers with Mod Podge only (no resin) needed 4 coats of glitter. The tumbler I made with spray adhesive only needed 2.
How do you prep a tumbler for glitter?
The first thing you need to do to prepare a tumbler for glitter is clean it. After it’s dry, tape off the top and bottom of the tumbler. Then you can add your first layer of adhesive and glitter.
Some tutorials will tell you to spray paint the tumbler first but I found no real value in this. In fact, even with spray paint specifically for use on metal, the paint came off after applying the Mod Podge and glitter.
What is the best adhesive for glitter tumblers?
The best adhesive for glitter tumblers depends on what you are planning to make. Spray adhesives, like Loctite, make it so that you need less coats of glitter. However, you can’t really sand them without the glitter coming off.
If you want to apply an image, I recommend using Mod Podge to adhere your glitter. You might need more coats of glitter, but it holds up to sanding better.
How do you mix and apply epoxy to glitter tumblers?
You mix your epoxy just as you would for any other project. Follow your package directions but in most cases, it is a 1:1 ratio of each solution (part A and part B).
Once your epoxy is mixed, apply it to your tumbler using a wood craft stick being sure to spread it evenly.
What if I accidentally get epoxy inside the cup?
If you accidentally get any of your resin inside of the cup, go over it with a fine grit sand paper after it has cured. When you’re done sanding, be sure to thoroughly wash the cup.
How do I make sure my epoxy is even?
Once I got a base coat on the tumbler, I found it easiest to turn on the cup turner and get my head down to eye level as it turned. This made it easy to spot gaps and bubbles in the resin.
How to Care for Your Tumbler
Although the resin seals your glitter, I still recommend hand washing your tumblers. I have found that they last longer and retain their shine better this way.
It’s so easy to learn how to make glitter tumblers. All you need are the right tools and these step-by-step instructions to make it happen.
These make awesome gifts for so many of your friends and family for every occasion. Give them as bridal party gifts, for Mother’s Day, Father’s Day, or any other combination!
Don’t Forget to Pin It!

More Resin Crafts
How To Make An Amazing Acrylic Paint Pour Cutting Board – Our Crafty Mom
