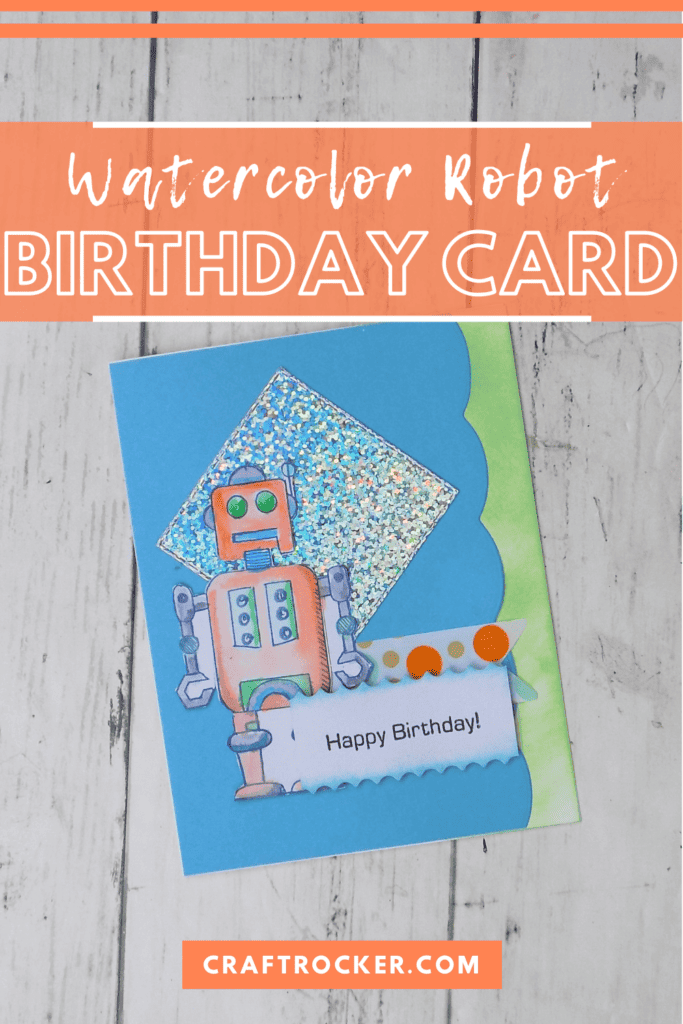
If you haven’t tried this watercolor technique, this Watercolor Robot Birthday Card is a fantastic way to try it out!
Affiliate links may be used in this post. Ordering a product through these links may result in a commission at no extra cost to you. Read the full disclosure here.

Jump to What You Want
Materials for Watercolor Robot Birthday Card
Watercolor Robot Birthday Card How-To
Printable Watercolor Robot Birthday Card Tutorial
Seriously, once I found out that you could use your Tombow markers this way, I was hooked. It’s so easy and so much fun, plus it allows you to get a real depth to your stamped images.
If you want to see my painting in action, be sure to check out the video and give it a watch.
Watercolor Robot Birthday Card Materials
Stamps Used
- Tim Holtz “Robots Blueprint” Stamps
- My Favorite Things “Every Flavor of Happy” Stamps
Paper Used
- White 8.5×11 inch Cardstock
- White Watercolor Paper
- Scrapbook.com A2 Holographic Mirror Paper Pad
- Scrapbook.com A2 Sunshine Cardstock Pad
Ink Used
- Navy Blue
- Black
- Green
- Blue
Tombow Markers Used
- Orange (925)
- Blue (476)
- Gray (N65)
- Green (245)
Adhesives Used
- Glue Runner
- Adhesive Foam Squares
Paper Cutting Dies Used
Ribbons Used
- 1 inch Decorative Ribbon
Tools Used
- Scoreboard
- Paper Cutter
- Sizzix Big Shot
- Acrylic Block
- Small Detail Scissors
- Paintbrush
- Small Container of Water

Step 1 – Make Your Card Base
Start with a 8.5×11 inch piece of white cardstock placed on a scoring board.
Then score the sheet at 5.5 inches and use a paper cutter to cut the sheet apart along the scored line.
After your cardstock is cut in half, take one half and place it back on your scoreboard, and score it at 4.25 inches.

Next, fold your card along the score line and run over the crease with either your scoring tool or bone folder to get a strong crease.

Step 2 – Stamp and Color Your Robot
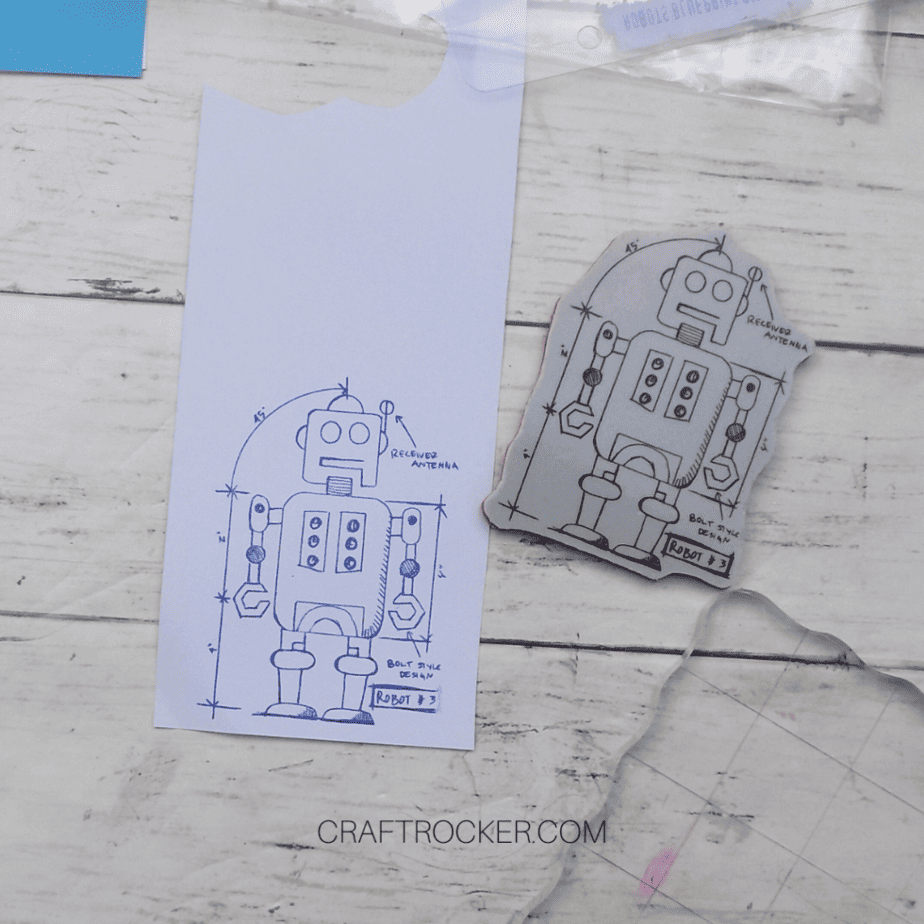
First, stamp the robot #3 stamp in navy blue ink on a piece of white watercolor paper.
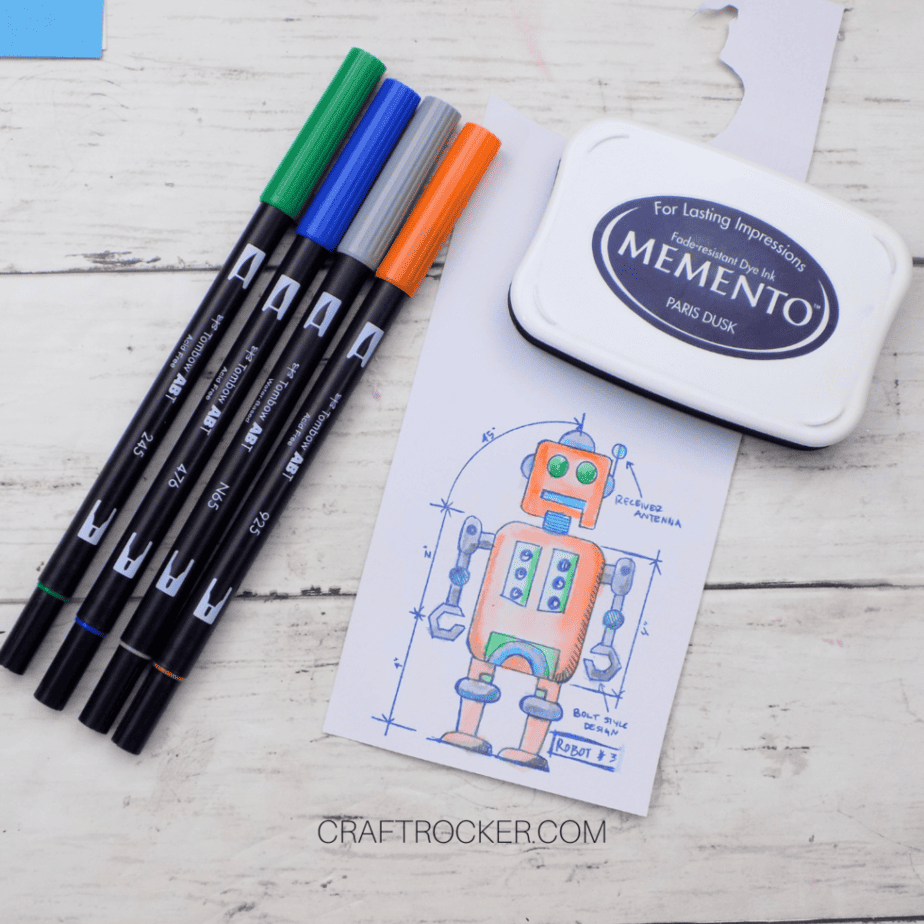
After your robot is stamped, scribble your orange Tombow marker (925) on an acrylic block.
Then dip your paintbrush into water lightly and run it over the scribbled color.
Now paint the head, body, and legs with orange like you would watercolor.
Then use the same method to paint the arms and joints of the robot gray (Tombow N65).
Again, use the watercolor method to paint the mouth and joints with blue (Tombow 476). Also go over the edges of your gray areas with blue to create shadows.
Lastly, paint the eyes and additional uncolored details in green (Tombow 245). Then set your robot aside to dry.

Step 3 – Prepare Your Card Front
Start by placing an A2 sized piece of teal cardstock on your Sizzix plates. Then tape your scalloped cutting die on the right edge of the paper, about an inch in.
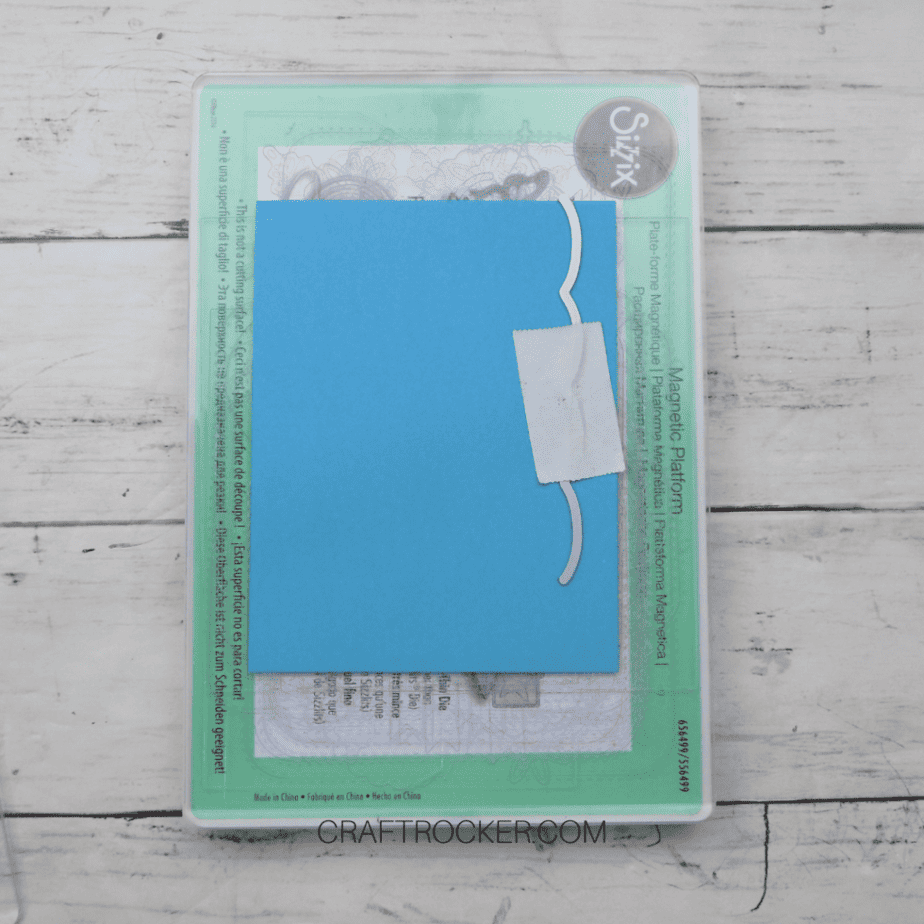
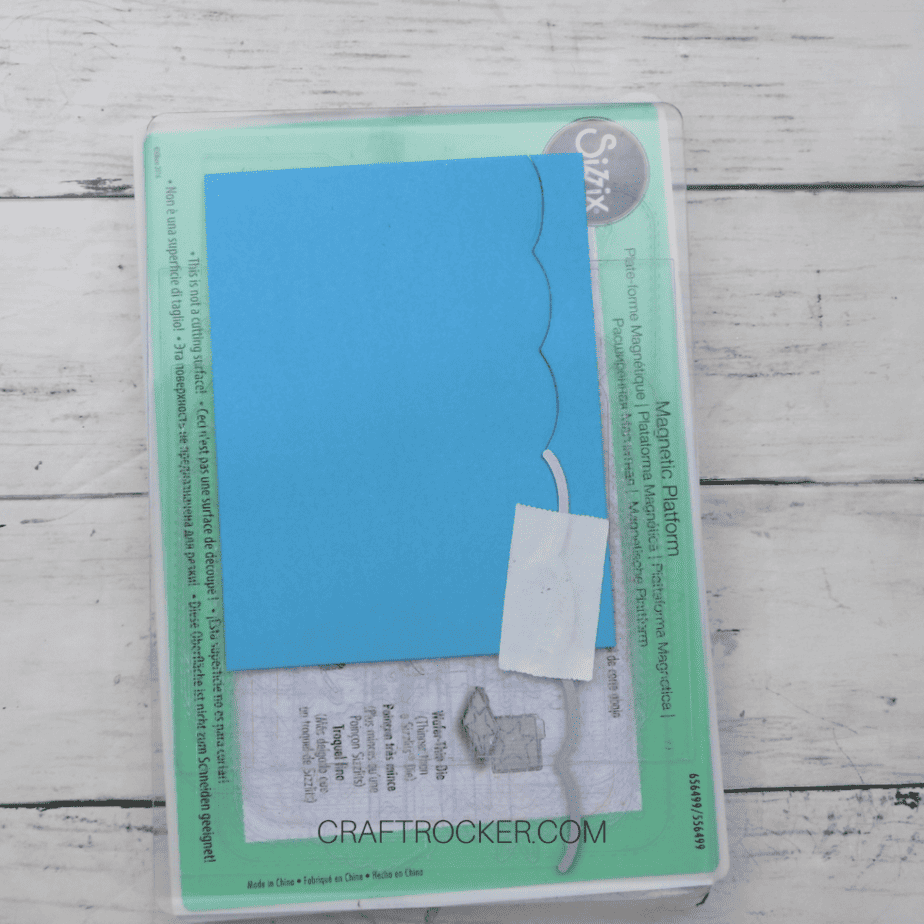

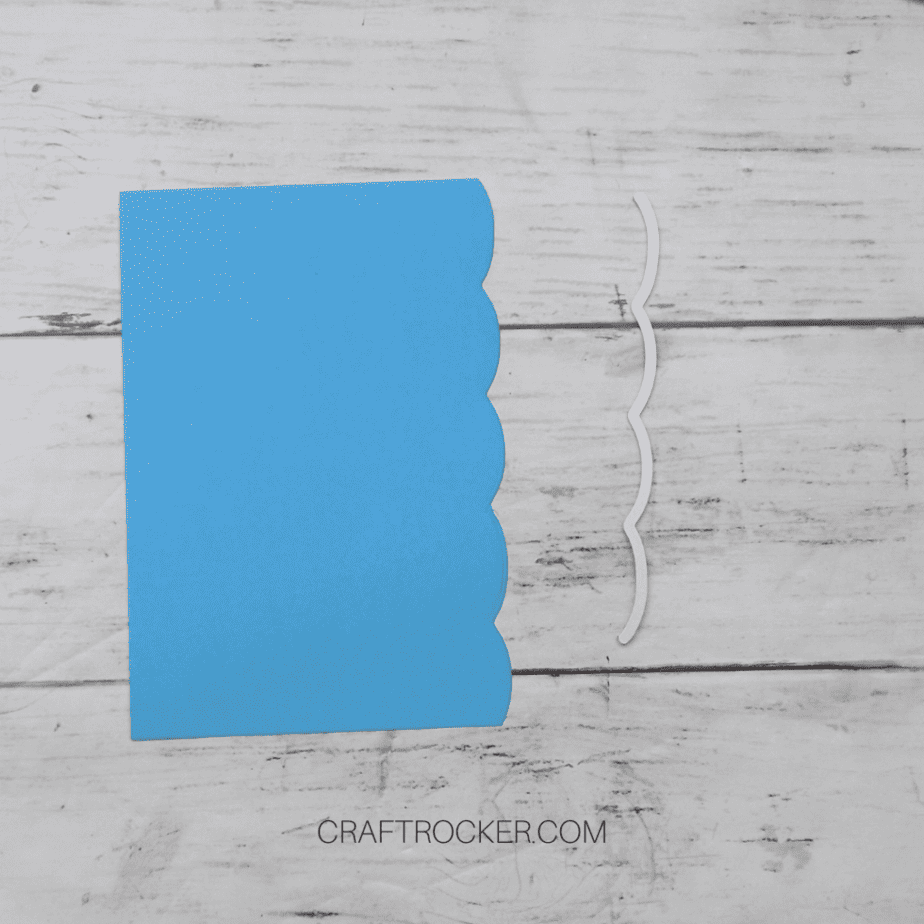
Cover with your other plate and run through your machine. If necessary, reposition your cutting die to completely cut the entire right edge of the cardstock.
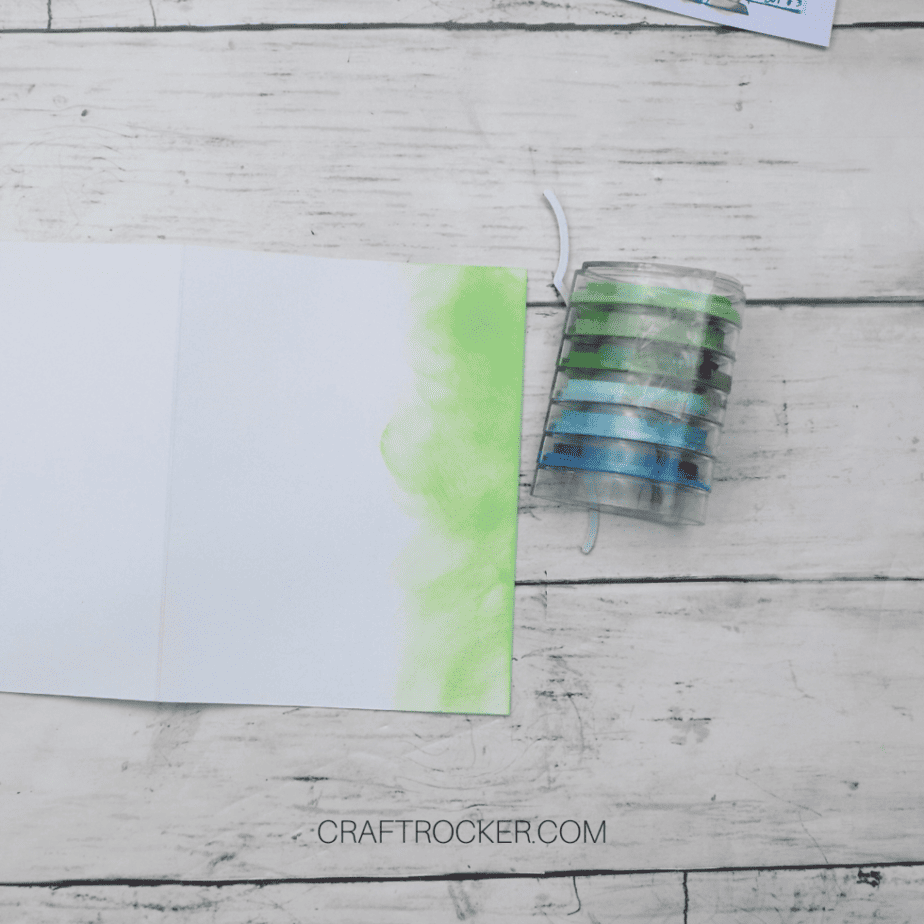
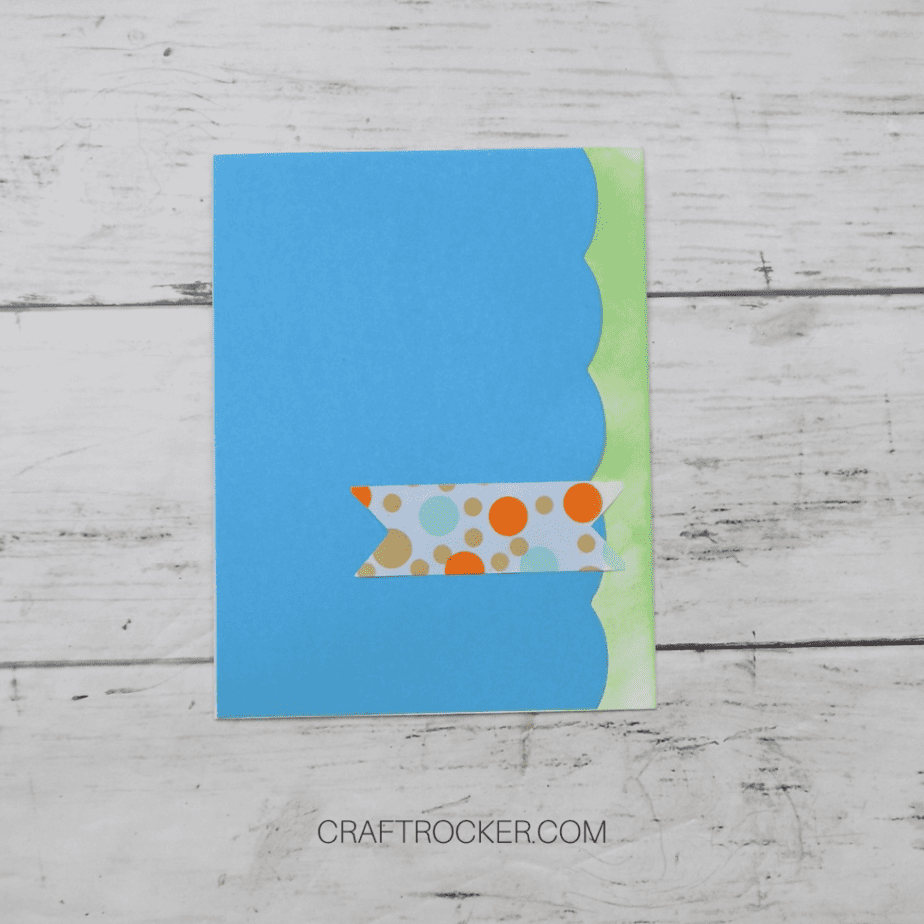
Now chalk the right side (the side that opens up) of your card front in green ink. You only need to go a little over an inch in from the edge. It only needs to be enough to cover the area revealed by the scalloped cardstock.
Lastly, attach your scalloped cardstock to the front of your card. Use a glue runner and align the straight edge with the folded edge of your card front.
Step 4 – Prepare Decorative Elements for Card Front
First, cut a piece of 1 inch wide ribbon to a length of 2.5 inches. Then create tails on the edges.
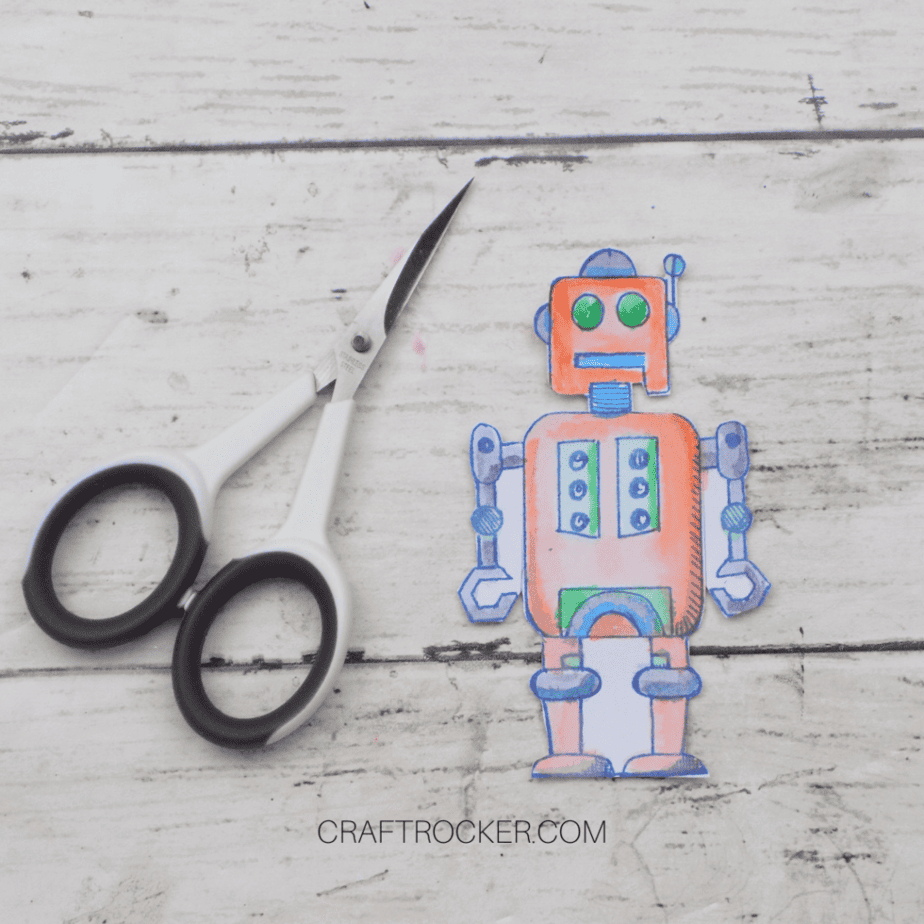
Next, cut out your robot with small detail scissors. Do not cut between the arms and the body, or between the legs.

Then grab a scrap of white paper (about 1.5 inches x 1 inch) and cut scalloped edges with your smaller scalloped cutting die on the long edges of the paper.
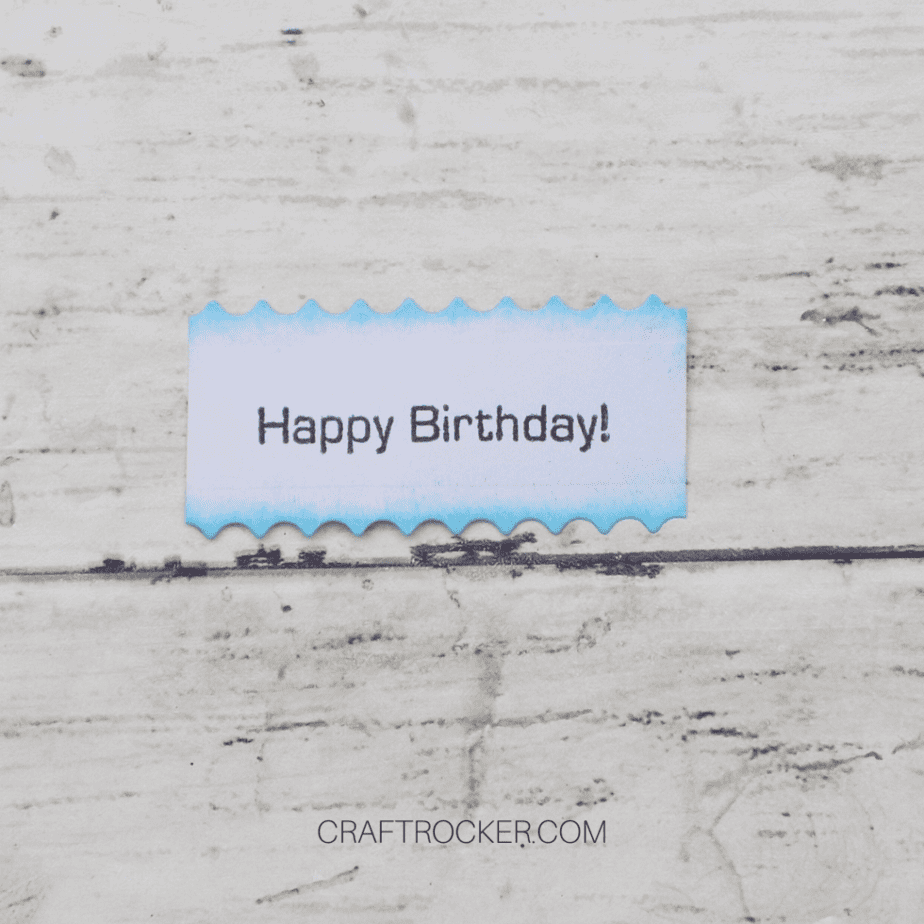
After you cut the paper, chalk the edges with blue ink. Next, stamp “Happy Birthday” sentiment in black ink.
Lastly, cut out a 2 inch square of holographic paper (I used the leftover square from making this Balloon Dog Birthday Card).
Step 5 – Assemble Your Card Front
Use a glue runner and attach your ribbon to the right, bottom third of your card front. (See the photo under step four.)

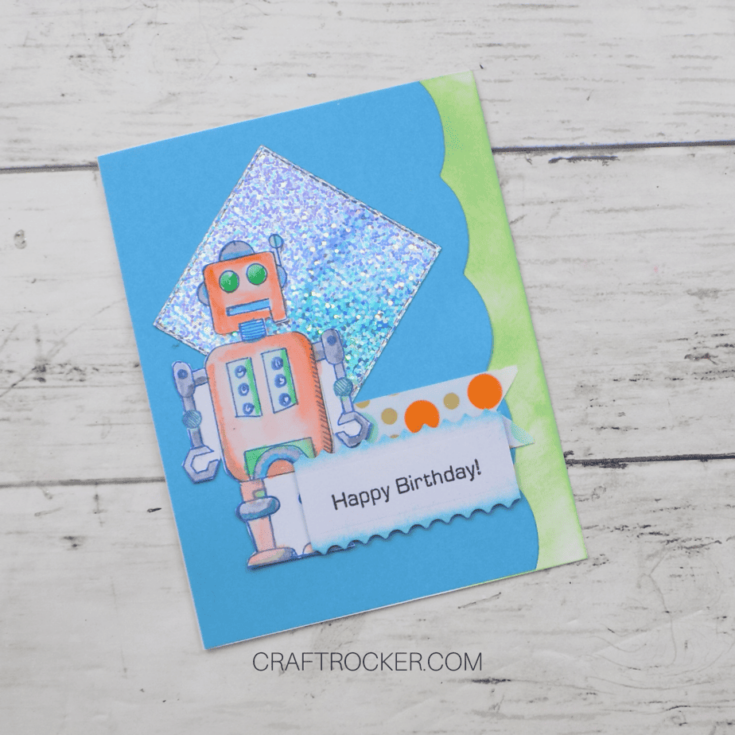
Then attach your holographic square sideways (like a diamond) on the top third of the card, slightly to the left of center.
Next, attach your robot so that the head and body slightly overlap the holographic square on your card front.
Lastly, mount your “Happy Birthday” sentiment to the card with adhesive foam squares. Place it so that it slightly overlaps the ribbon and the legs of your robot.

Step 6 – Finish Inside of Card
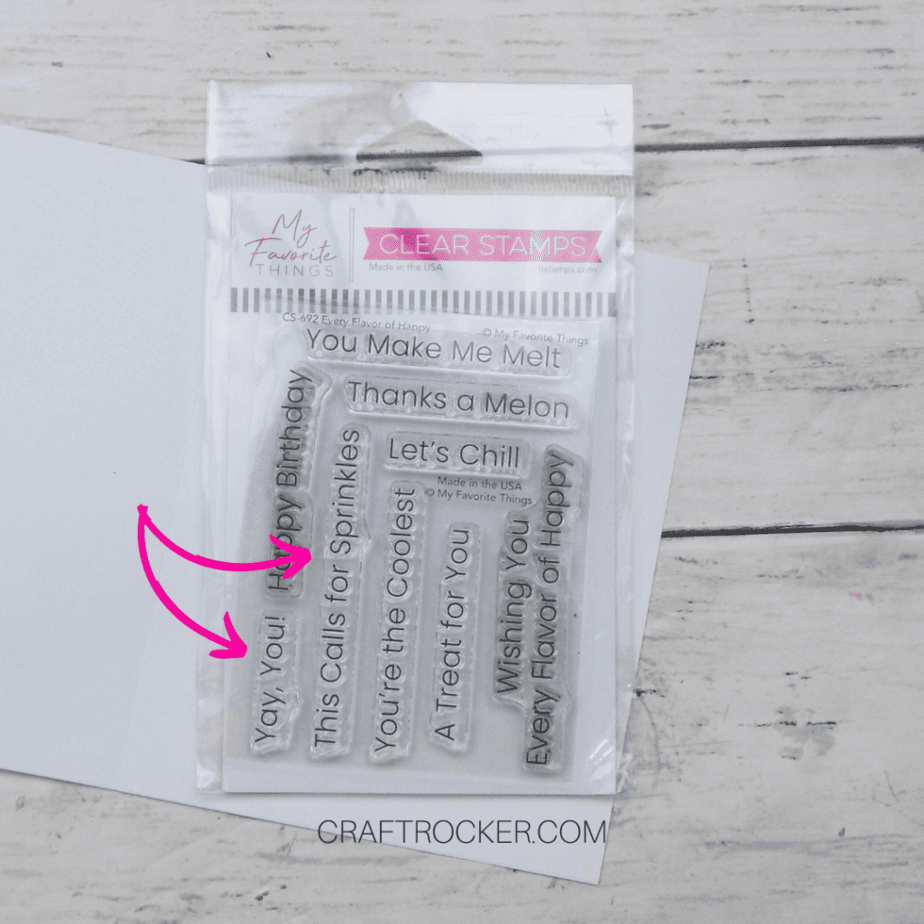
Place the “Yay, you!” and “This Calls for Sprinkles” stamps on your acrylic block. Line them up the way that you want them to be stamped before inking.
Then stamp them in black ink on the inside, right flap of your card.
Tips and Tricks
- I like to use up scraps when I can, so I used the square cut from the window on the Balloon Dog Birthday Card for this card. If you want to do the same, I recommend checking out that tutorial first so that you can get the placement for the window correct and avoid waste.
- If you struggle with creating shadows and depth when coloring or painting, watch the video tutorial to see exactly how I painted the robot.
Printable Watercolor Robot Birthday Card Tutorial
Watercolor Robot Birthday Card
Try out a fun watercolor technique with this Watercolor Robot Birthday Card! It will change the way you color your stamps.
Materials
- Tim Holtz “Robots Blueprint” Stamps
- My Favorite Things “Every Flavor of Happy” Stamps
- White 8.5x11 inch Cardstock
- White Watercolor Paper
- Scrapbook.com A2 Holographic Mirror Paper Pad
- Scrapbook.com A2 Playful Cardstock Pad
- Navy Blue
- Black
- Green
- Blue
- Orange (925)
- Blue (476)
- Gray (N65)
- Green (245)
- Glue Runner
- Adhesive Foam Squares
Tools
- 2” Square Cutting Die
- Wavy Scalloped Edge Cutting Die
- Smaller, Pointed Scalloped Edge Cutting Die
- 1 inch Decorative Ribbon
- Scoreboard
- Paper Cutter
- Sizzix Big Shot
- Acrylic Block
- Small Detail Scissors
- Paintbrush
- Small Container of Water
Instructions
- Start with a 8.5x11 inch piece of white cardstock placed on a scoring board.
- Then score the sheet at 5.5 inches and use a paper cutter to cut the sheet apart along the scored line.
- After your cardstock is cut in half, take one half and place it back on your scoreboard, and score it at 4.25 inches.
- Next, fold your card along the score line and run over the crease with either your scoring tool or bone folder to get a strong crease.
- First, stamp the robot #3 stamp in navy blue ink on a piece of white watercolor paper.
- After your robot is stamped, scribble your orange Tombow marker (925) on an acrylic block.
- Then dip your paintbrush into water lightly and run it over the scribbled color.
- Now paint the head, body, and legs with orange like you would watercolor.
- Then use the same method to paint the arms and joints of the robot gray (Tombow N65).
- Again, use the watercolor method to paint the mouth and joints with blue (Tombow 476). Also go over the edges of your gray areas with blue to create shadows.
- Lastly, paint the eyes and additional uncolored details in green (Tombow 245). Then set your robot aside to dry.
- Start by placing an A2 sized piece of teal cardstock on your Sizzix plates. Then tape your scalloped cutting die on the right edge of the paper, about an inch in.
- Cover with your other plate and run through your machine. If necessary, reposition your cutting die to completely cut the entire right edge of the cardstock.
- Now chalk the right side (the side that opens up) of your card front in green ink. You only need to go a little over an inch in from the edge. It only needs to be enough to cover the area revealed by the scalloped cardstock.
- Lastly, attach your scalloped cardstock to the front of your card. Use a glue runner and align the straight edge with the folded edge of your card front.
- First, cut a piece of 1 inch wide ribbon to a length of 2.5 inches. Then create tails on the edges.
- Next, cut out your robot with small detail scissors. Do not cut between the arms and the body, or between the legs.
- Then grab a scrap of white paper (about 1.5 inches x 1 inch) and cut scalloped edges with your smaller scalloped cutting die on the long edges of the paper.
- After you cut the paper, chalk the edges with blue ink. Next, stamp “Happy Birthday” sentiment in black ink.
- Lastly, cut out a 2 inch square of holographic paper (I used the leftover square from making this Balloon Dog Birthday Card).
- Use a glue runner and attach your ribbon to the right, bottom third of your card front.
- Then attach your holographic square sideways (like a diamond) on the top third of the card, slightly to the left of center.
- Next, attach your robot so that the head and body slightly overlap the holographic square on your card front.
- Lastly, mount your “Happy Birthday” sentiment to the card with adhesive foam squares. Place it so that it slightly overlaps the ribbon and the legs of your robot.
- Place the “Yay, you!” and “This Calls for Sprinkles” stamps on your acrylic block. Line them up the way that you want them to be stamped before inking.
- Then stamp them in black ink on the inside, right flap of your card.

I absolutely love this little guy. It’s such a cute and colorful card that’s sure to delight the tiny birthday human on their special day.
Don’t Forget to Pin It!