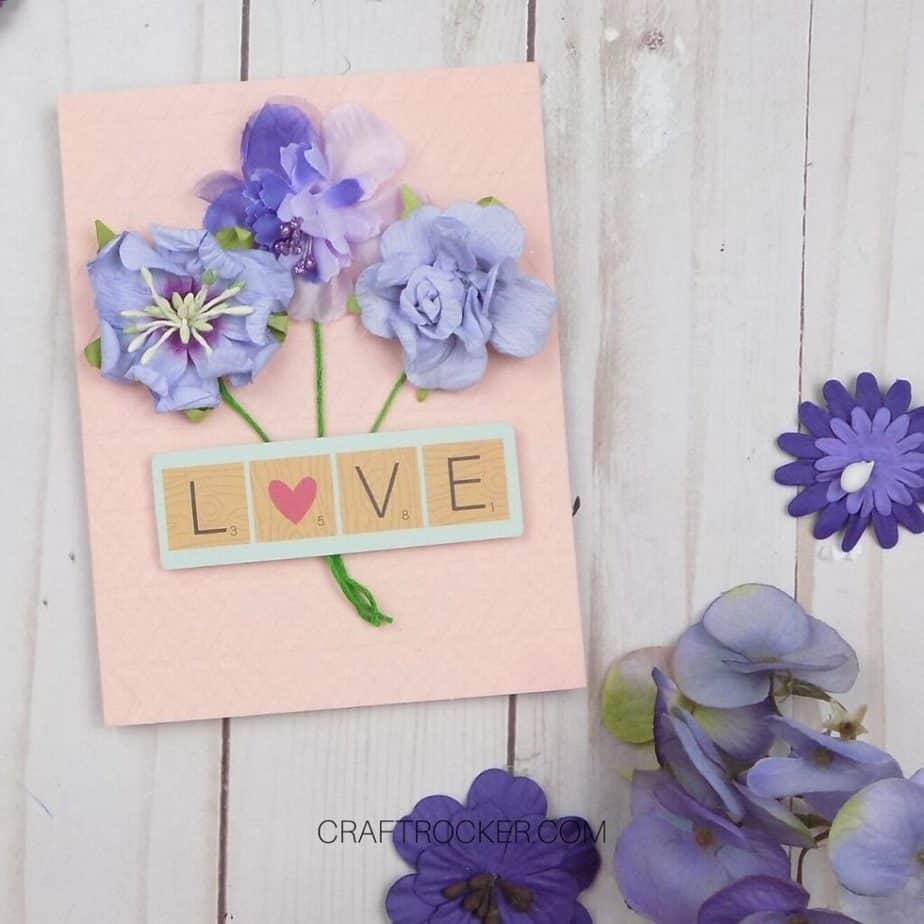
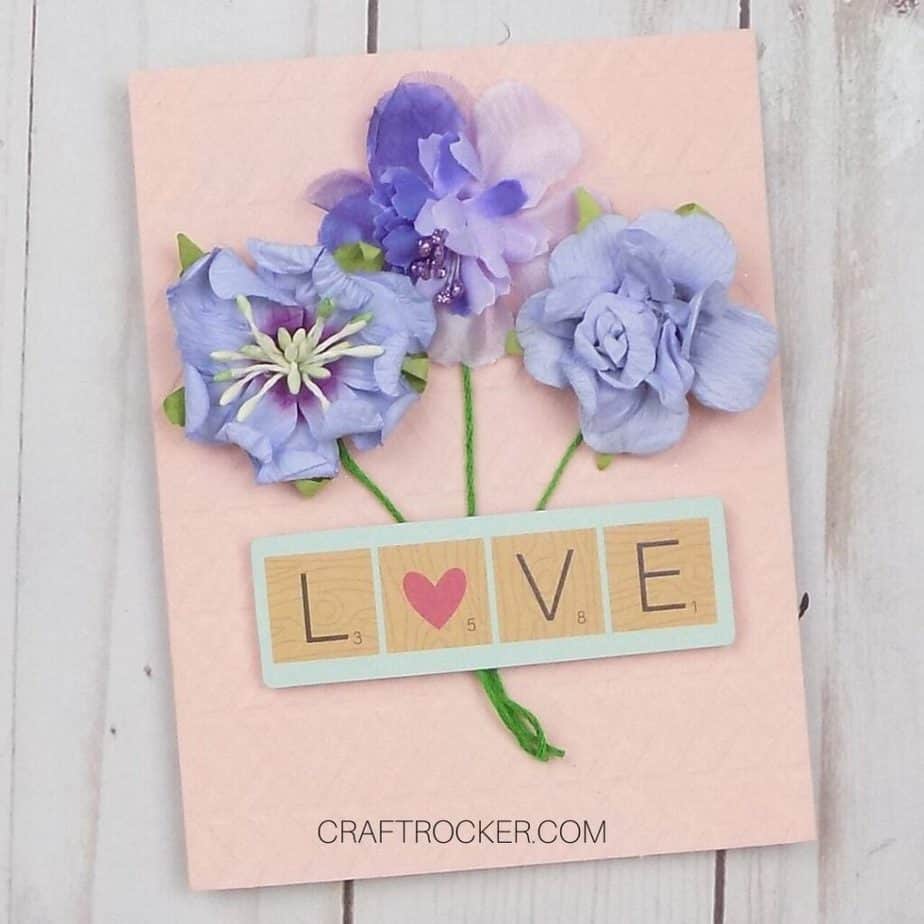
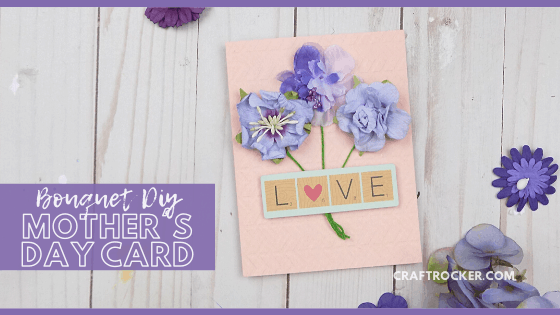
Skip the store and make Mom this flower bouquet DIY Mother’s Day card this year. It’s so pretty plus it’s a bouquet that won’t die in a few weeks!
Affiliate links may be used in this post. Ordering a product through these links may result in a commission at no extra cost to you. Read the full disclosure here.
Jump to What You Want
Bouquet DIY Mother’s Day Card How-To
Printable Bouquet Mother’s Day Card Tutorial
I’ve actually had the idea for this card for a few years but never got around to making it. Finally I decided it’s time to finally get it made.
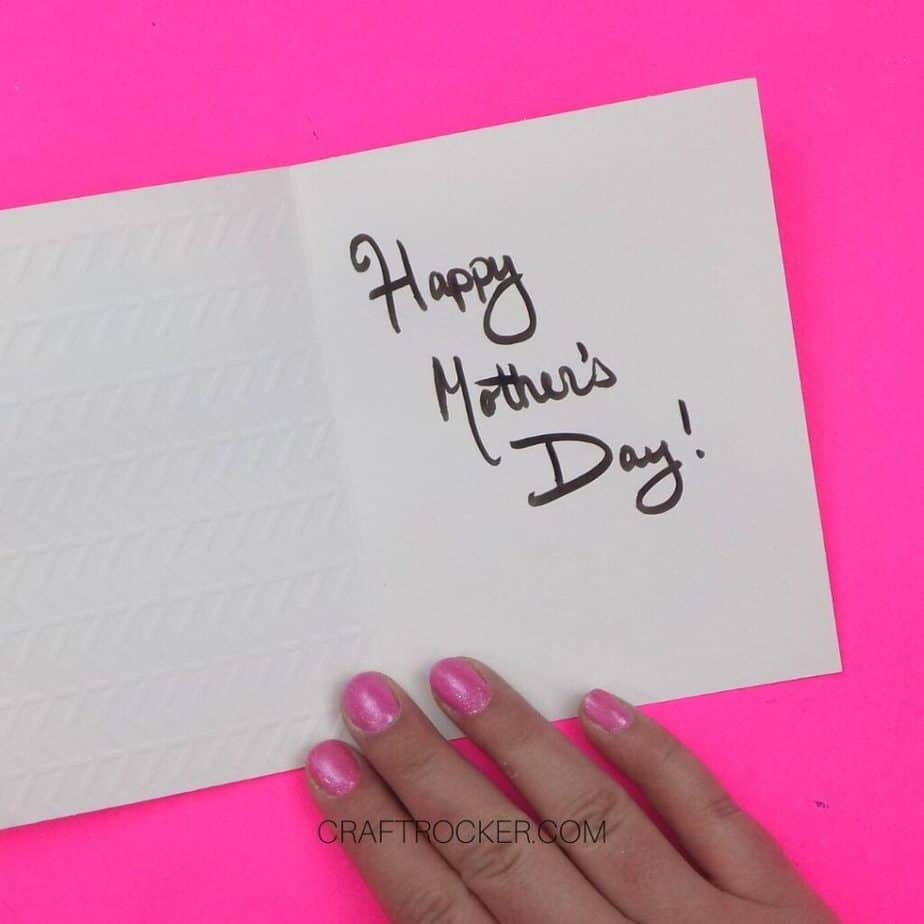
Obviously, I’m making it for Mother’s Day but honestly it totally works as a wedding card, Valentine’s card, or even a thank you card.
To change it up, simply add a different sentiment to the inside of the card. Easy-peasy.
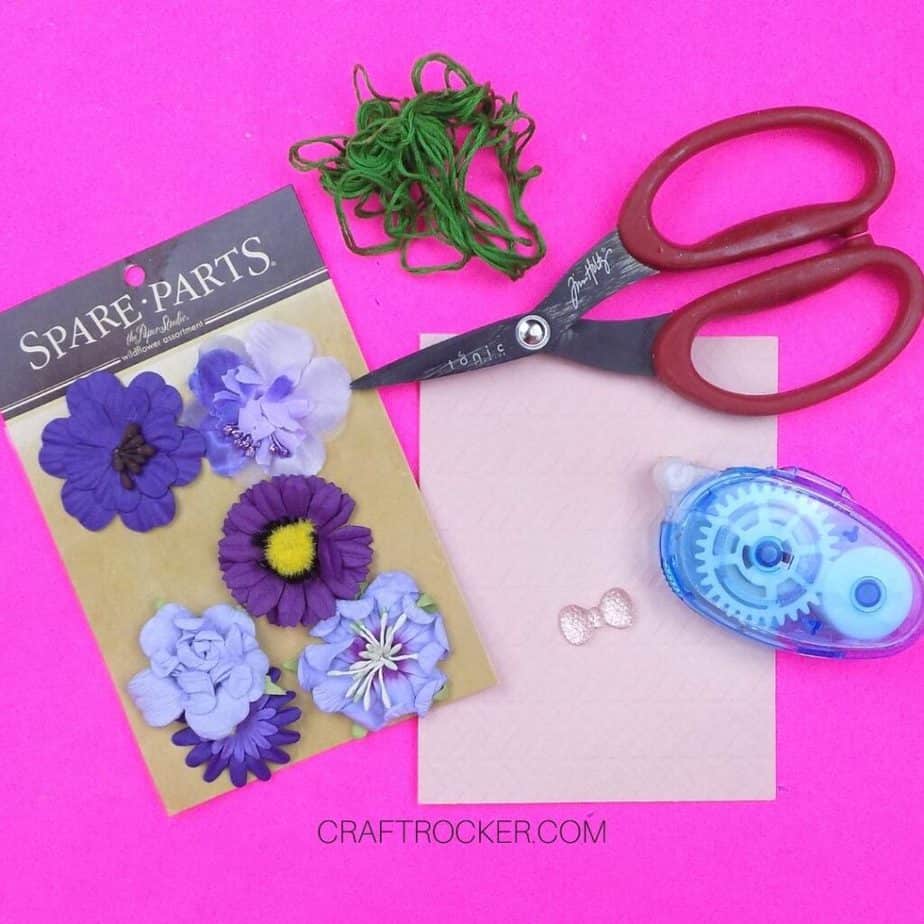
Bouquet DIY Mother’s Day Card Materials
Blank Peach Card
3-D Flower Stickers (Here’s a similar set)
Green Floss
Scissors
Love Scrabble Saying (mine came from this set)
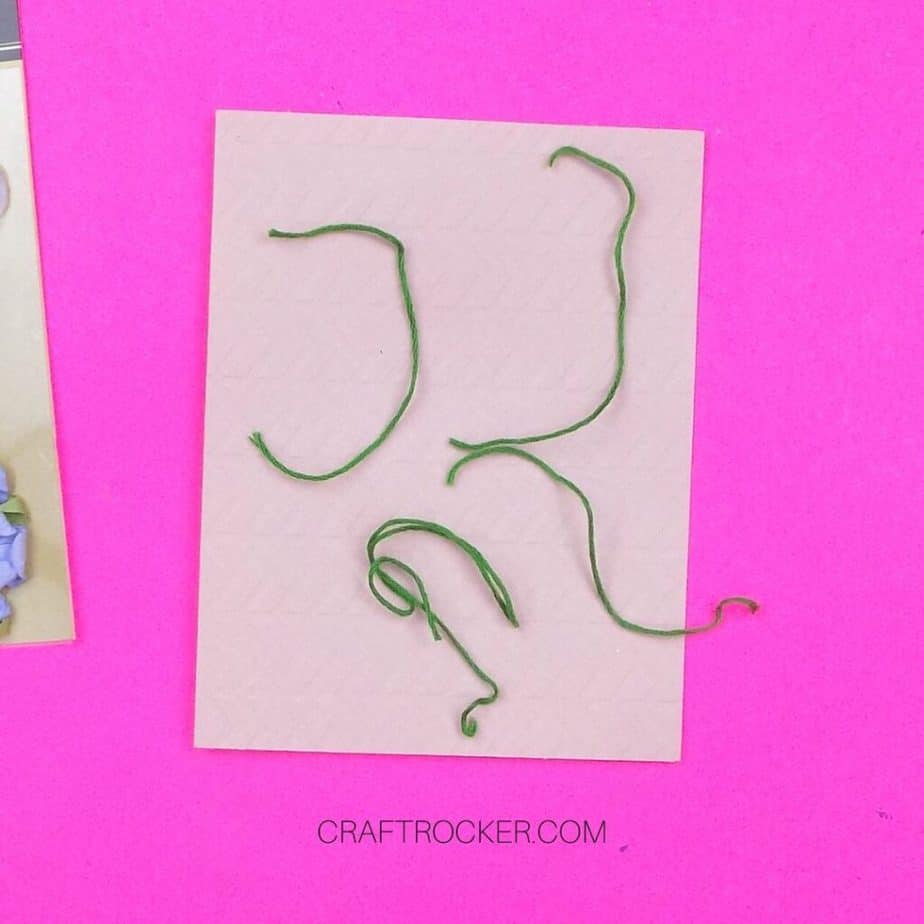
Step 1 – Make Your Stems
First, cut 3 lengths of green floss that are roughly4 inches long. Don’t worry about them being exactly the right length. You will trim them down later.


Step 2 – Attach the Flowers and Stems
After your green floss is cut, choose 1 of your flowers and attach one end of a piece of green floss to the sticky part on the back of the flower.
Then stick the flower and floss to the top center on the front of your card.
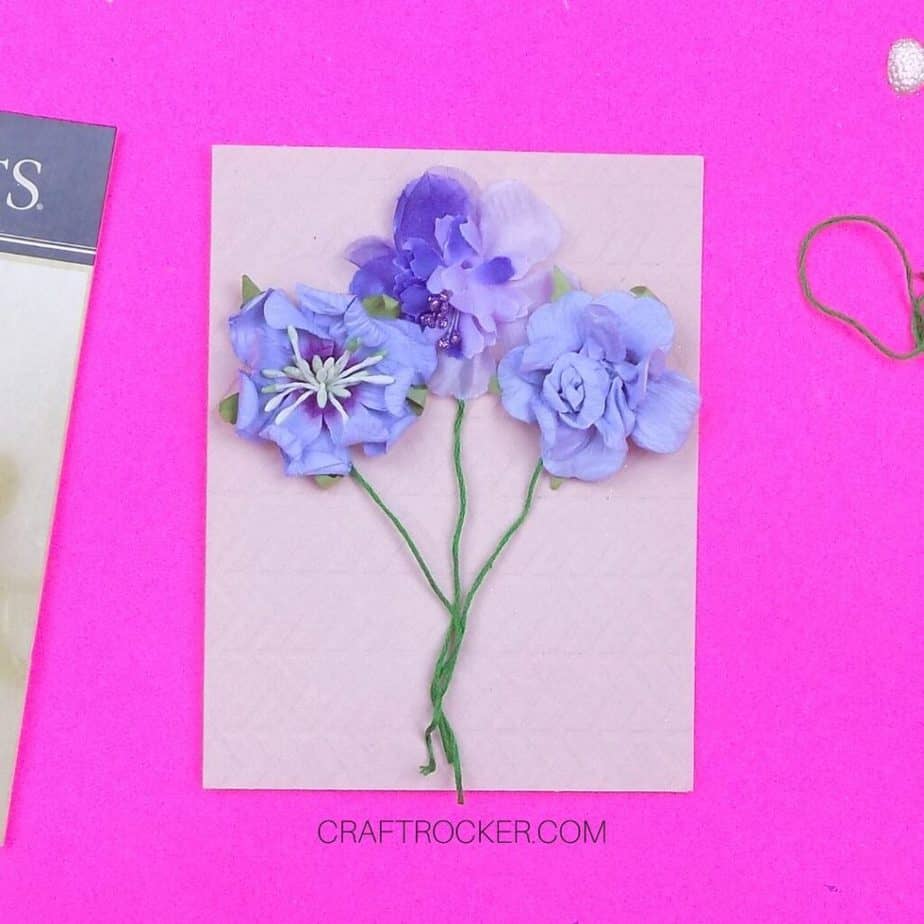
Repeat with 2 more flowers and attach them to the card slightly lower than the first flower and on either side. See the photo above for reference.

Step 3 – Secure and Trim Your Stems
Once all of your flowers and stems are attached, pull the stems together slightly below your flowers.
Secure the stems in place together with an adhesive foam square.
Then trim the ends so that they are just above the bottom of your card front.
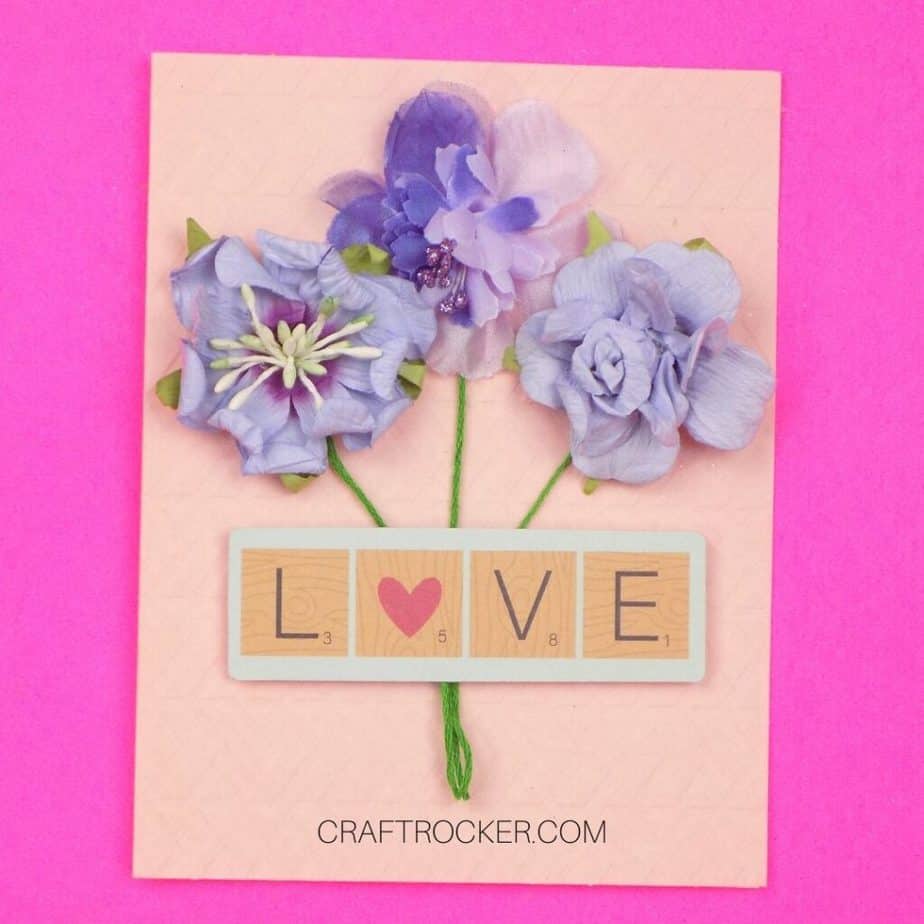
Step 4 – Attach Your Saying
Lastly, add an adhesive foam square to the left and right sides of the back of your saying.
Then attach it to the front of your card so that the center lines up over the adhesive foam square attached to your stems.
Tips and Tricks
You may need to fluff your flower stickers after you attach them to your card. Sometimes they get smooshed a little in the packaging.
Make sure that you pull the stems of the flowers taut before securing them with the adhesive foam square. You want them to be straight, however, you don’t want to pull them too hard and pull them out from under the flowers.
This card should not require extra postage to mail however the flowers might get smashed down some during transit so keep that in mind.
Printable Bouquet Mother’s Day Card Tutorial
Flower Bouquet DIY Mother's Day Card
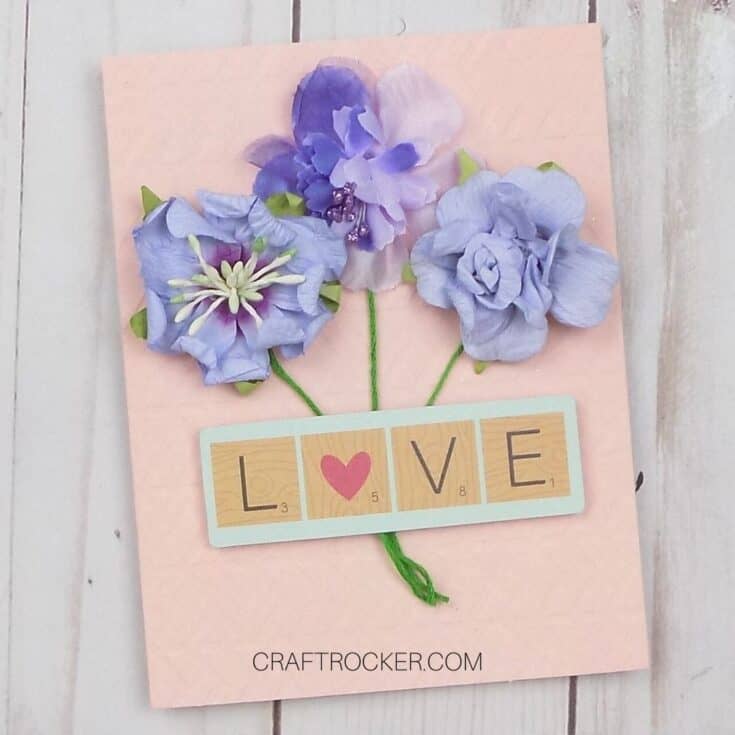
Mom will love receiving this flower bouquet DIY Mother’s Day card! It is beautiful, easy to make, and incredibly thoughtful.
Materials
- Blank Peach Card
- 3-D Flower Stickers
- Green Floss
- Scissors
- Adhesive Foam Squares
- Love Scrabble Saying
Instructions
- First, cut 3 lengths of green floss that are roughly4 inches long. Don’t worry about them being exactly the right length. You will trim them down later.
- After your green floss is cut, choose 1 of your flowers and attach one end of a piece of green floss to the sticky part on the back of the flower.
- Then stick the flower and floss to the top center on the front of your card.
- Repeat with 2 more flowers and attach them to the card slightly lower than the first flower and on either side. See the photo above for reference.
- Once all of your flowers and stems are attached, pull the stems together slightly below your flowers.
- Secure the stems in place together with an adhesive foam square.
- Then trim the ends so that they are just above the bottom of your card front.
- Lastly, add an adhesive foam square to the left and right sides of the back of your saying.
- Then attach it to the front of your card so that the center lines up over the adhesive foam square attached to your stems.
Notes
- This card should not require extra postage to mail however the flowers might get smashed down some during transit so keep that in mind.
Mom will love receiving this flower bouquet DIY Mother’s Day card! It is beautiful, easy to make, and thoughtful.
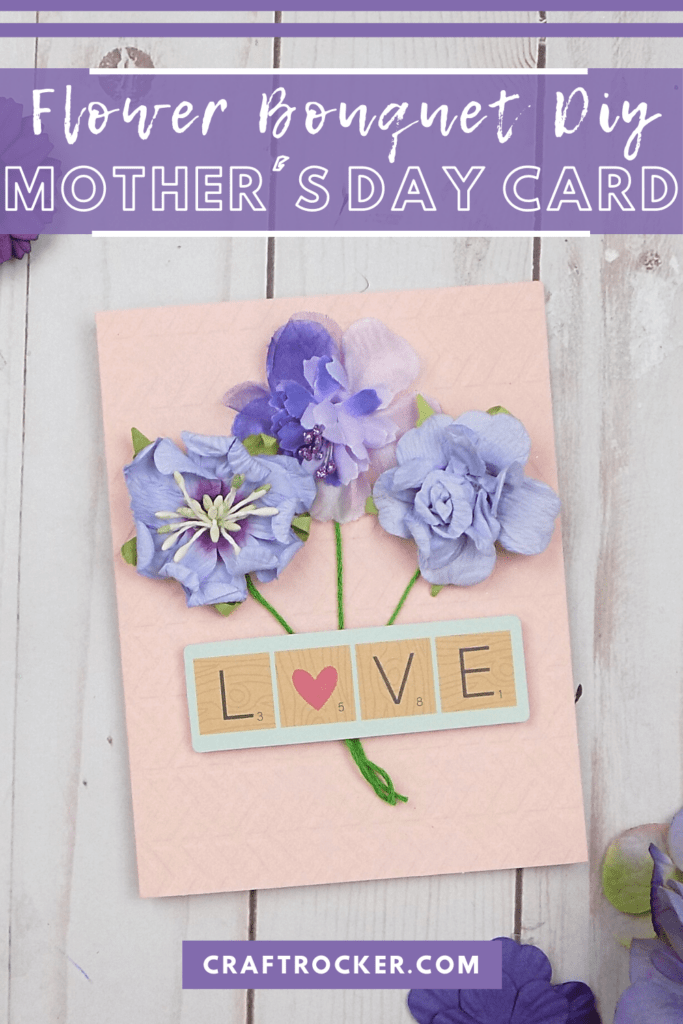
Don’t Forget to Pin It!
More Mother’s Day Ideas You’ll Love
Mini Canvas Mother’s Day Gifts
Mother’s Day Vanity Jars – My Pinterventures
