Add a glittery pop of color to your Halloween décor with these upcycled Halloween potion bottles.
Affiliate links may be used in this post. Ordering a product through these links may result in a commission at no extra cost to you. Read the full disclosure here.
People fall into 2 camps when it comes to glitter: you either love it or you hate it. I have always fallen into the love it category.
If something is sparkly, I am drawn to it like a moth to a flame. So, of course, when making these potion bottles I had to take the opportunity to add a little glitz.
Now we have colorful décor to display for the season and I have more shiny stuff to love!
Halloween Potion Bottles Materials
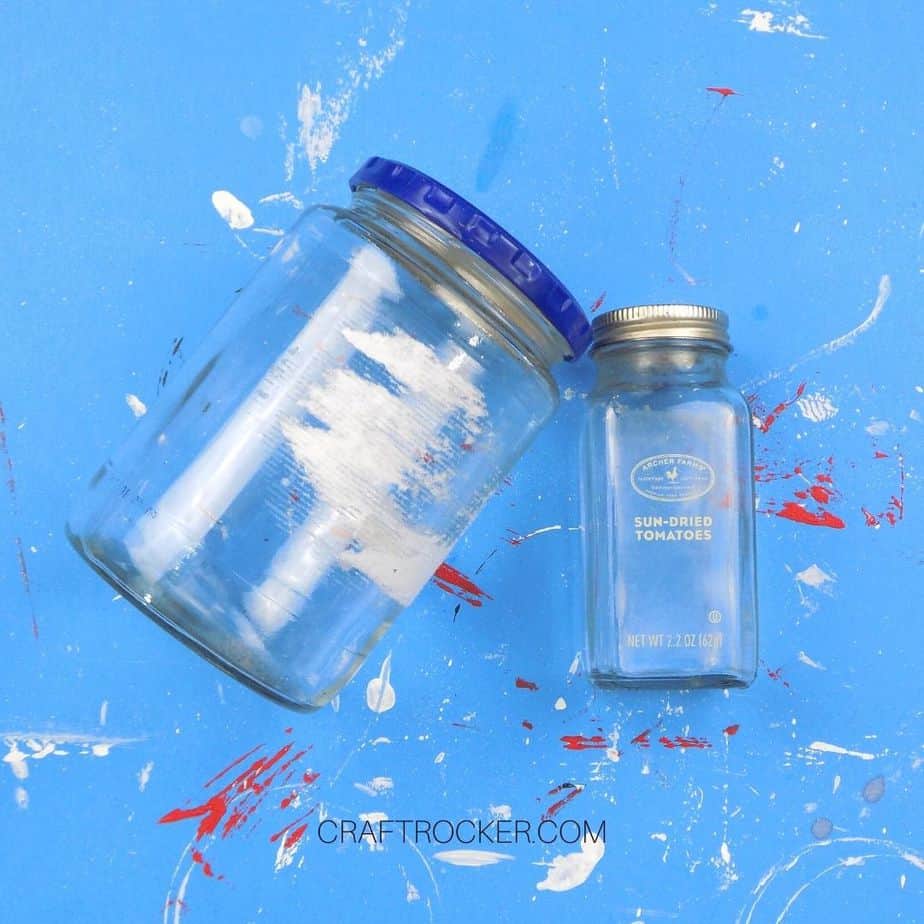
- Empty Bottle and Jars (I used a seasoning bottle and a pickle jar)
- Plastic Halloween Toy Assortment (mine came from Dollar Tree)
- Scissors
- Hot Glue Gun and Glue Sticks
- Matte Mod Podge
- Small Flat Paint Brush
- Paper Towels
- Craft Knife or Utility Knife
- Neon Purple and Neon Green Acrylic Paints (I used the ones from this set)
- Green and Purple Glitter
- Black Acrylic Paint
- Small Fine Tip Paint Brush
Optional Materials
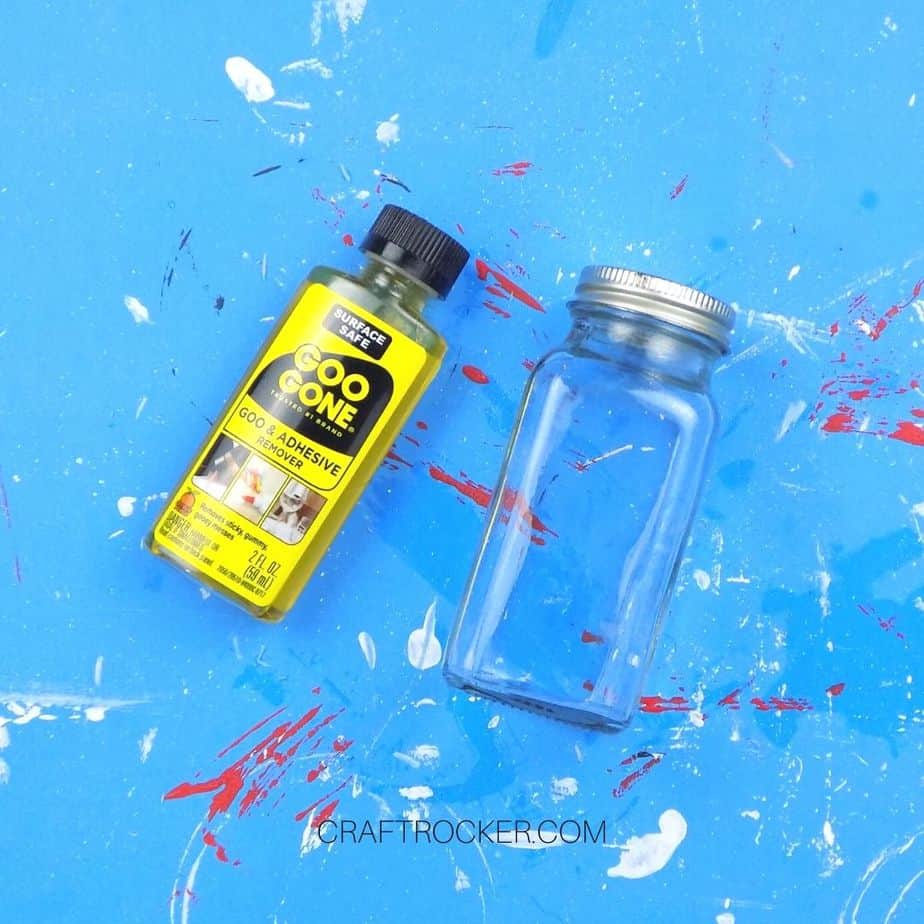
- Goo Gone
- Glitter Tray
- Spray Acrylic Sealant
Step 1
First, remove any labels from your jars and bottles. Use Goo Gone to get any excess sticky off. Then make sure you thoroughly clean you jars and bottles so that your hot glue and Mod Podge will adhere properly.
Step 2
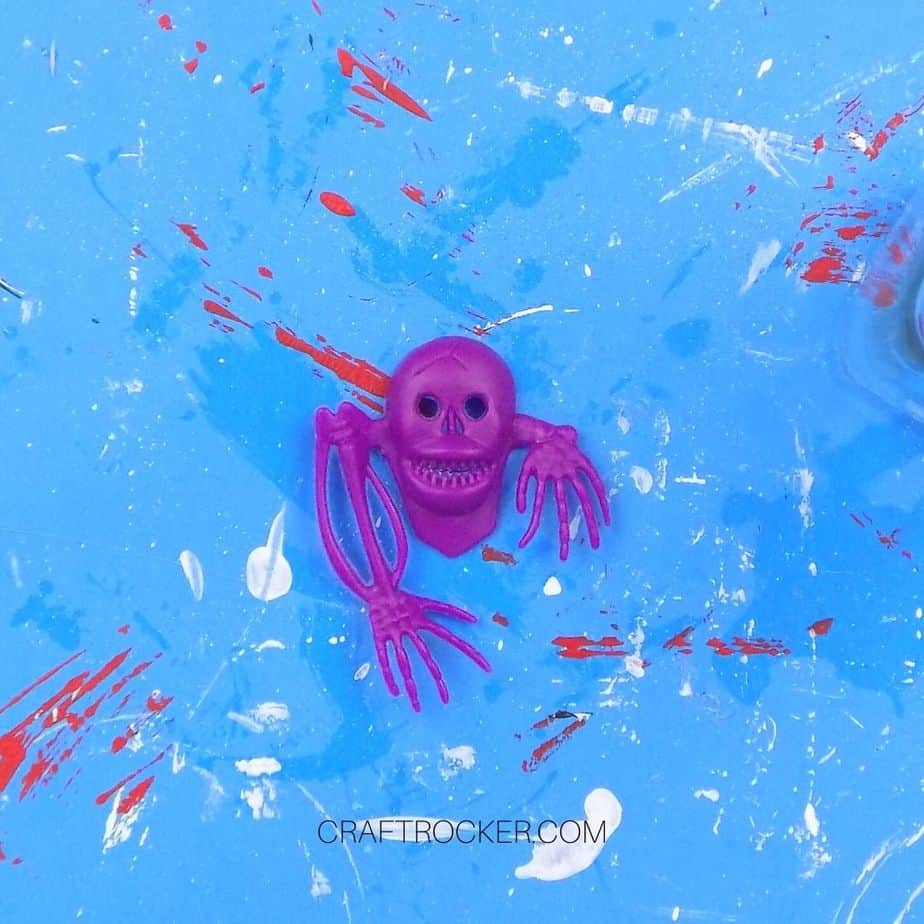
Next, pull out a skull head and full plastic skeleton toy from your assortment. The color doesn’t matter because you will be covering them later.

Step 3
Then, cut everything off of the skull head that isn’t specifically the skull and cut the arms off of you full skeleton. Also cut the hands from the ends of the arms so that only the arm bones are left.
Step 4
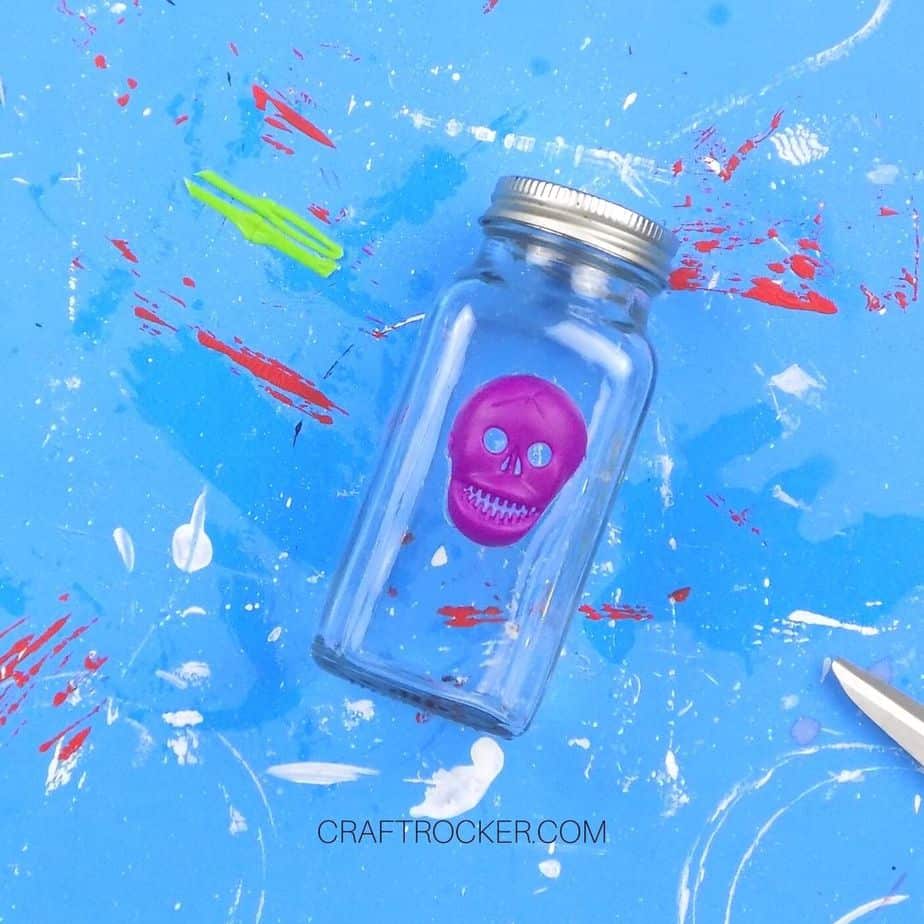
Now, hot glue the skull to the center of your smaller bottle. Make sure you remove any excess glue that seeps out around the edges of the skull (carefully… you don’t want to get burned).
Step 5
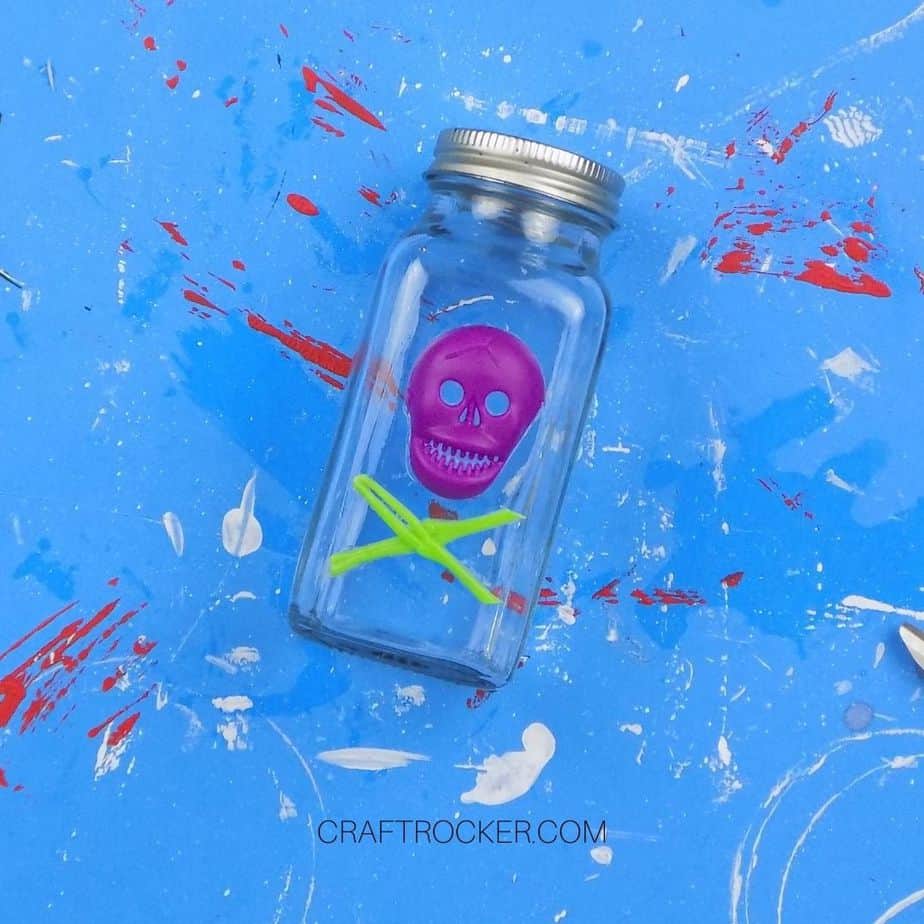
Next, hot glue your arm bones in an “X” under the skull. Again, carefully remove any excess glue that seeps out.

Step 6
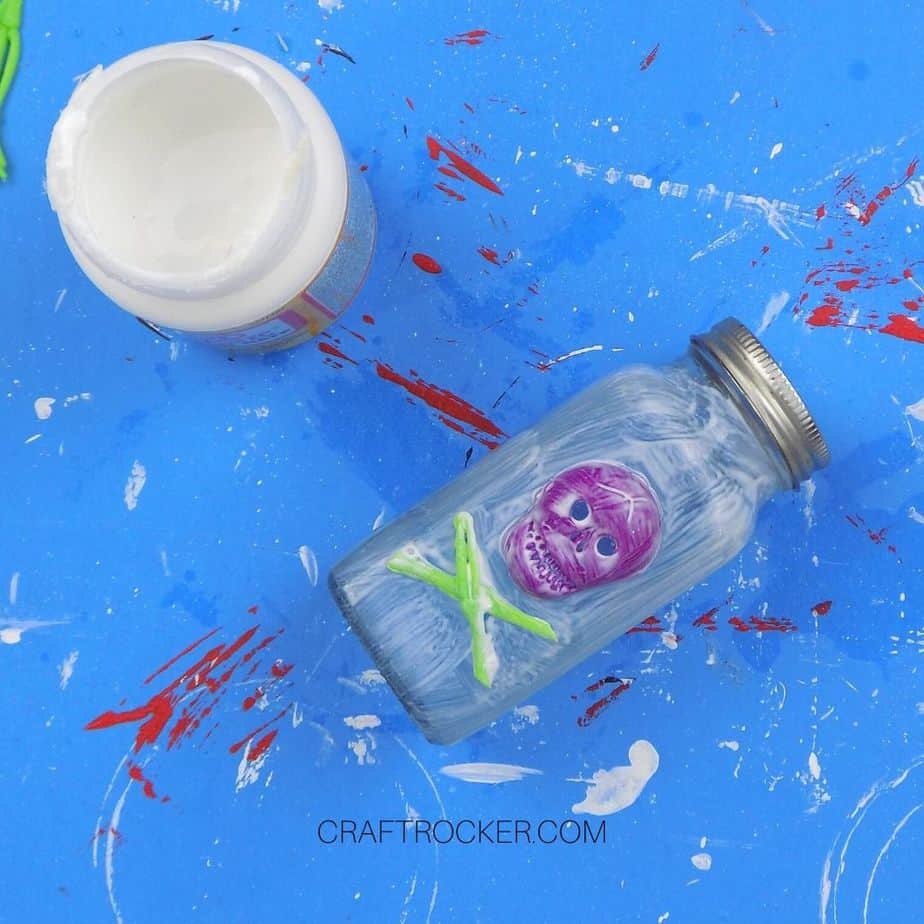
After your pieces are glued to your bottle, cover the front of it with a coat of Mod Podge.
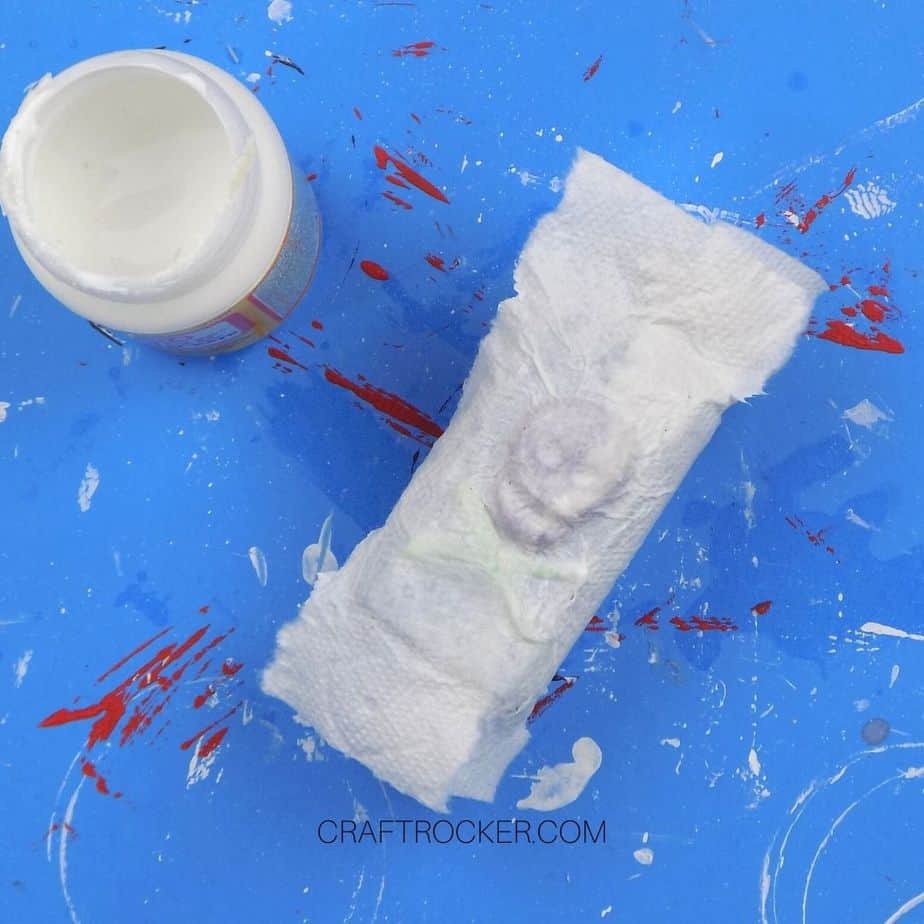
Step 7
Then tear up strips of paper towel and place them on the Mod Podge on the bottle. As you apply the paper towels, go back over them with more Mod Podge.
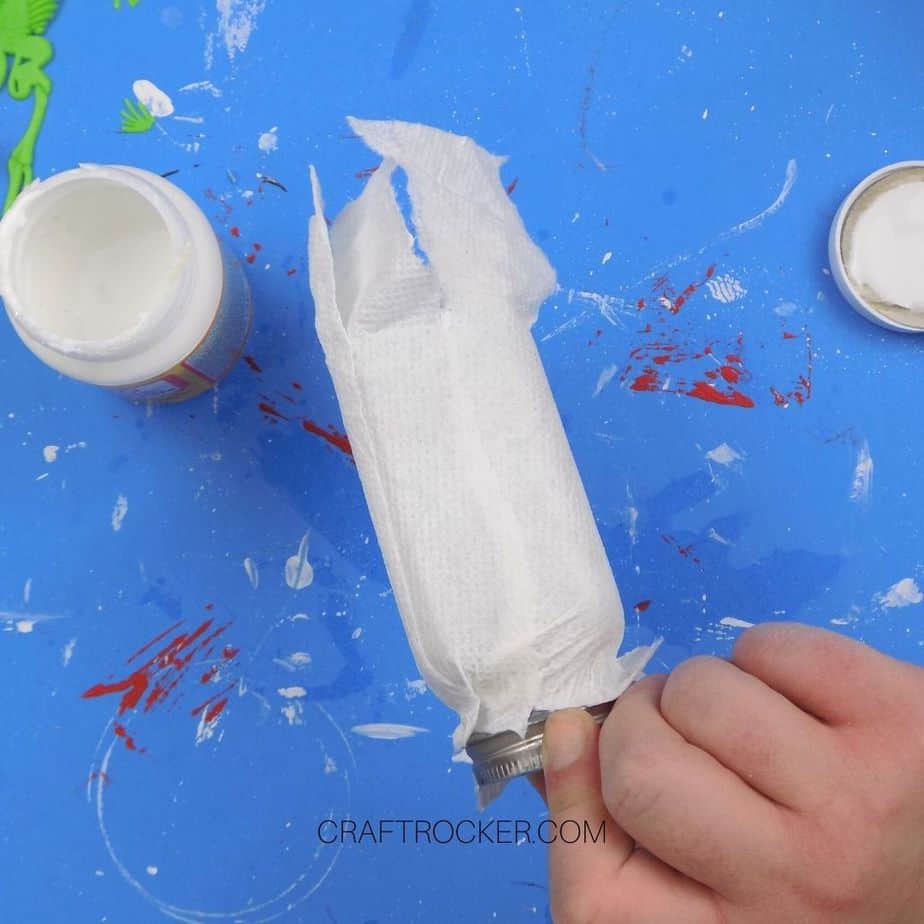
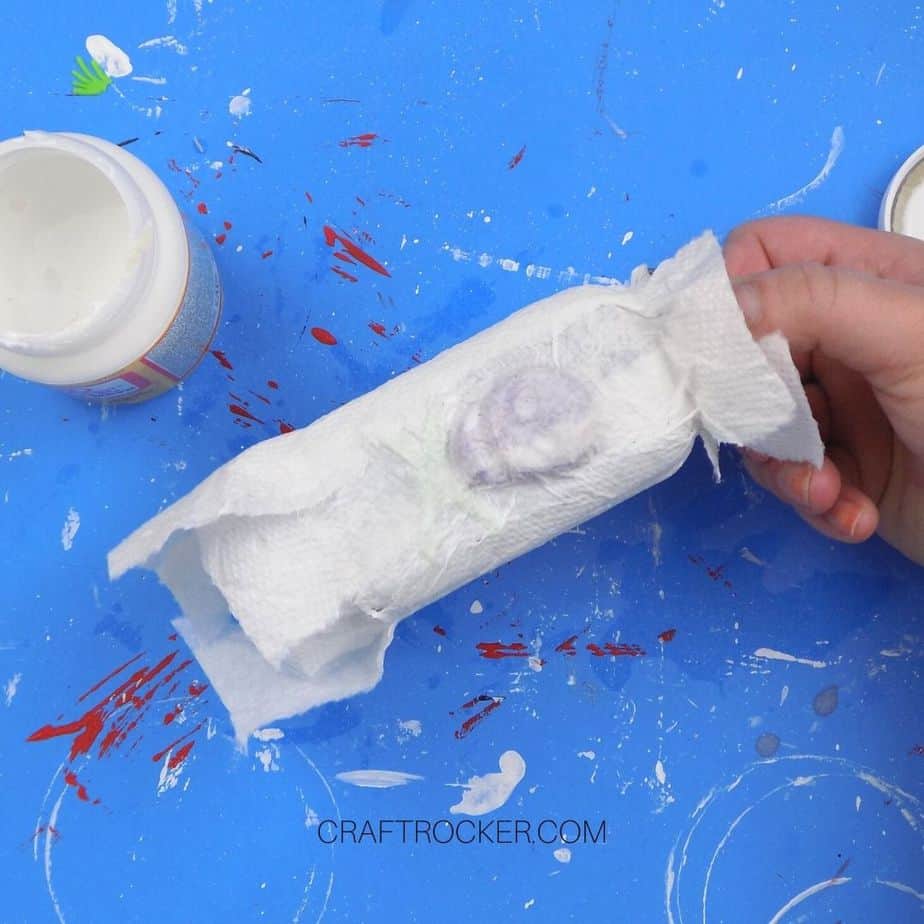
Step 8
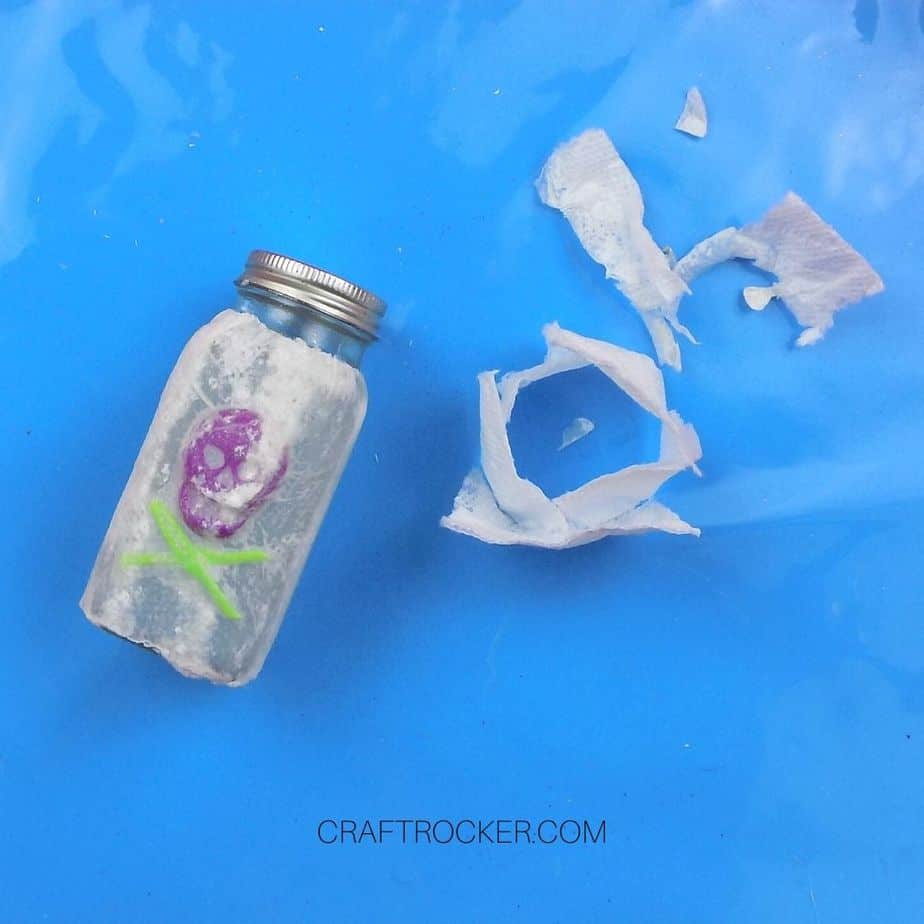
Continue covering your bottle with Mod Podge and strips of paper towels until the entire base is covered. Don’t cover the lid.
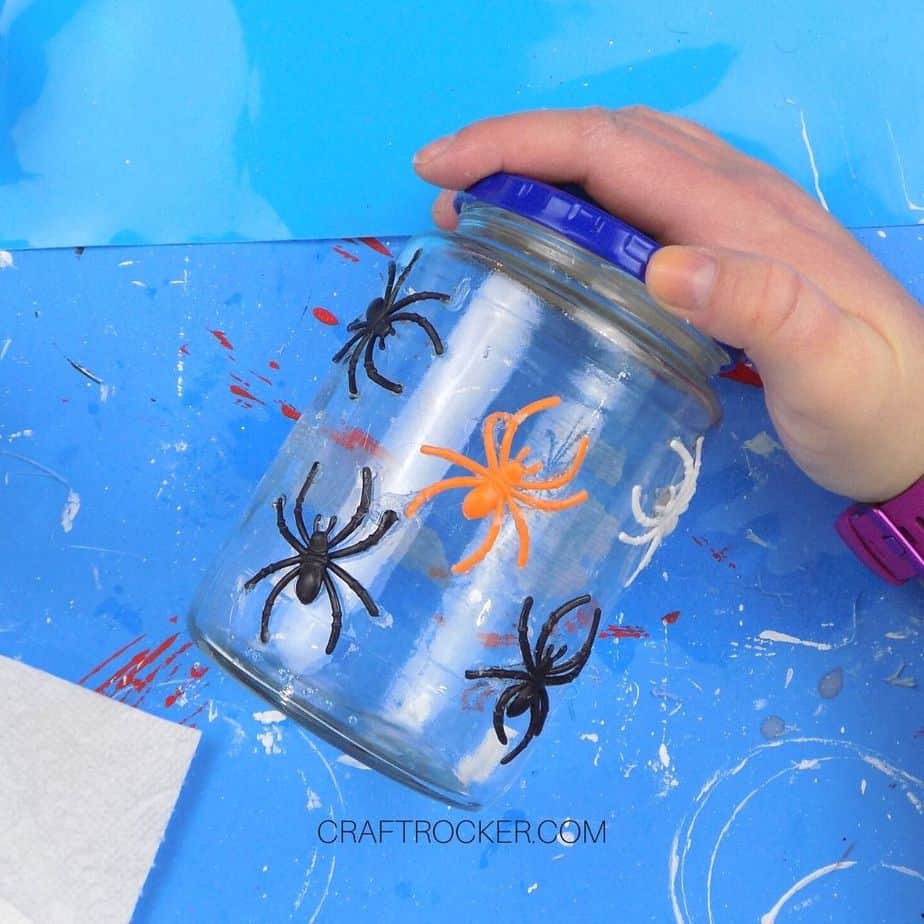
Step 9
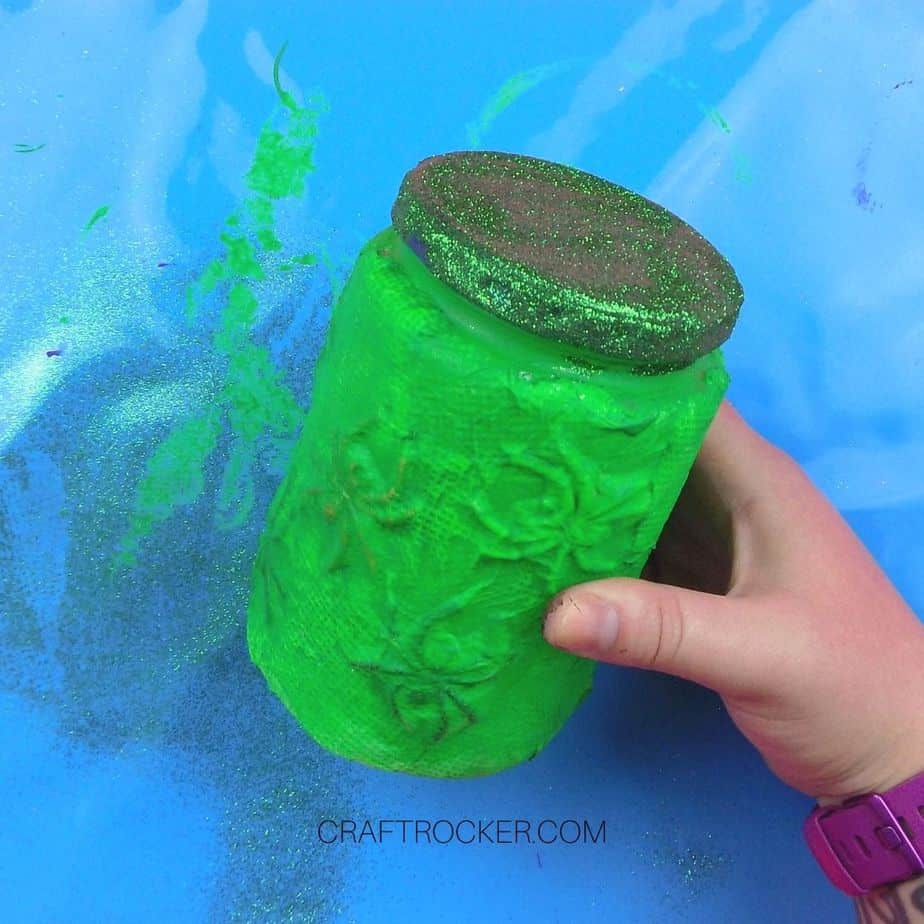
Set you bottle aside to dry and grab your larger jar and some plastic spiders from your assorted toys. Hot glue the spiders to your jar. Also, make sure that you carefully remove any excess glue.
Step 10
After the spiders are glued to your jar, repeat the process of layering Mod Podge and strips of paper towels until the entire jar is covered. Again, set it aside to dry.
Step 11
Next, remove the excess paper towel from your dried jars with a craft or utility knife.
Step 12
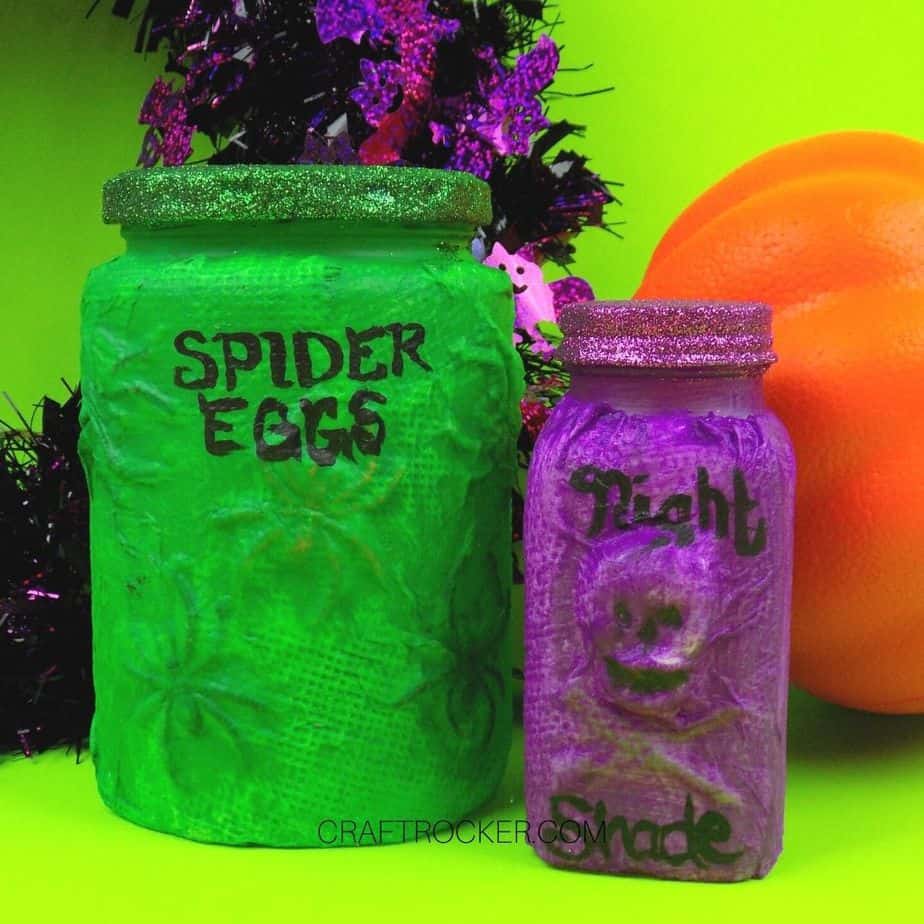
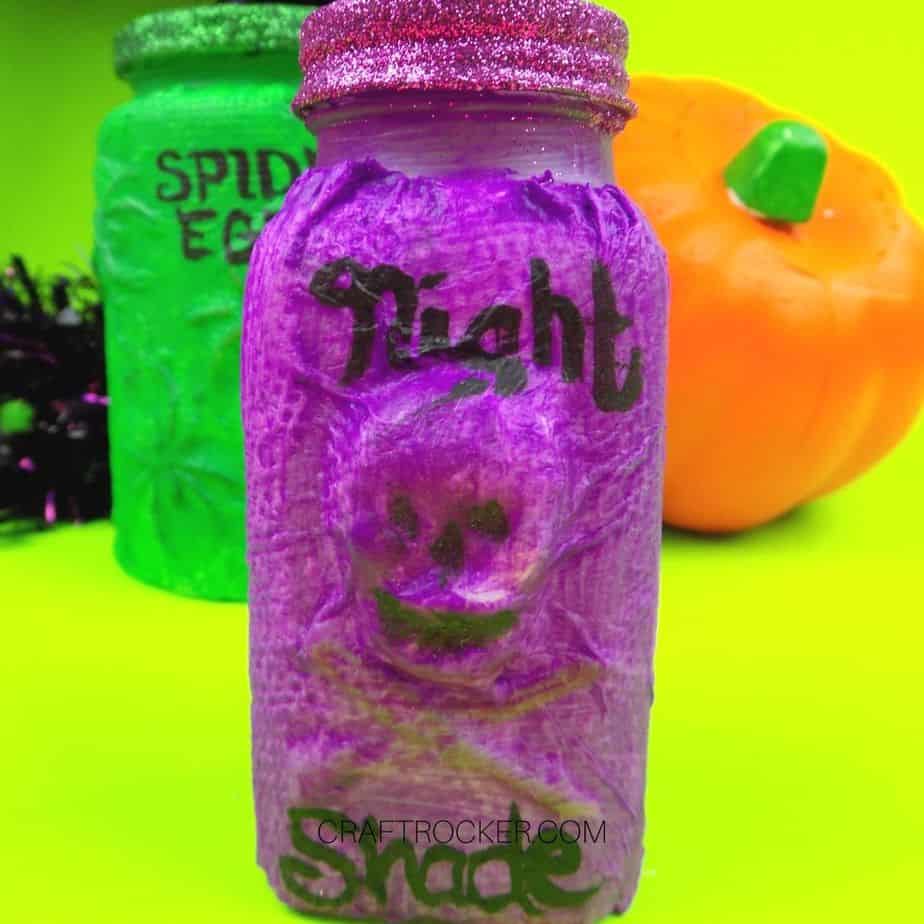
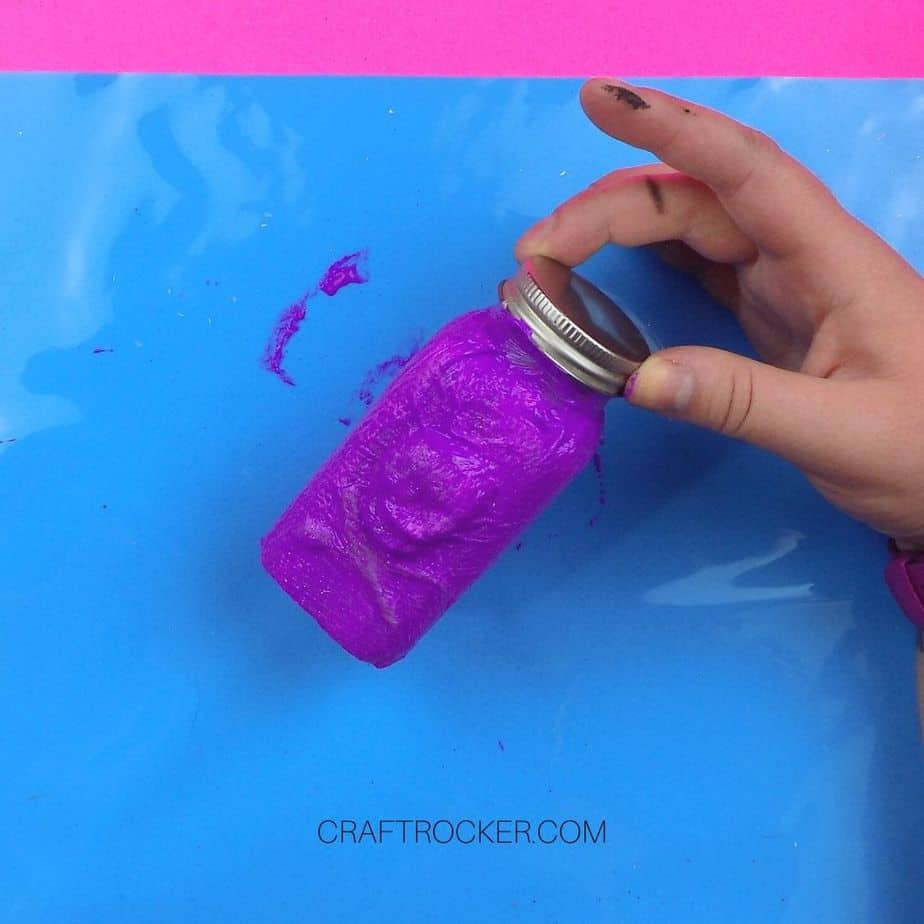
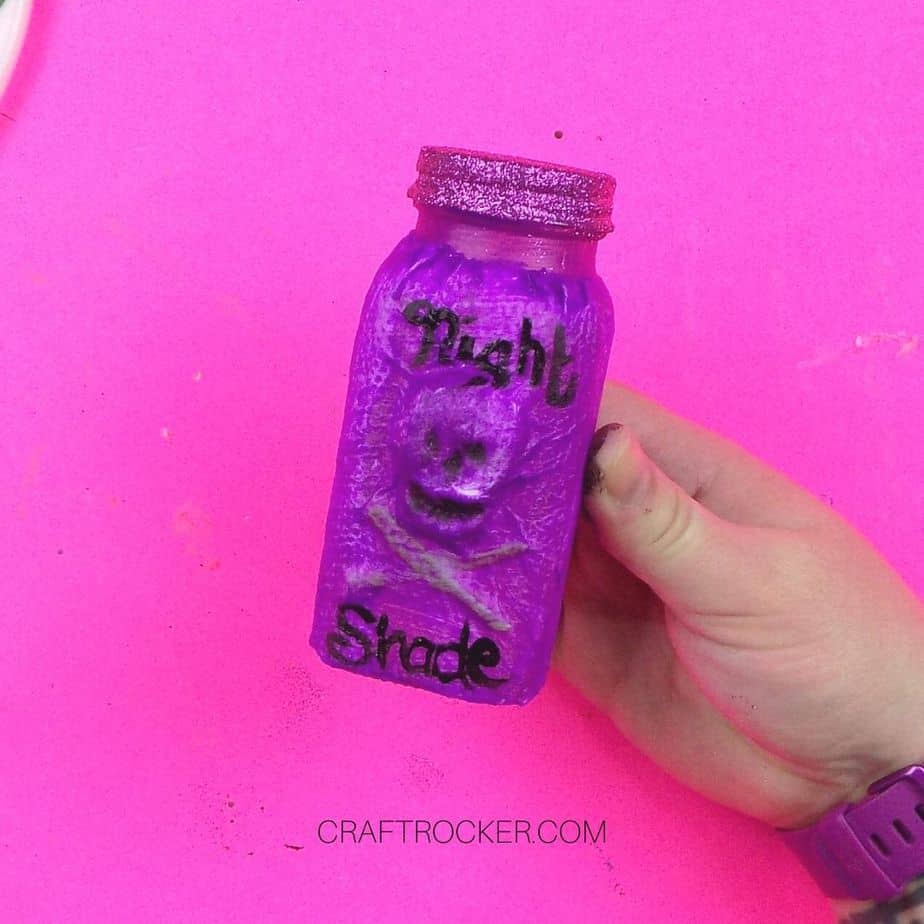
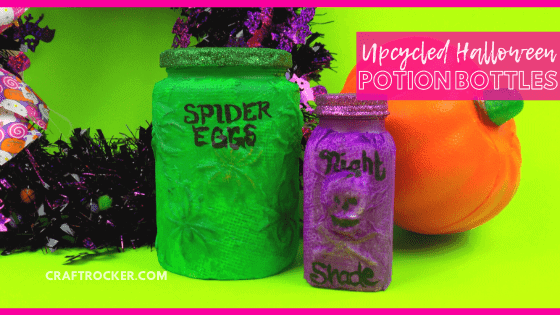
Then paint the skull and crossbones bottle with neon purple acrylic paint and set it aside to dry.
Step 13
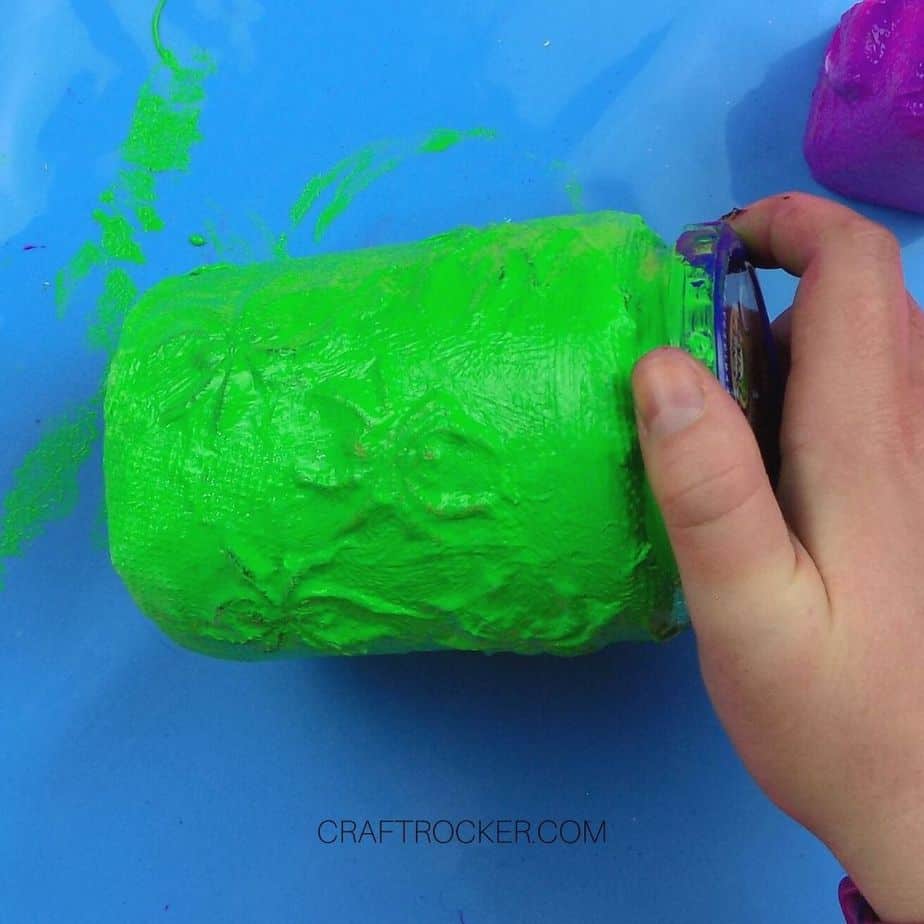
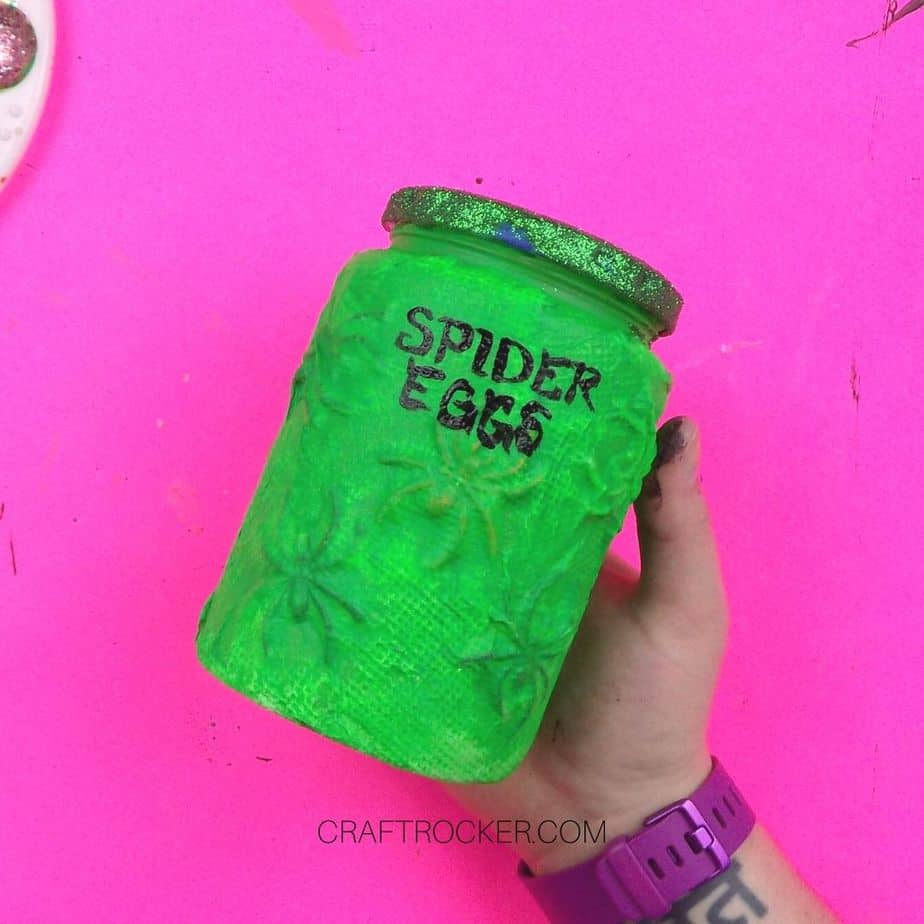
Next, paint your spider jar with neon green acrylic paint and, again, set it aside to dry.
Step 14
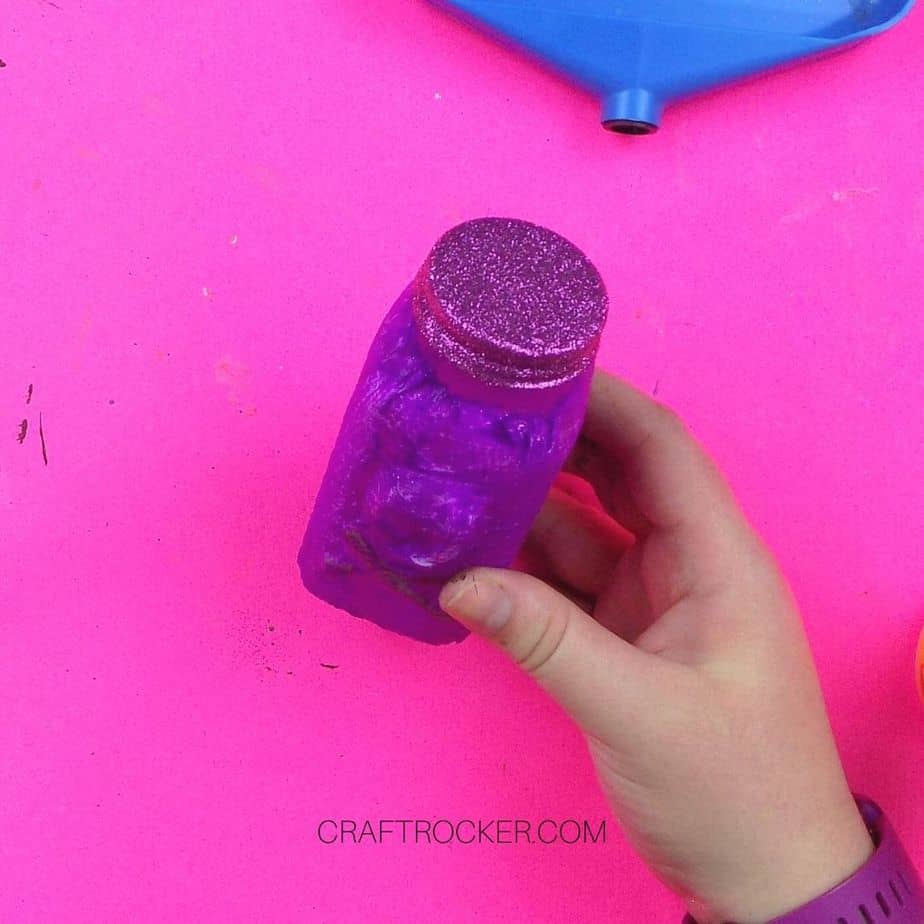
After your paint is dry, add a coat of Mod Podge to your lids and cover them in the corresponding colors of glitter. Shake off the excess glitter and allow them to dry.
Tip:
- Glitter trays make it really easy to return the excess glitter to the containers. I totally recommend investing in one.
Step 15
Lastly, use a small paintbrush to paint the words “Night Shade” on your purple bottle and “Spider Eggs” on your green jar. Let the paint dry.
Note:
- I added a small amount of black paint to the details on the skull to make it more pronounced. This is totally optional and your jar will still look awesome either way.
Step 16 (Optional)
Keep glitter from coming off of your jars by sealing them with spray acrylic sealant.
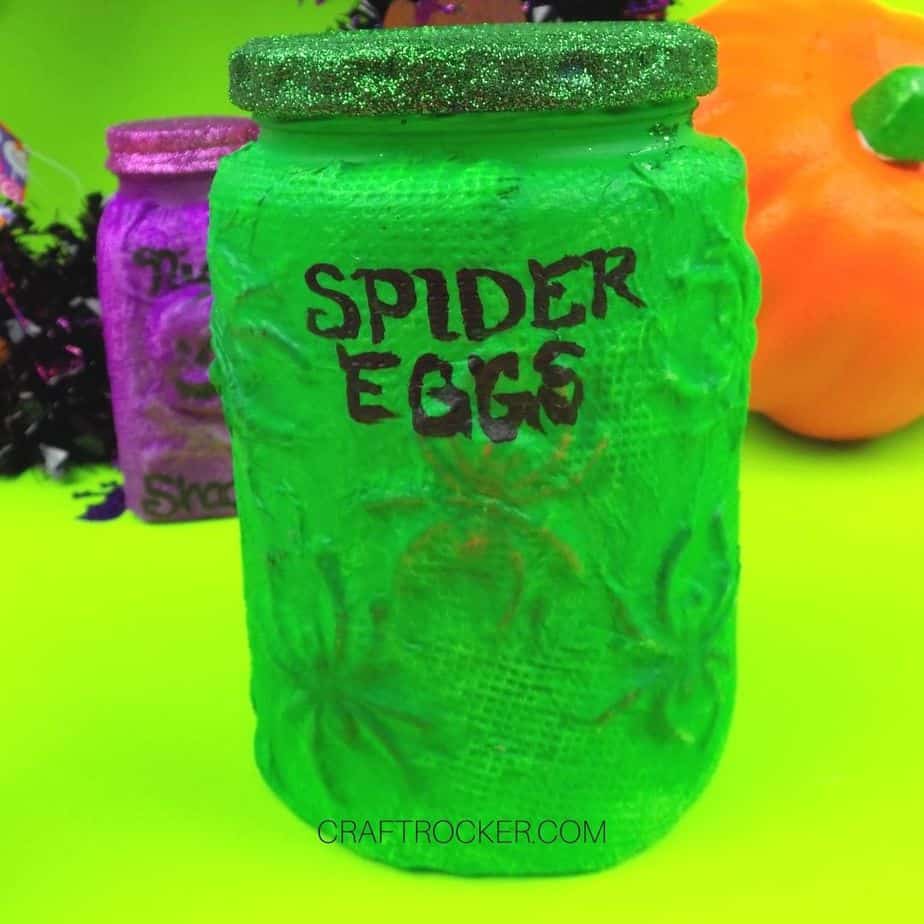
These upcycled Halloween potion bottles are a fun and sparkly addition to your décor this year.
Group a few of them together to create a vignette for your mantle all October long!
Don’t Forget to Pin It!

More Projects to Love:
- Popsicle Stick Halloween Characters
- Mini Unicorn Pumpkin DIY
- Hanging Ghosts Halloween Porch Decorations
- Pumpkin Face Shadow Box – My Pinterventures

This is a great craft. I love things that aren’t costly and are easy to make.
Thanks, Erlene! It’s always fun to see what you can make with a few supplies and simple household items. 🙂