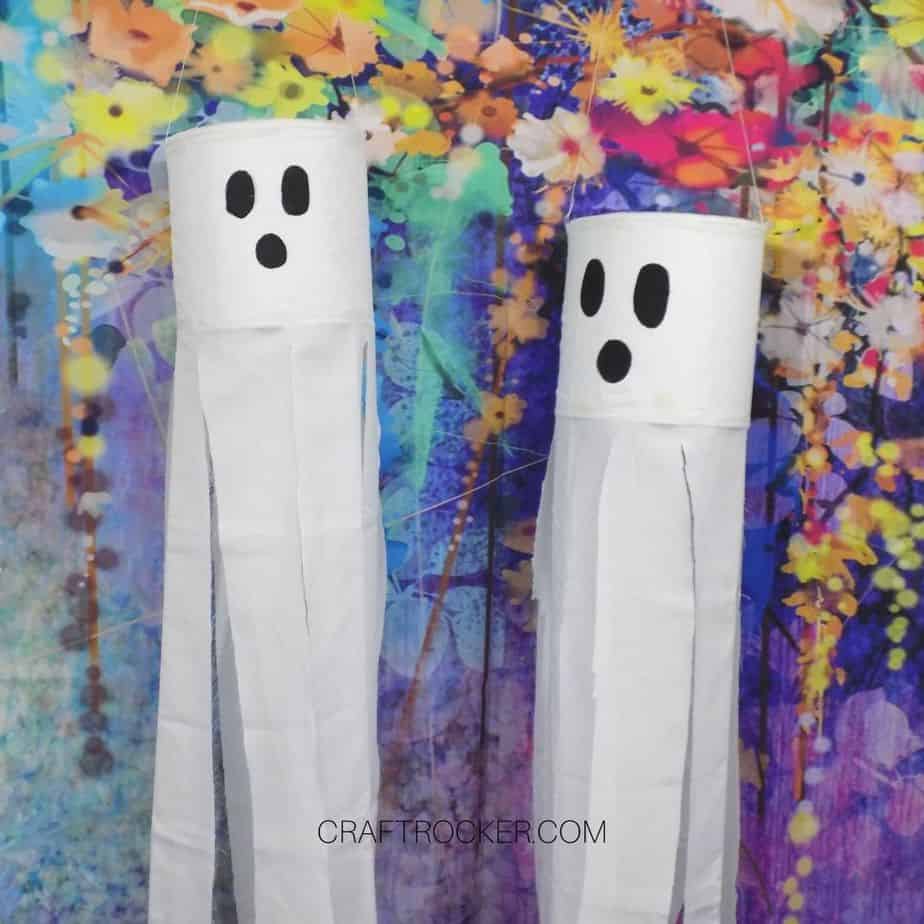
Get your home ready for October with these hanging ghosts Halloween porch decorations.
Affiliate links may be used in this post. Ordering a product through these links may result in a commission at no extra cost to you. Read the full disclosure here.
Frankly, I am so ready for Halloween. Not only is it my favorite holiday but I also think we can all use a dose of fun after the excruciating year this has been.
Even if trick-or-treat gets canceled (it’s already starting), we are celebrating. I have this idea that we’ll load up the van with candy and drive around in costumes to look at all of the decorations. It will be the new, spookier looking at Christmas lights.
Then we still get all of the fun and sugary treats while social distancing. It’s a win-win, not to mention that you’re guaranteed to get your favorite candy!
That’s why I’m encouraging you to decorate for Halloween this year, even if you normally don’t. Give your neighborhood a splash of fun starting with these easy hanging ghosts.
Hanging Ghosts Materials
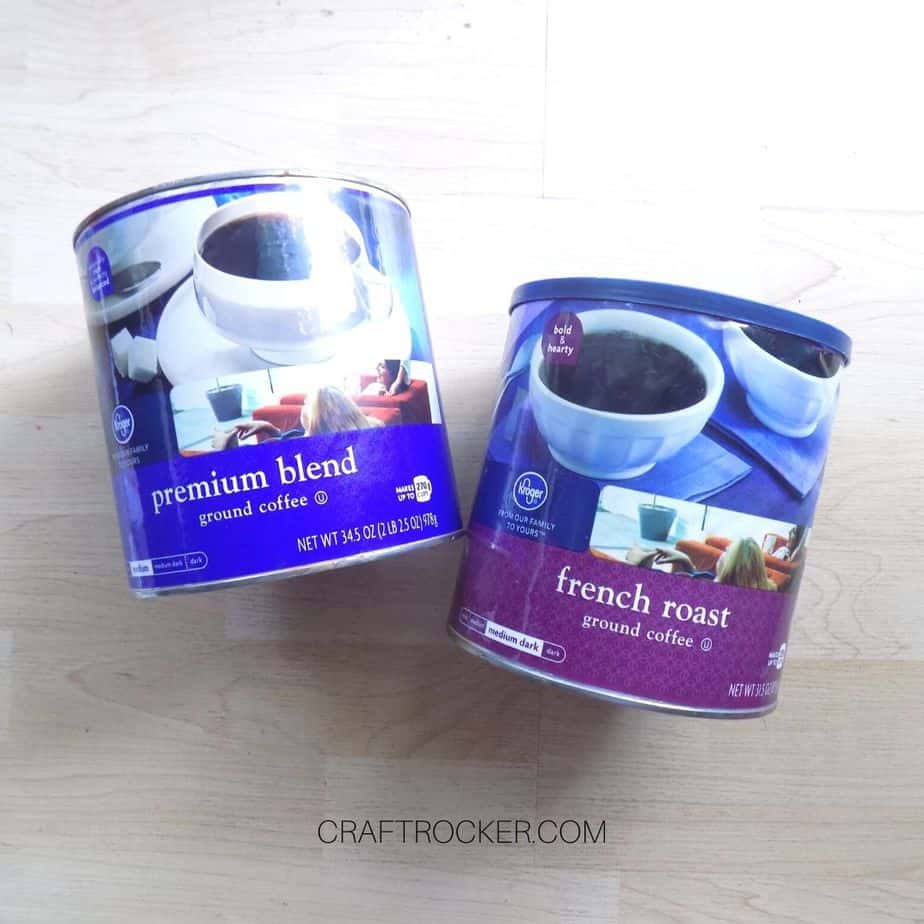
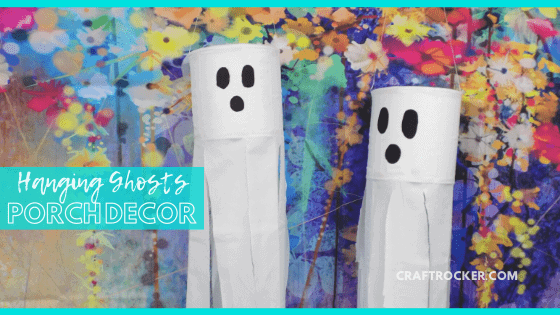
- Old Coffee Cans (or similarly sized empty containers)
- White Paint (acrylic or spray)
- Fishing Line
- Hot Glue Gun and Glue
- Scissors
- White Pillow Case (queen)
- Black Permanent Marker (or Black Acrylic Paint)
- Drill and 5/32 Drill Bit

Step 1
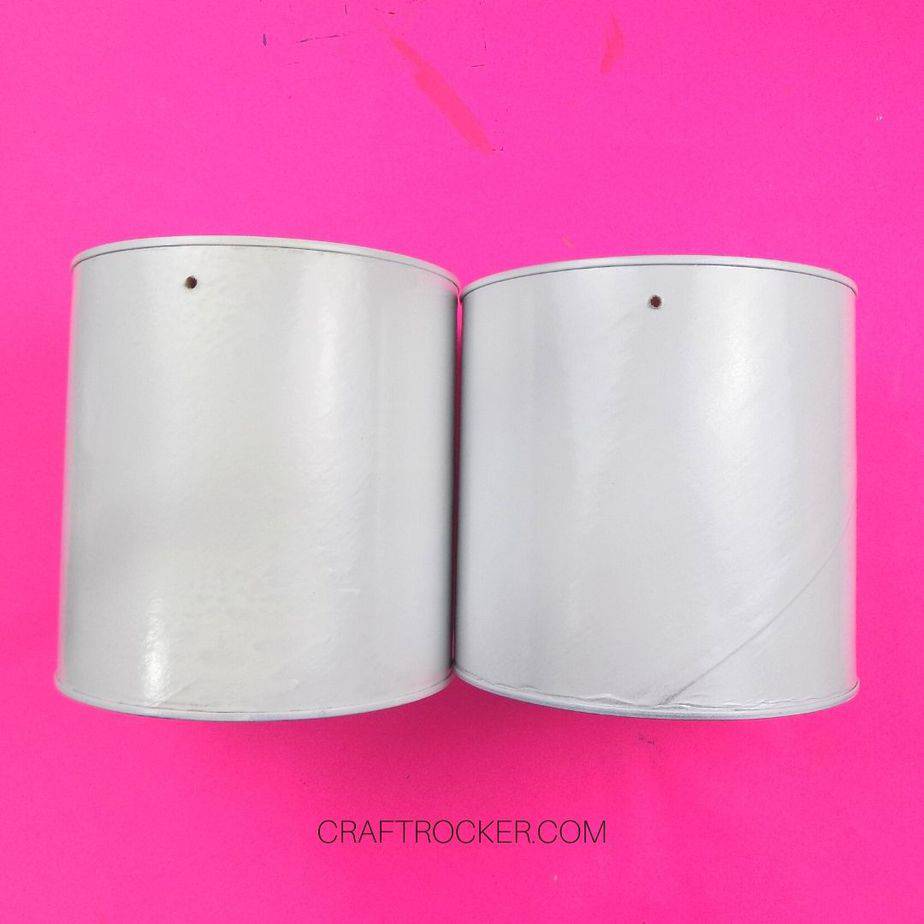
First, clean your coffee cans. You don’t want them attracting any critters to your porch.
Step 2
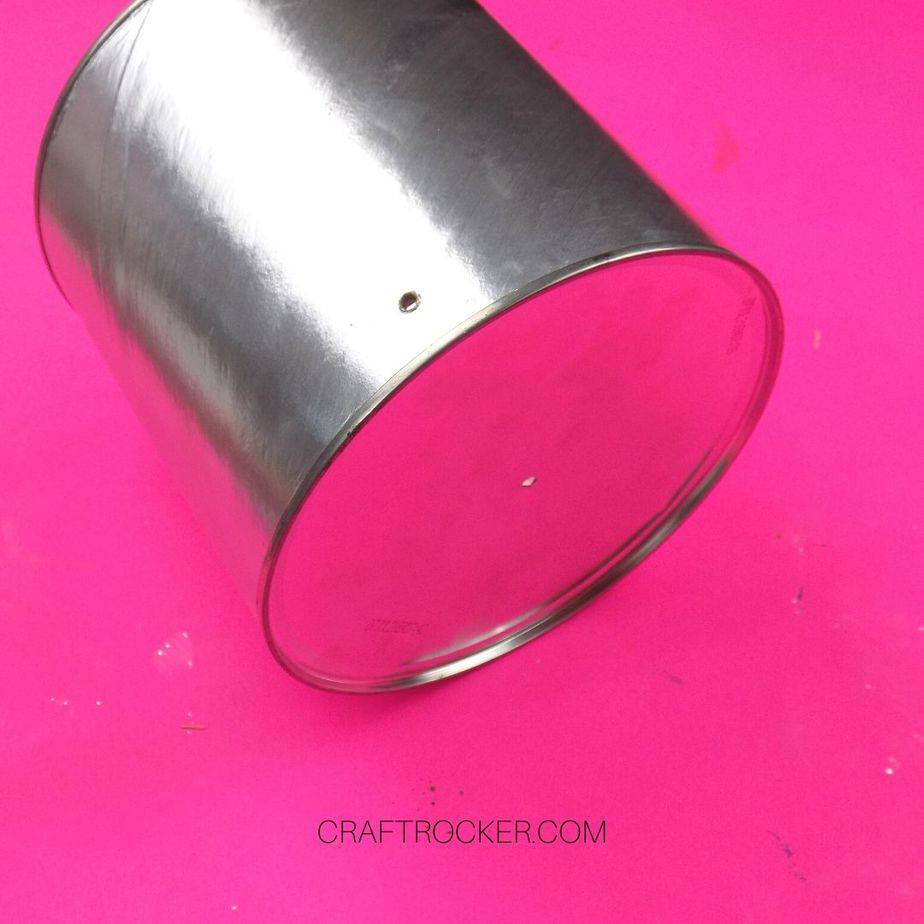
Next, drill holes in the left and right sides at the bottom of your coffee cans. Try to line them up across from each other but no worries if it isn’t exact.
Step 3
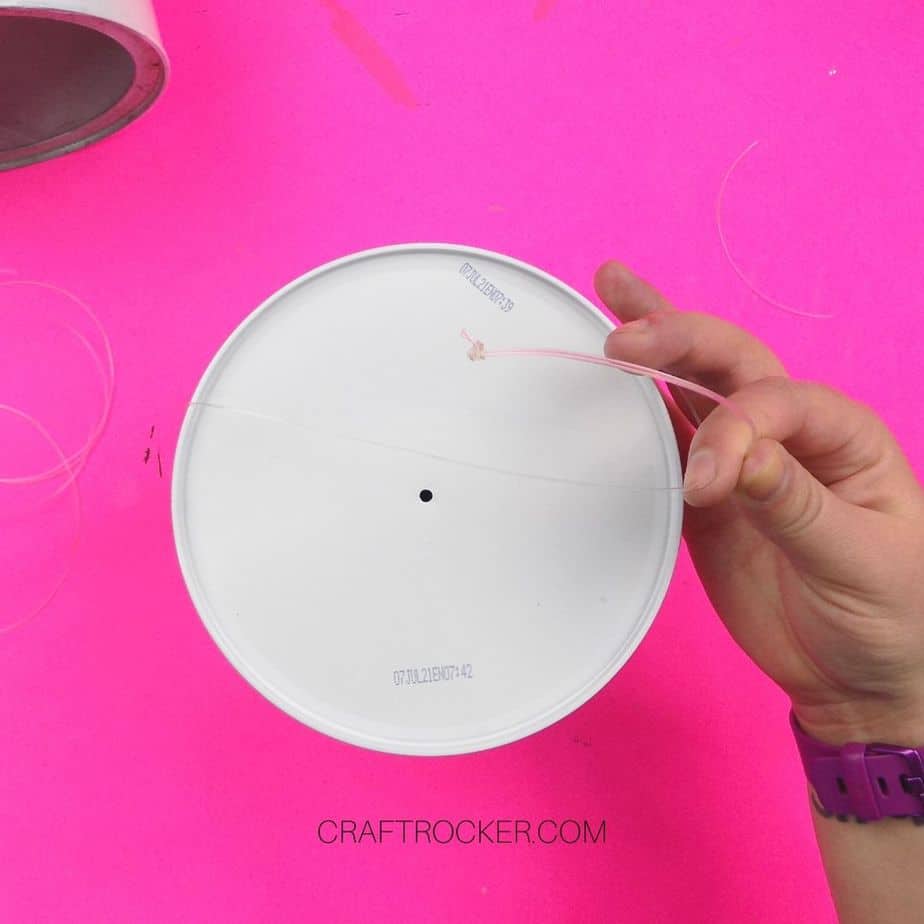
Then drill a 3rd hole in the bottom center of your coffee cans. This allows air to travel through your ghost to help prevent mold and other yuckiness.
Step 4
After your holes are drilled, paint your coffee cans white. I recommend using spray paint because it is quicker and easier than acrylic paint.
If you use acrylic paint, you will need multiple coats which leads to longer drying time.
Step 5
Once your cans are painted, set them aside to dry completely.

Step 6
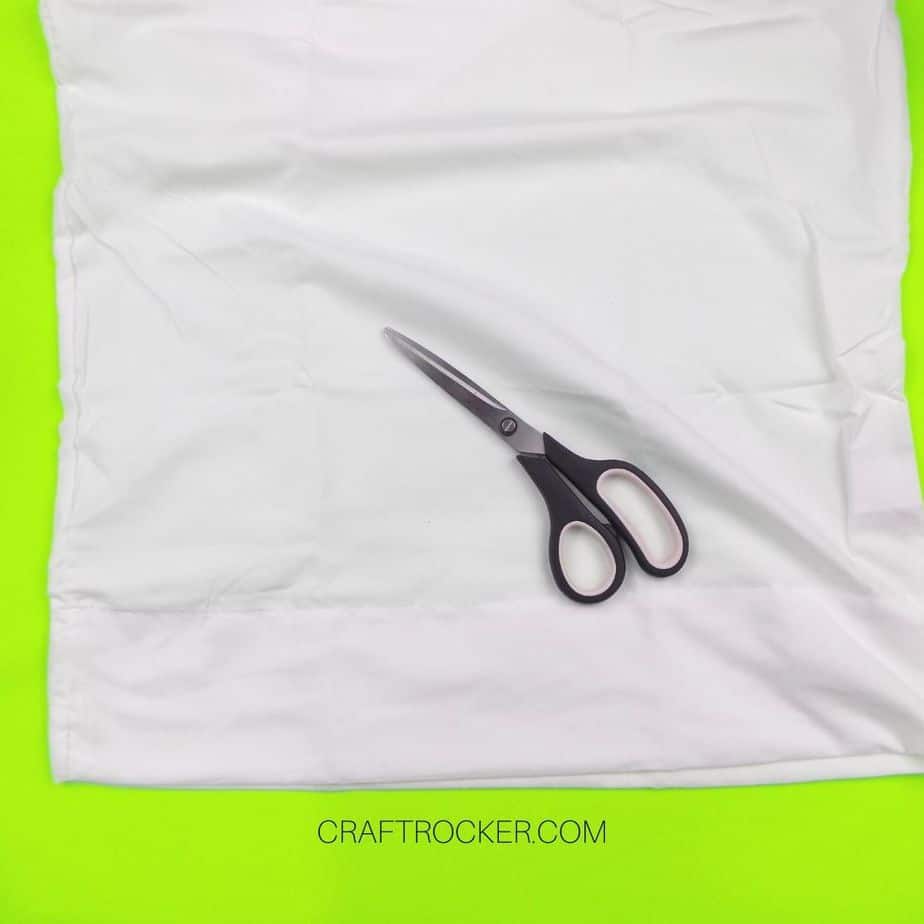
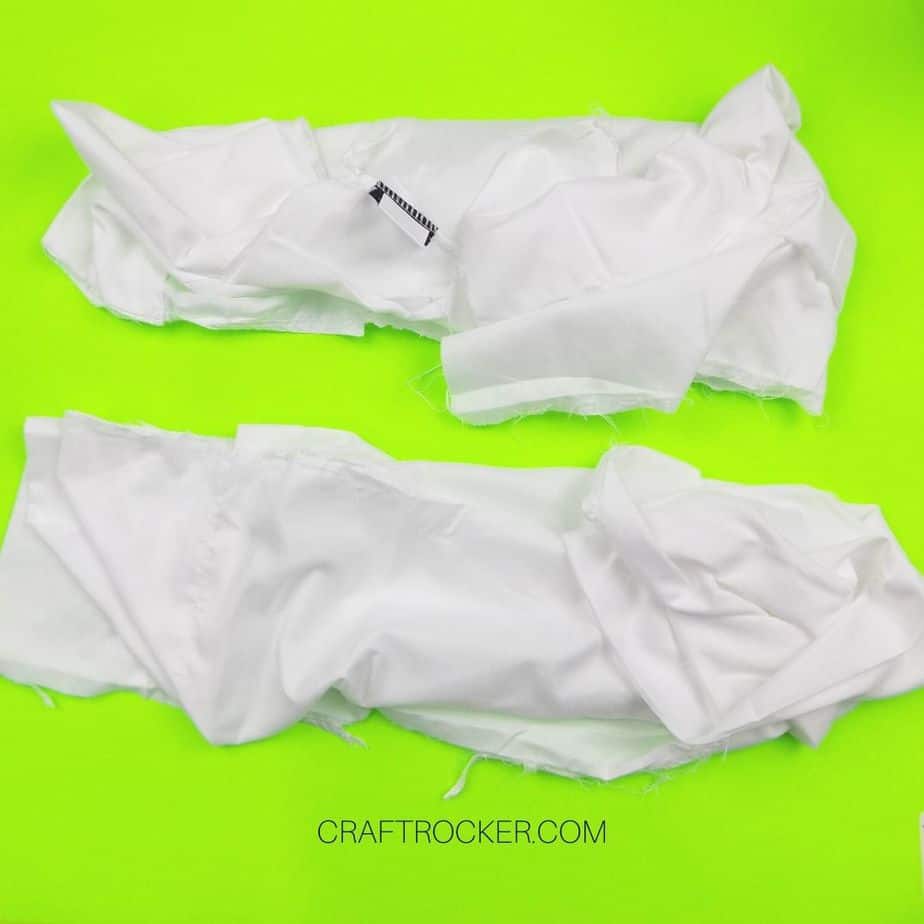
While your cans dry, cut along the 2 long edges of your pillow case. Then cut the short, connected edge of the pillow case so that you have two separate halves of the pillow case.
Step 7
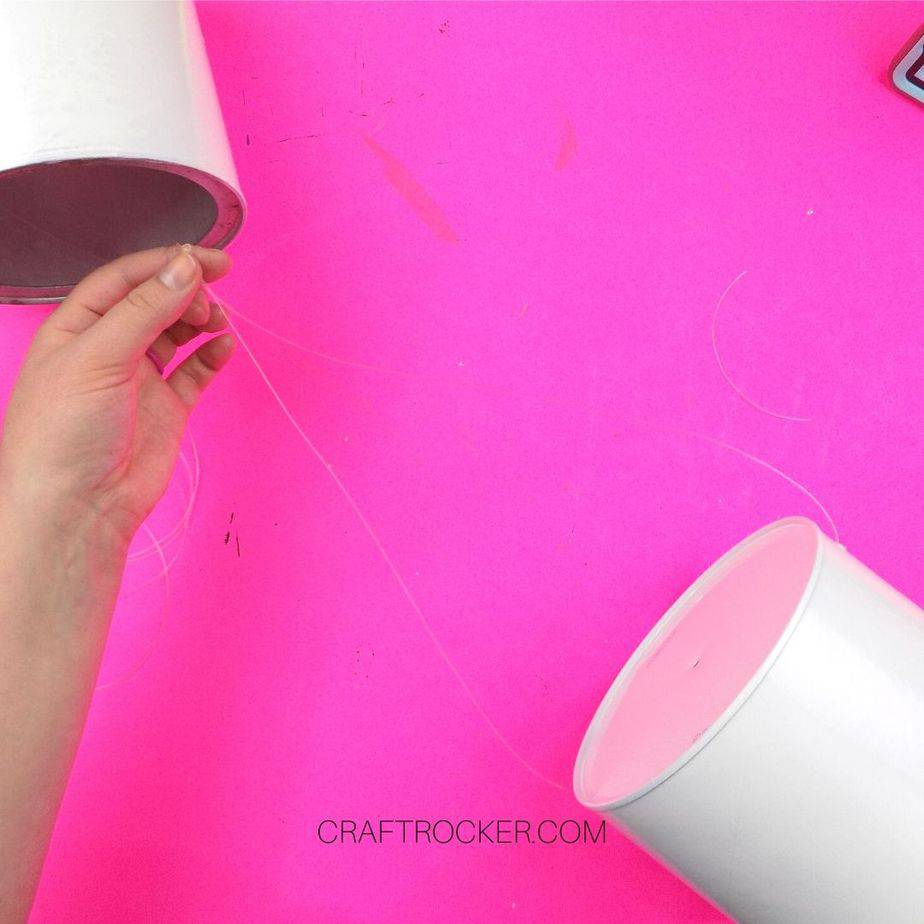
After your coffee cans are dry, thread 36-40 inches of clear fishing line through the side holes. Then bring the ends together above the center of the bottom of the can and knot them together.

Note:
- The fishing line I used was 50lb test but that is only because that’s what I found in my husband’s tackle box. You do not need heavy duty fishing line for this project.

Step 8
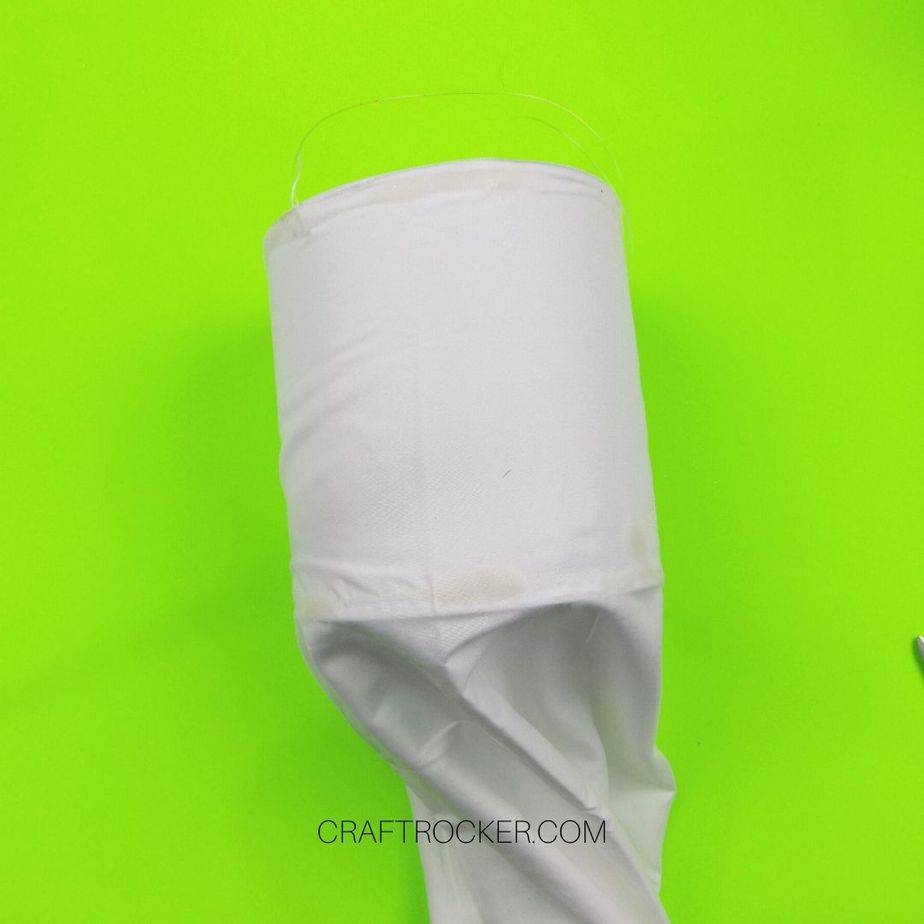
Next, add a line of hot glue to a small section of the top and bottom of your coffee can. Attach your pillow case so that the short seam you cut is lined up with the bottom of your can.
Note:
- Make sure that your fishing line loop is on the bottom of the can during the gluing steps. You need to be able to use it to hang your ghosts later and don’t want it glued under the pillow case.
Step 9
Continue working around the can with the hot glue and pillow case until the entire can is covered.
Step 10
When you reach the end, fold the cut edge under the fabric and glue it to the coffee can.
Step 11
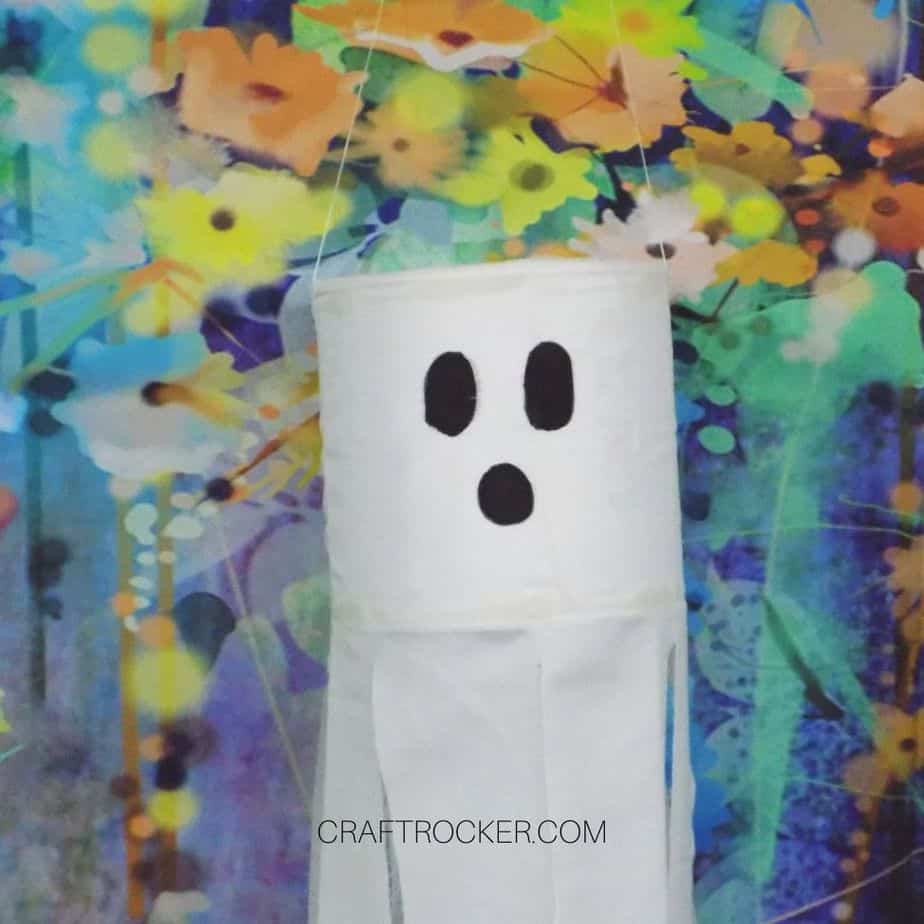
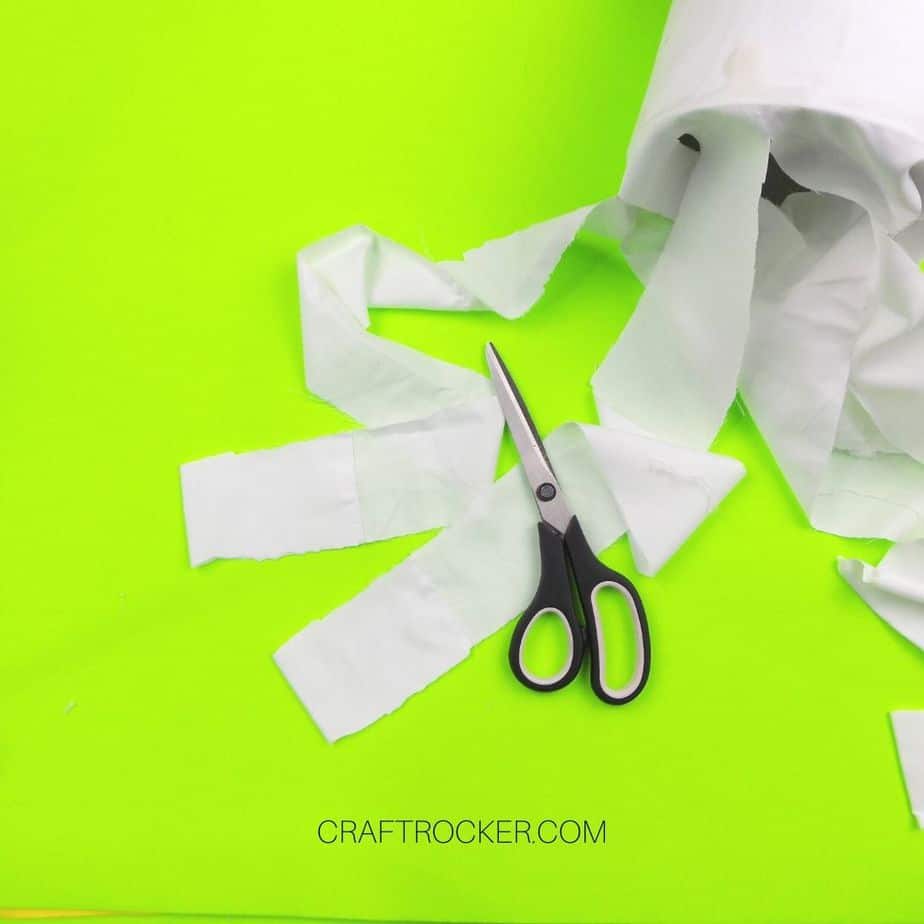
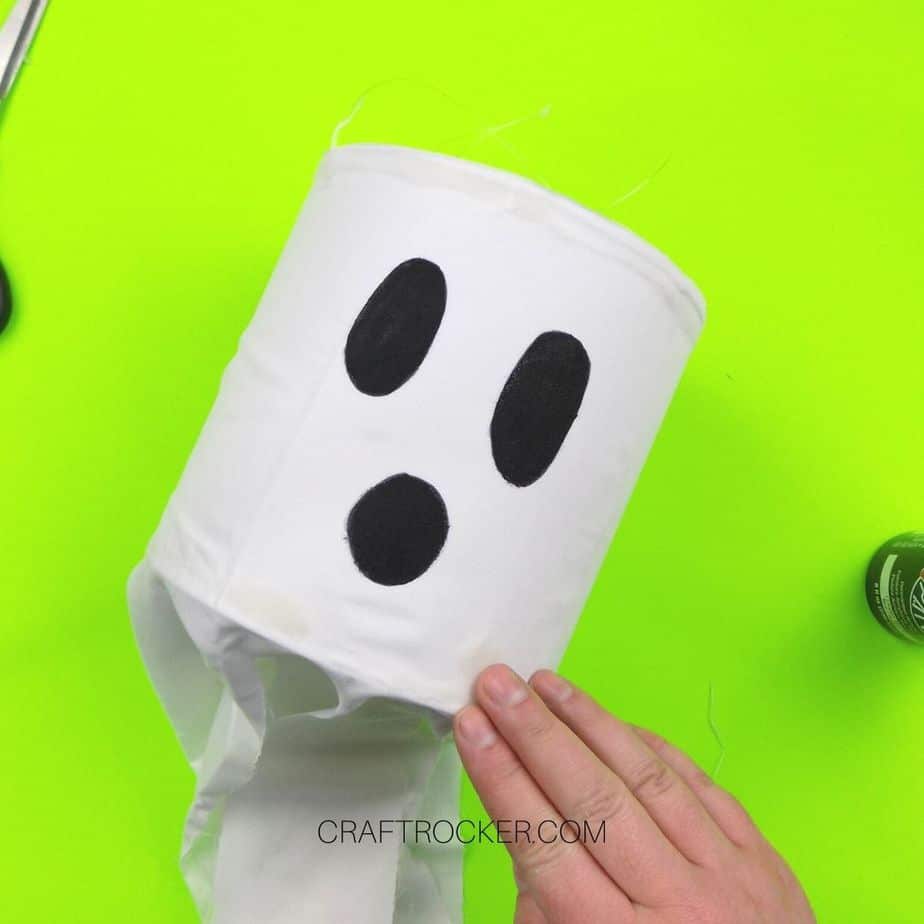
Now cut vertical strips from the bottom of the pillow case up to the lip of the coffee can.
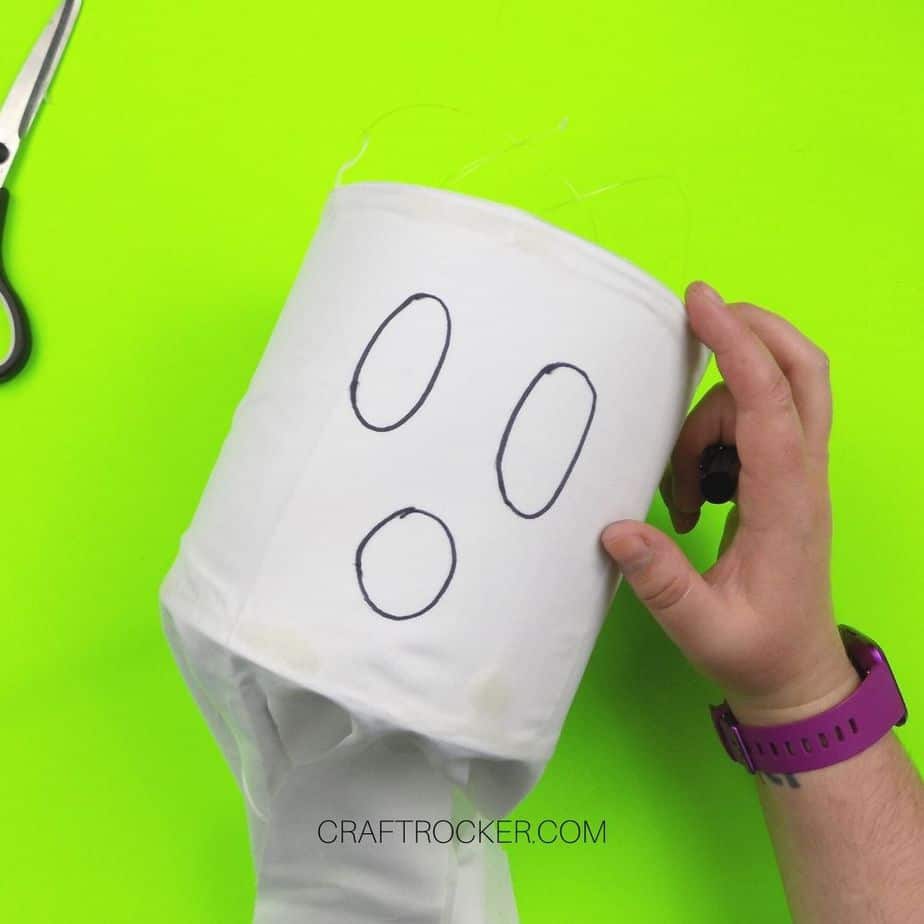
Step 12
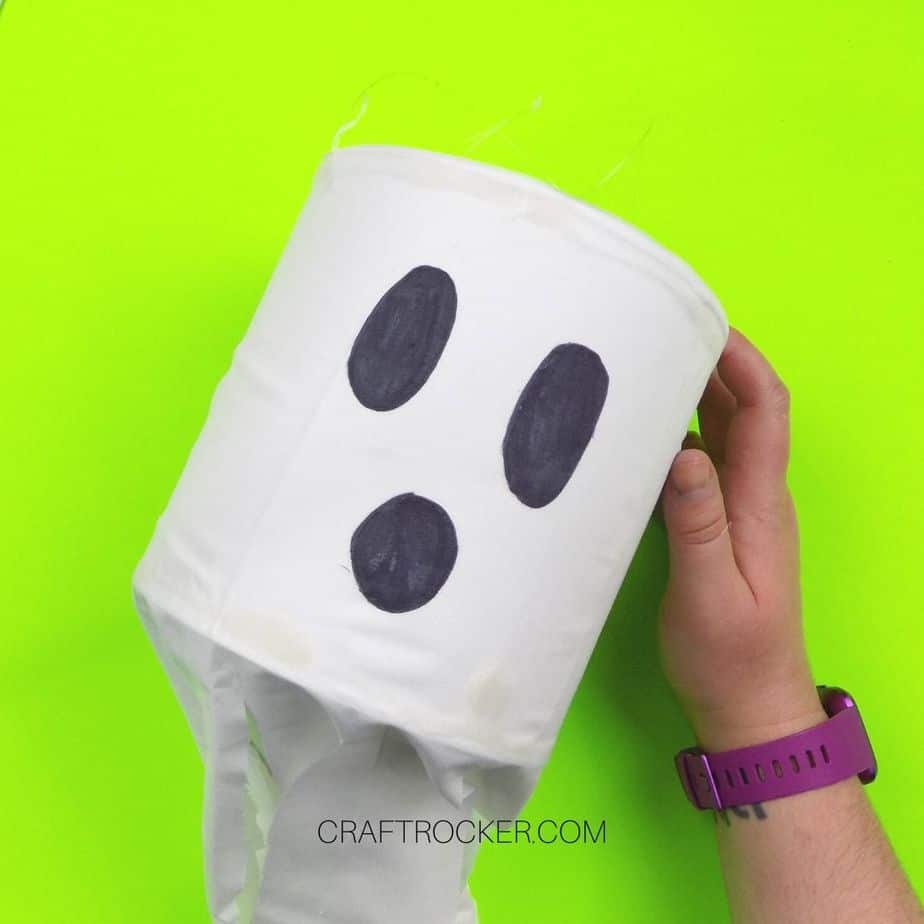
Lastly, draw ghostly eyes and a mouth on the part of the pillow case attached to the coffee can.
Note:
- I didn’t think the eyes and mouth were dark enough with the permanent marker so I went back over them with black acrylic paint. This is totally optional.
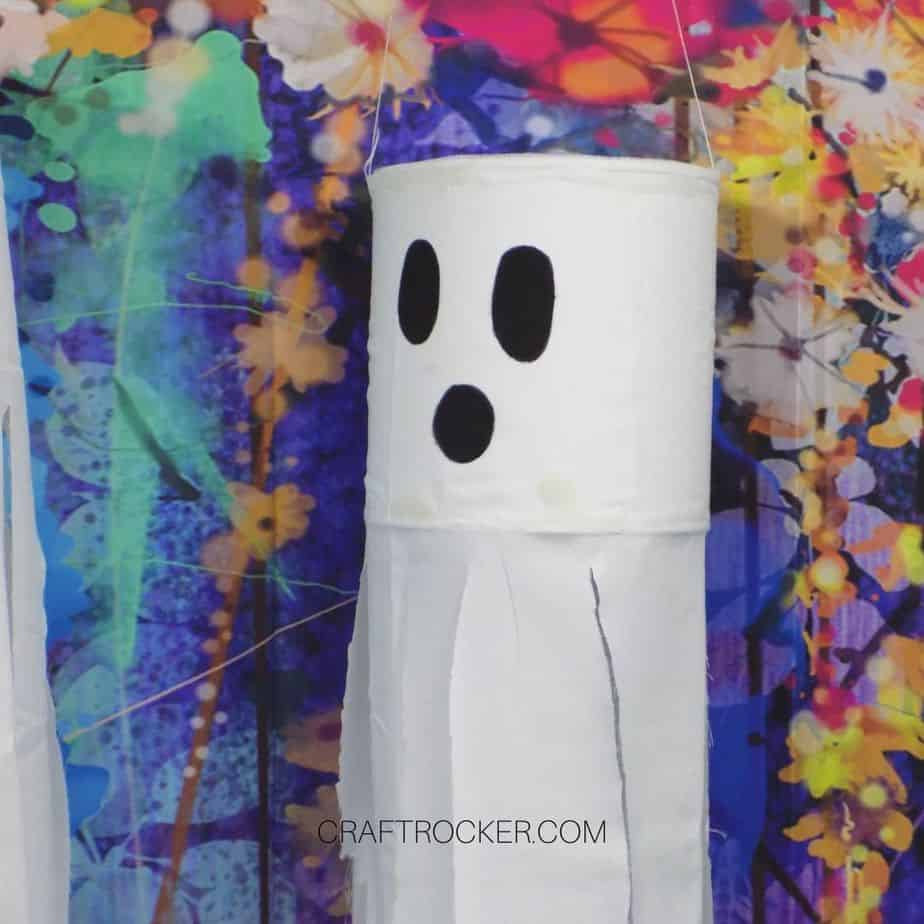
How to Hang Your Ghosts Halloween Porch Decorations
I used medium outdoor Command hooks to hang mine. Make sure that you clean the area of your porch roof before attaching the hooks.
You also want to make sure that the hook is oriented upright.
After your hooks are attached, place the fishing line loop on the hook.
How much fun are these hanging ghosts Halloween porch decorations? They’re also a great way to reuse those old coffee cans. I mean, how many can you really use to store nuts and screws in the garage? Eventually you’re out of things to store.
Don’t Forget to Pin It!

More Projects to Love:
- Halloween Clip-On Earrings
- Wood Painted Pumpkins Decor
- Yarn Pumpkins – A Quick and Easy DIY
- Wooden Ghost Halloween Blocks – Cookies, Coffee, and Crafts
