Stop! Don’t plan your next trip to the Dollar Tree without adding the materials for this mini unicorn pumpkin to your list!
Affiliate links may be used in this post. Ordering a product through these links may result in a commission at no extra cost to you. Read the full disclosure here.

Dollar Tree pumpkins are a hot commod. for crafters like us. There are so many ways to transform them into unique creations for fall and Halloween.
This year I wanted to make something a little more fun and colorful so I knew a unicorn pumpkin was the way to go. Sadly, it took me a few more weeks before even considering (duh!) the little foam pumpkins at their store.
A unicorn headband from their costume section and some of their fake flowers and this baby was ready to be made.
Tip:
The flowers I bought when I got the other items were way to big and I ended up using ones from a lei I had gotten there in the summer. Keep that size reference in mind when buying your flowers to save you the headache later.

Mini Unicorn Pumpkin Materials
- Dollar Tree Pumpkin
- White Spray Paint
- Unicorn Headband
- Scissors
- Hot Glue Gun and Glue Sticks
- Flowers
- Purple Puffy Fabric Paint
Step 1
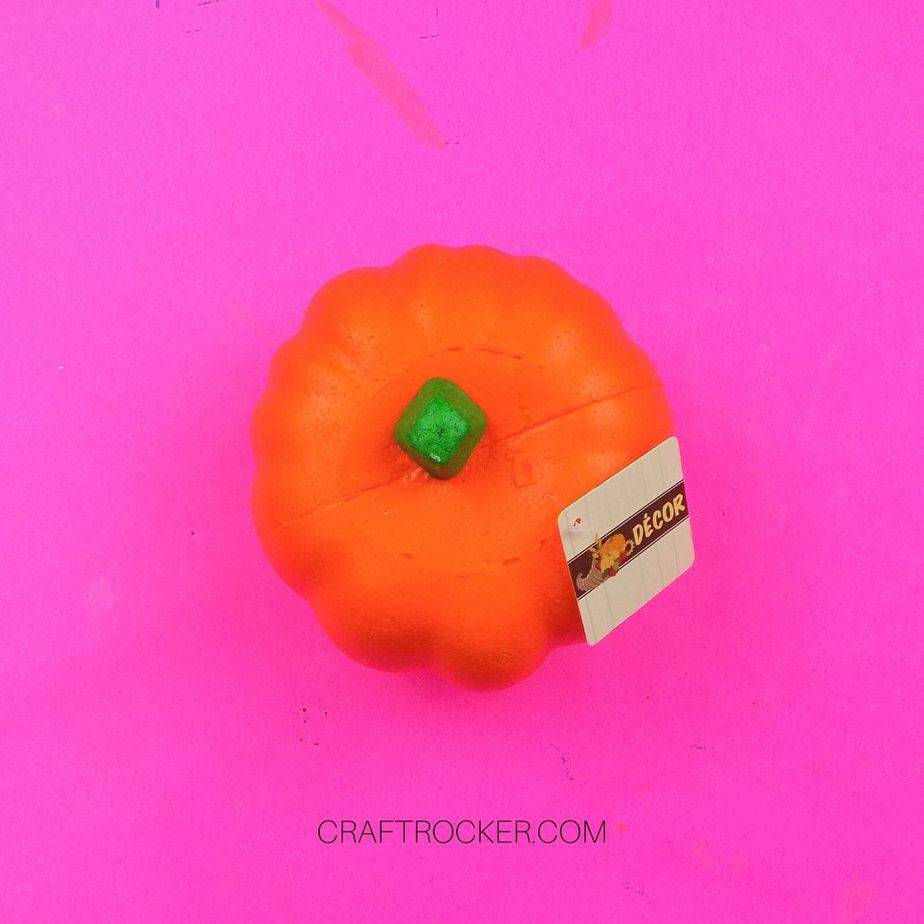
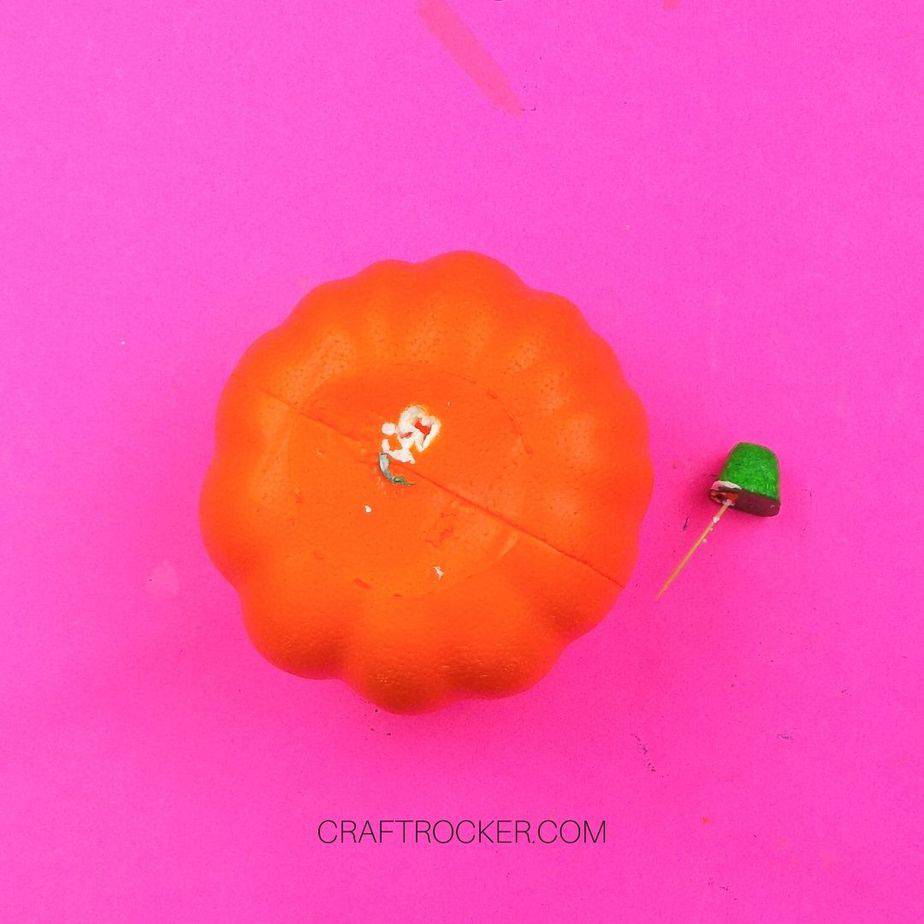
First, remove the tags and stem from your Dollar Tree pumpkin.
Step 2
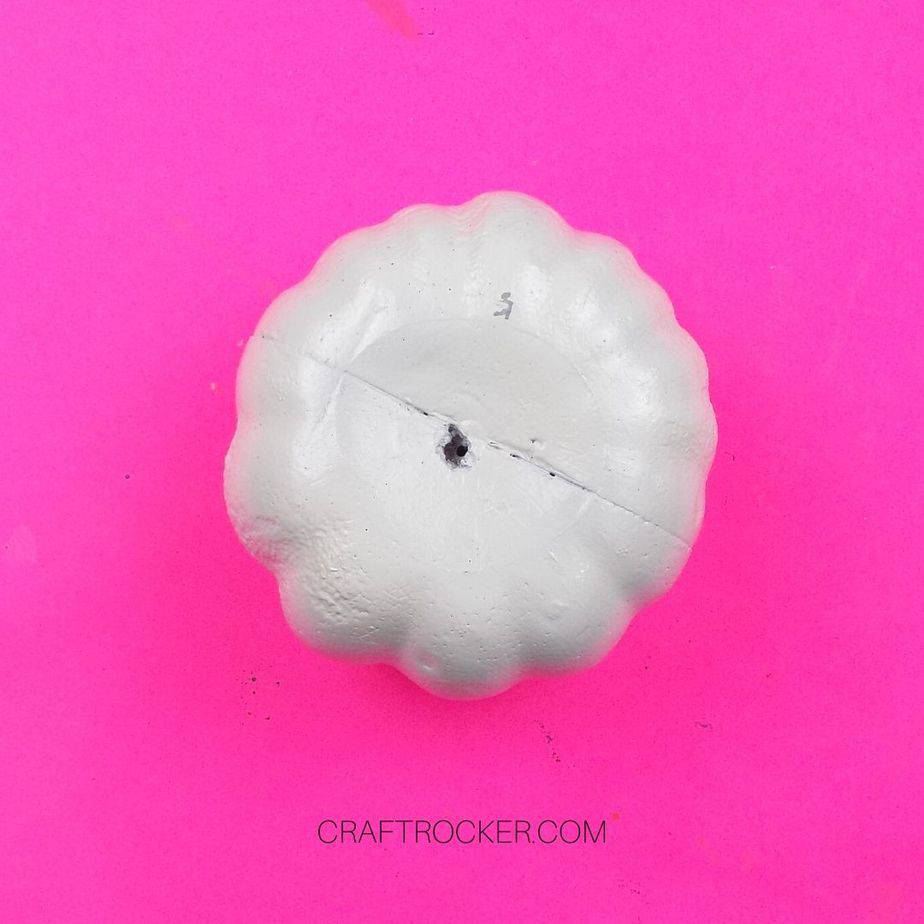
Next, spray paint your pumpkin white and set it aside to dry.
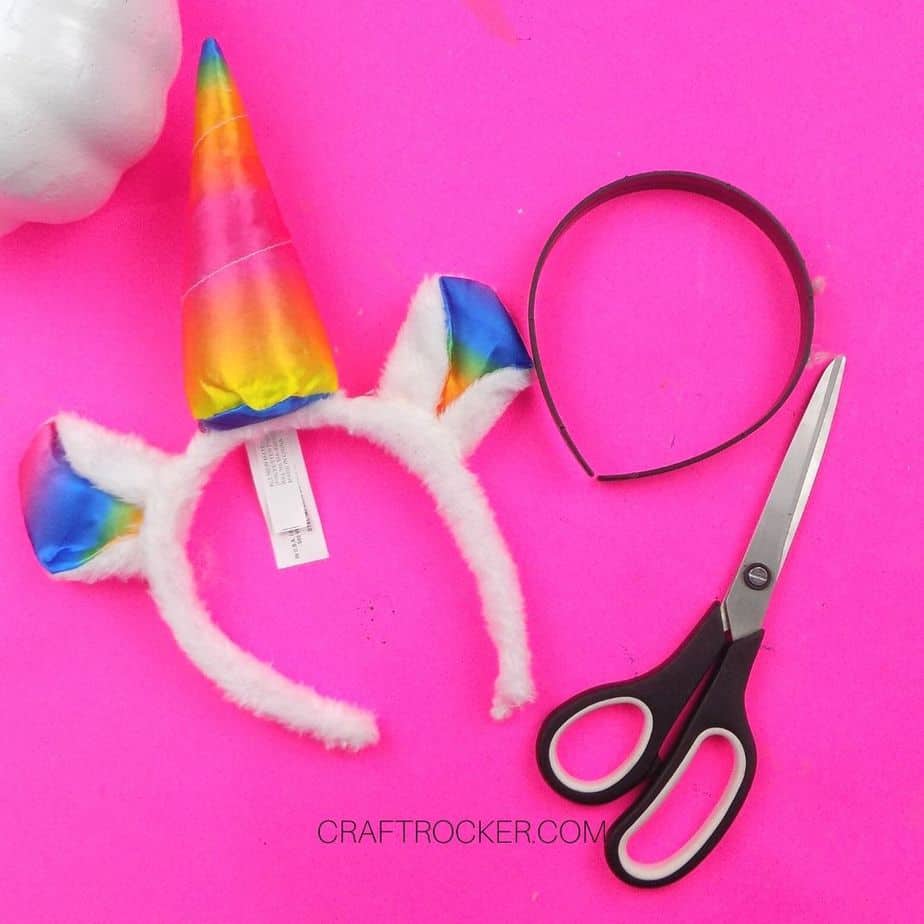
Step 3
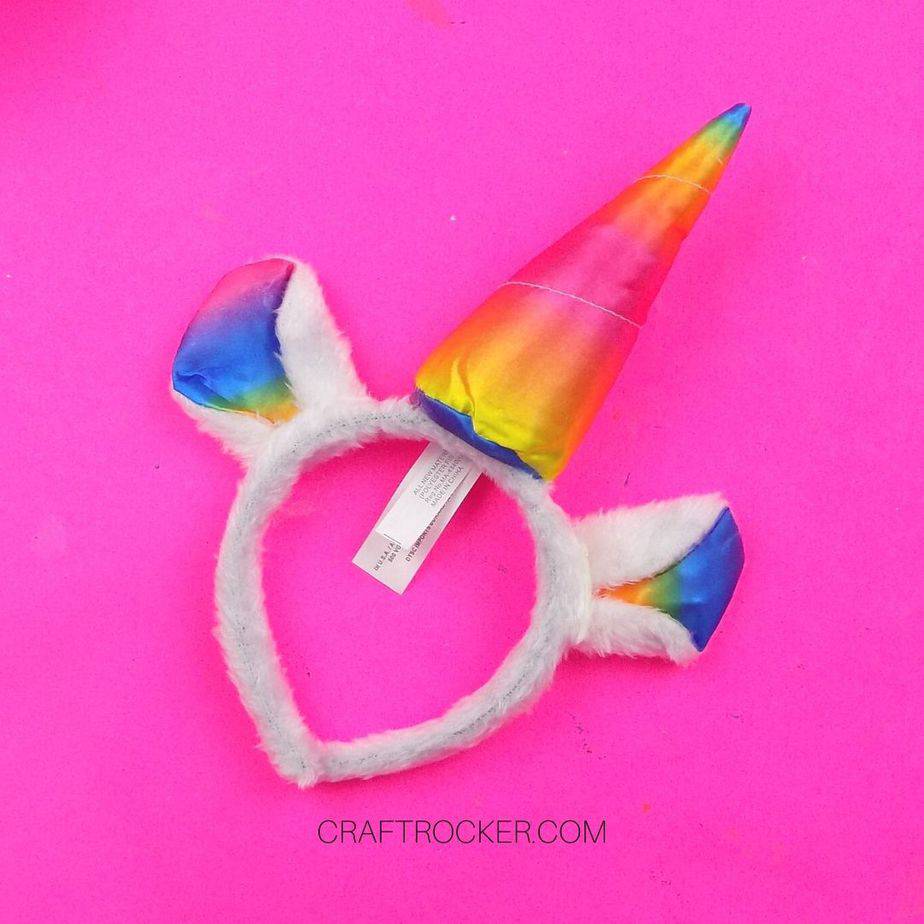
While you pumpkin dries, pull out your unicorn headband and snip off the end of the fabric, the part that would rest behind your ear if you were wearing it.
Step 4
Then carefully pull the plastic headband out of the fabric. It is glued in some sections but a quick and gentle tug on that section of the fabric should detach it.

Step 5
Next, cut your horn from the headband. Stay as close to the base of the horn as you can while you cut it.
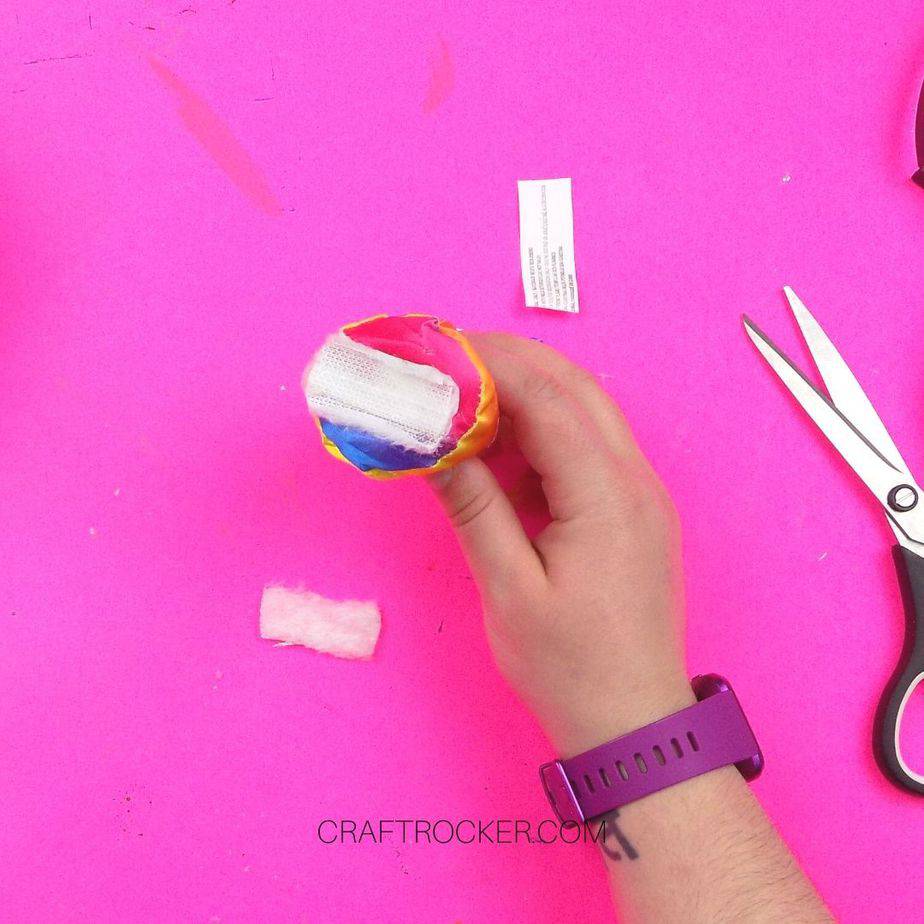
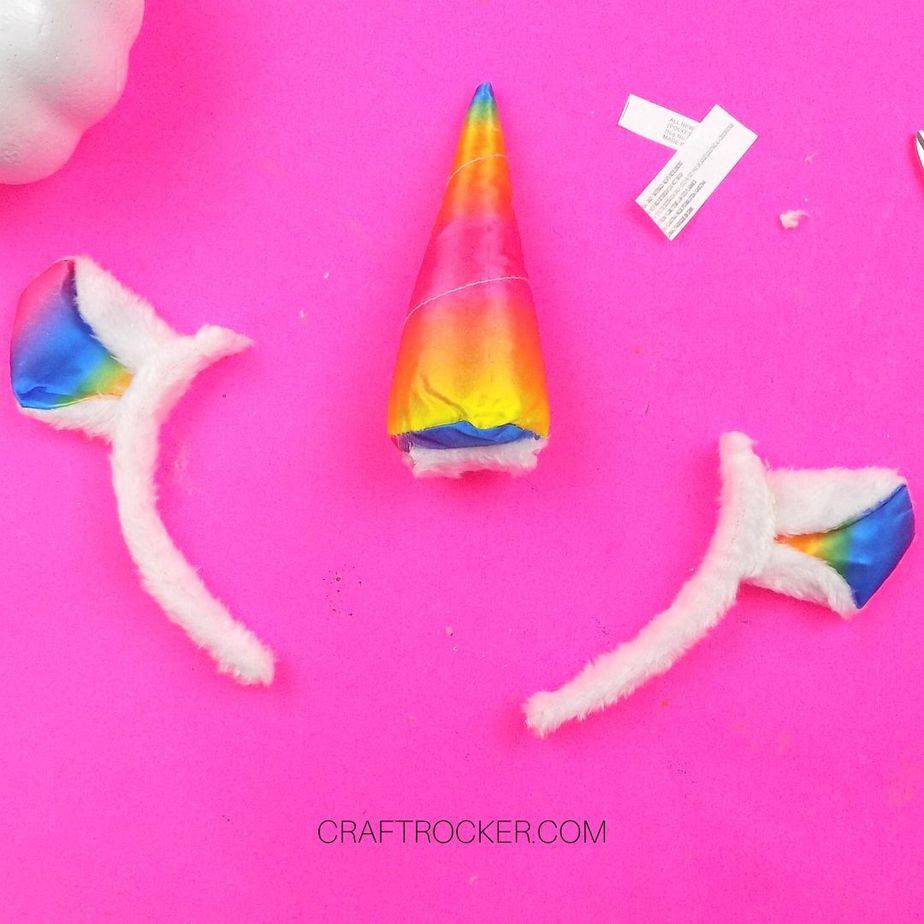
Step 6
Then cut the tags and excess white fur fabric from the base of the horn. Do not cut all of the fabric that holds in the stuffing from the bottom.
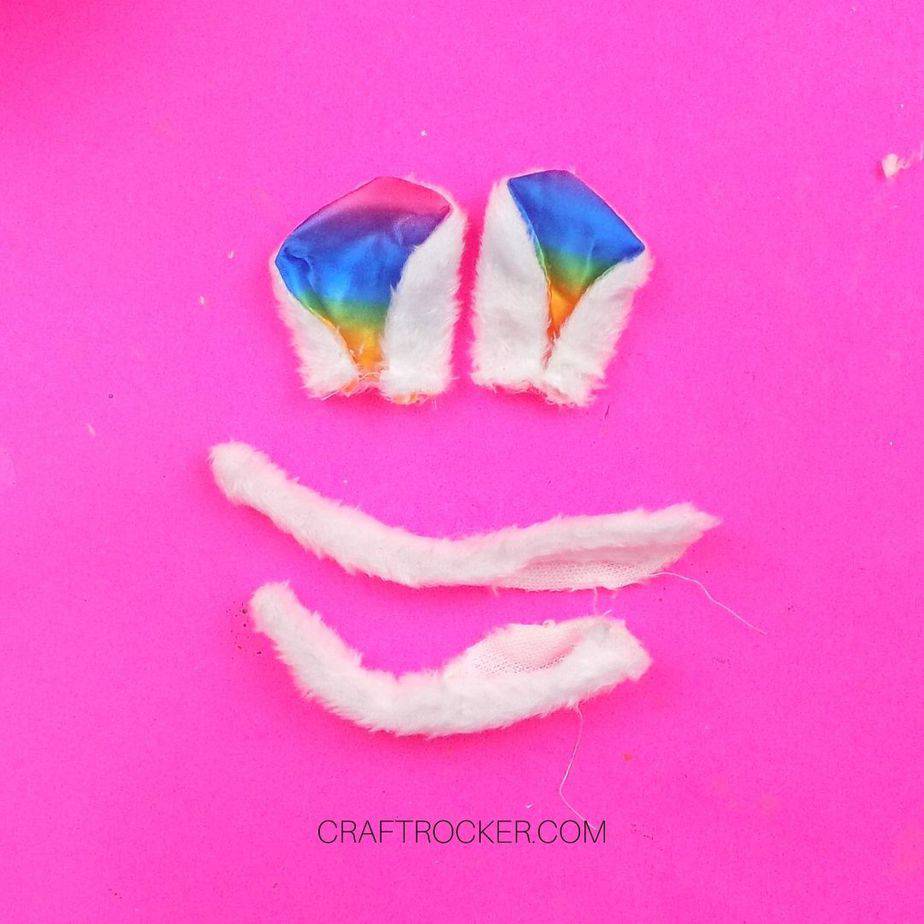
Step 7
Now, carefully separate the ears from the headband. These were just glued on so you don’t need to cut them.
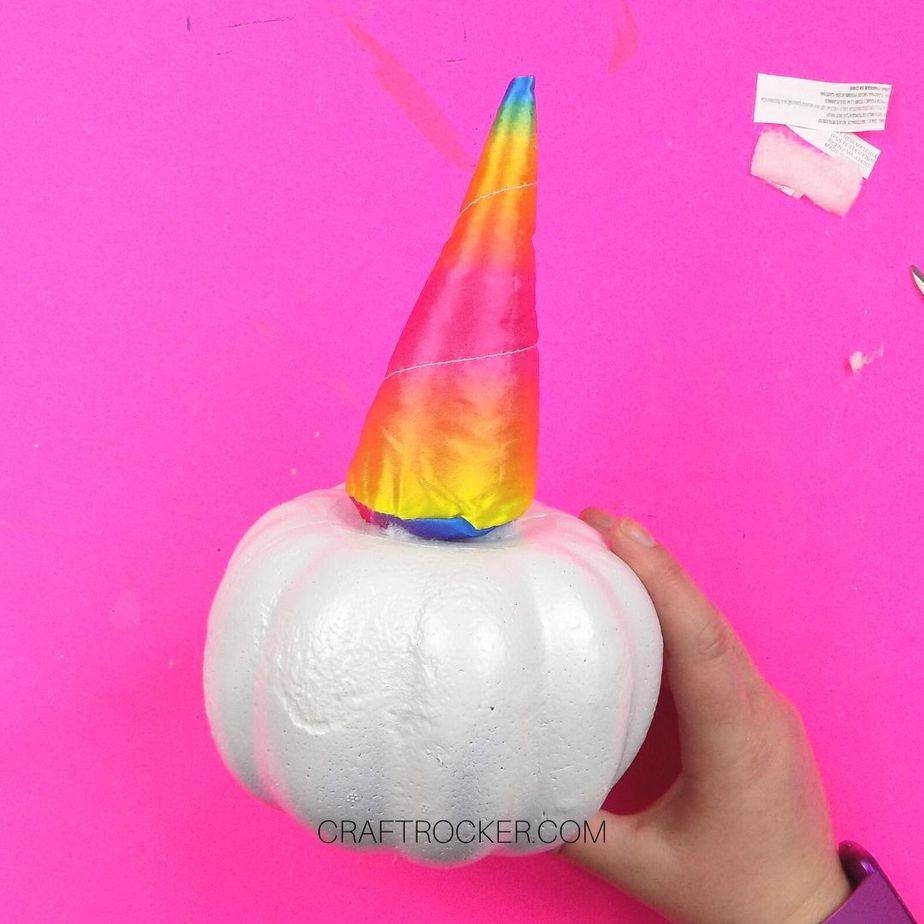
Step 8
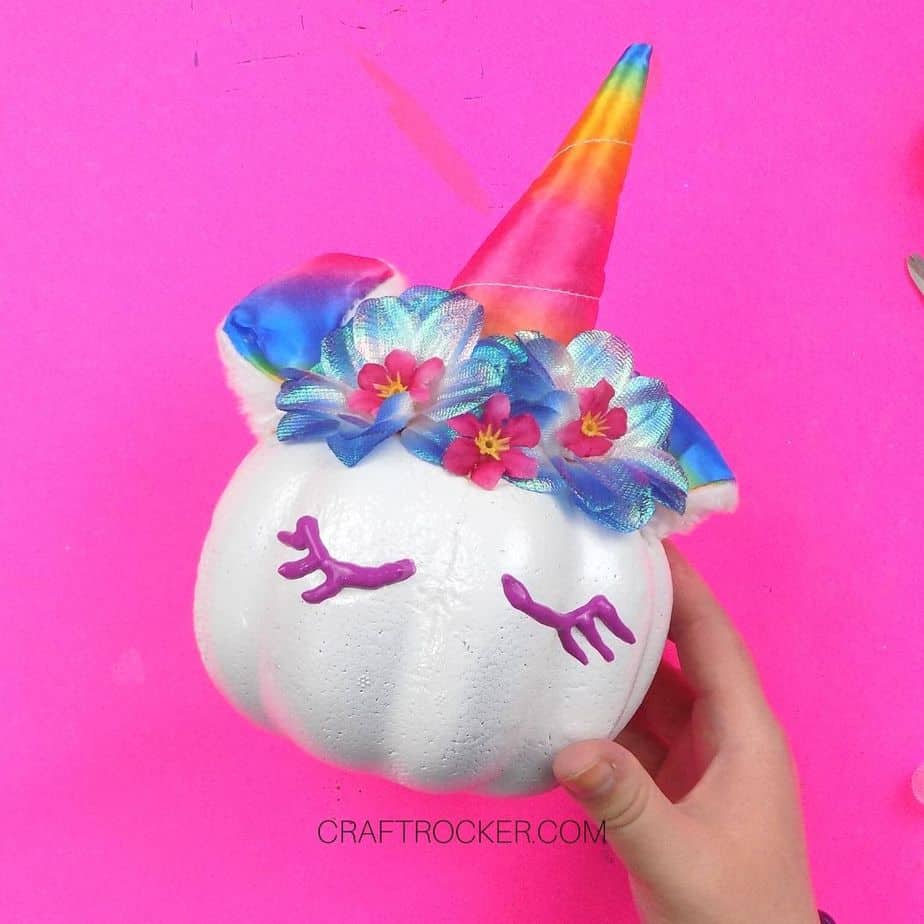
After your pumpkin is dry, hot glue your unicorn horn to the top of your pumpkin in the center.
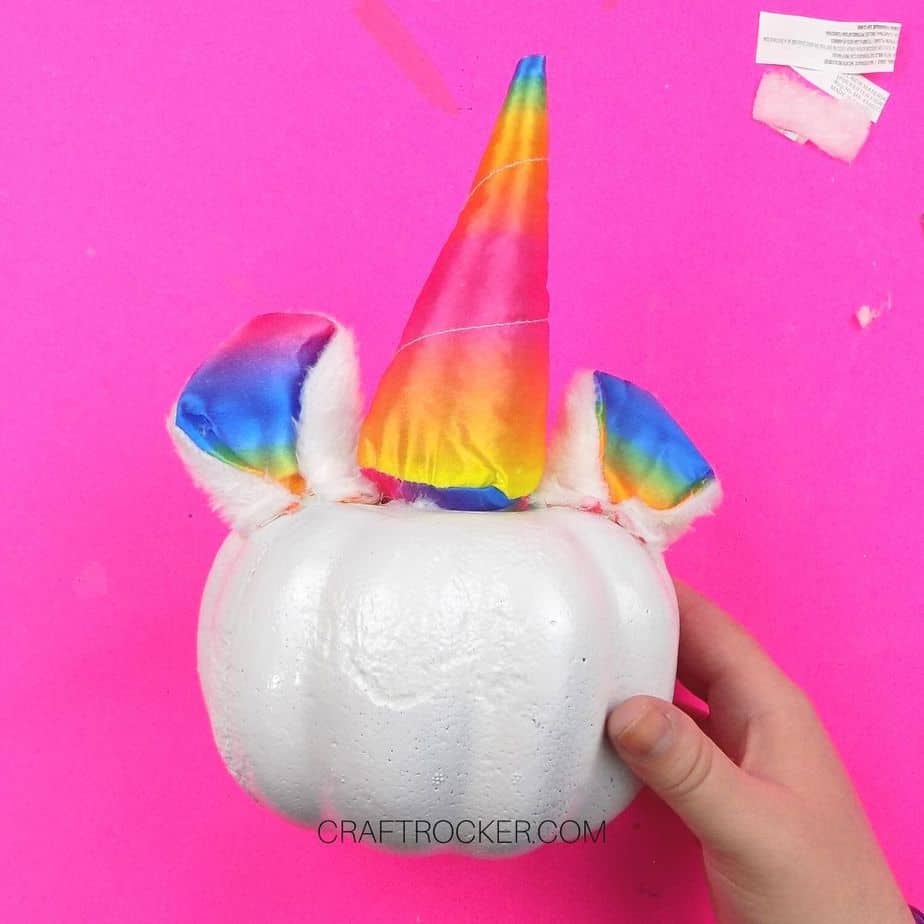
Step 9
Next, hot glue your ears to the top of your pumpkin on the left and right side of the unicorn horn.
If you have trouble getting them to stand up, add a dab of hot glue to the inside folds of the ears and pinch the fabric together. Be careful not to burn yourself.

Step 10
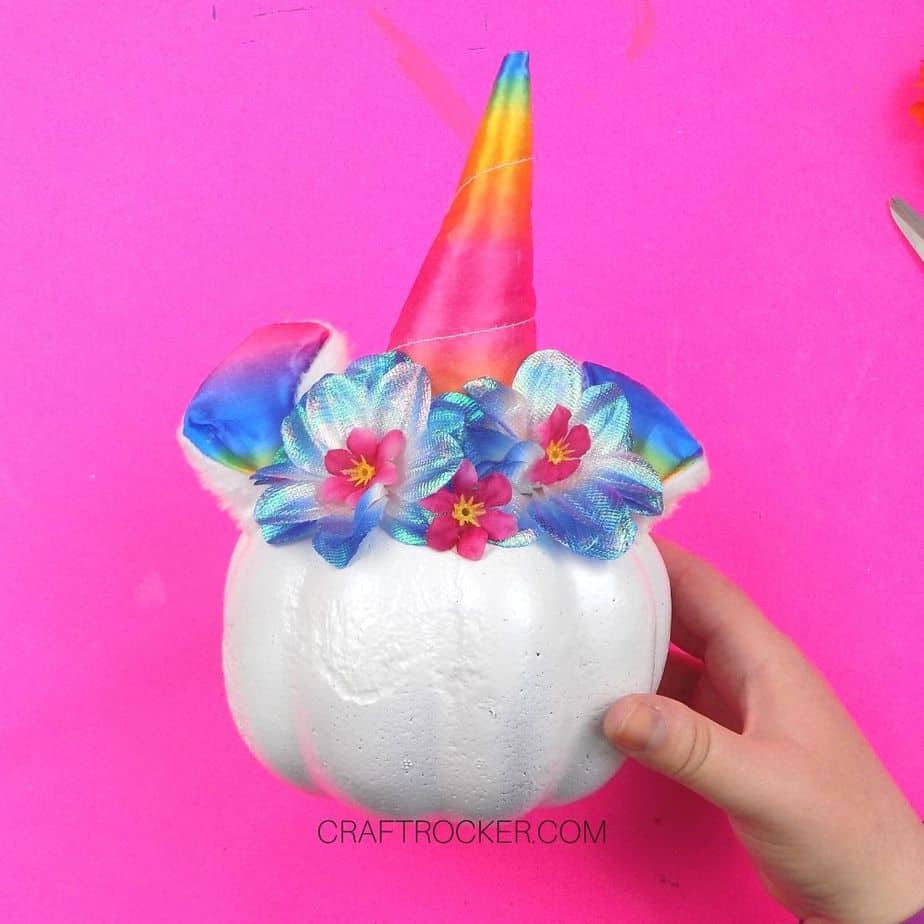
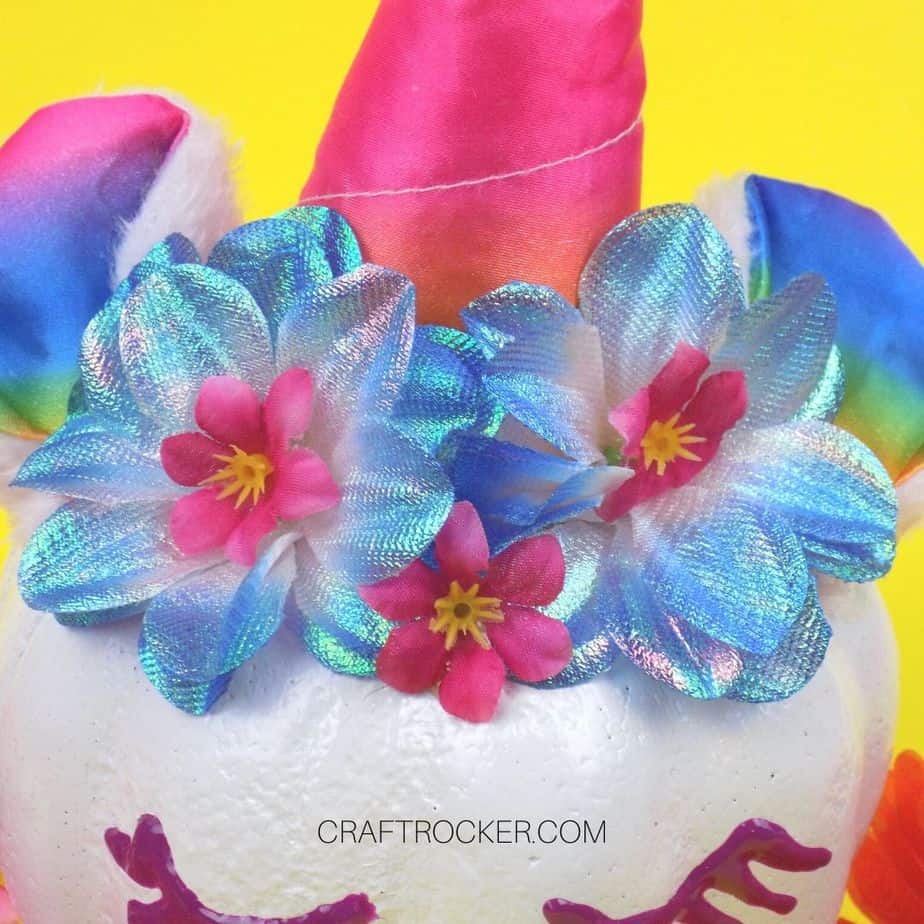
Now, hot glue flowers to the top of your pumpkin in front of the horn and the ears.
I used small brads to secure the blue flowers from the lei together. Then I hot glued small pink flowers in the center of them.
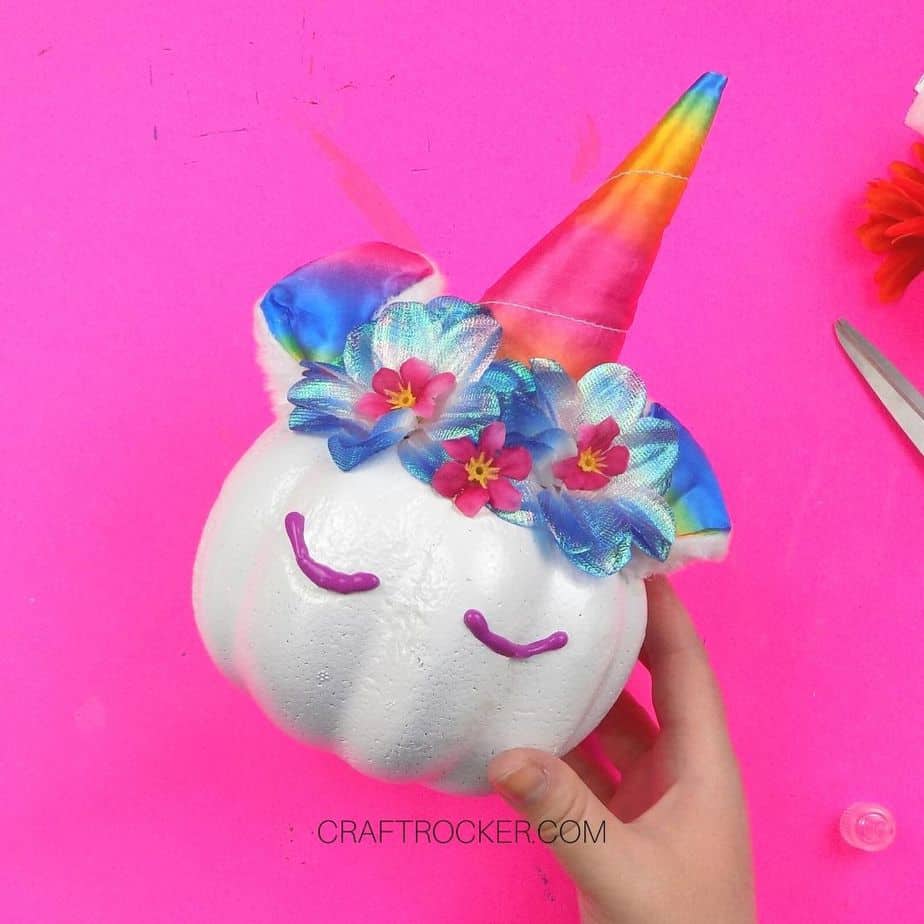
Step 11
Lastly, paint on lashes with purple puffy paint. Start by making 2 semi-circles and then paint small lines coming down at an angle from them.
Allow your paint to dry completely before displaying.
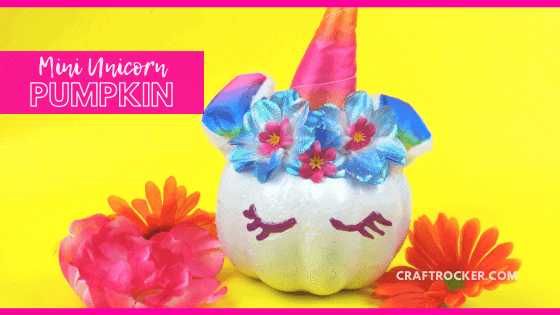
This mini unicorn pumpkin turned out so adorable! I love it!
Even better, it is so easy to make and a great colorful and not-so-spooky addition to your Halloween decor.
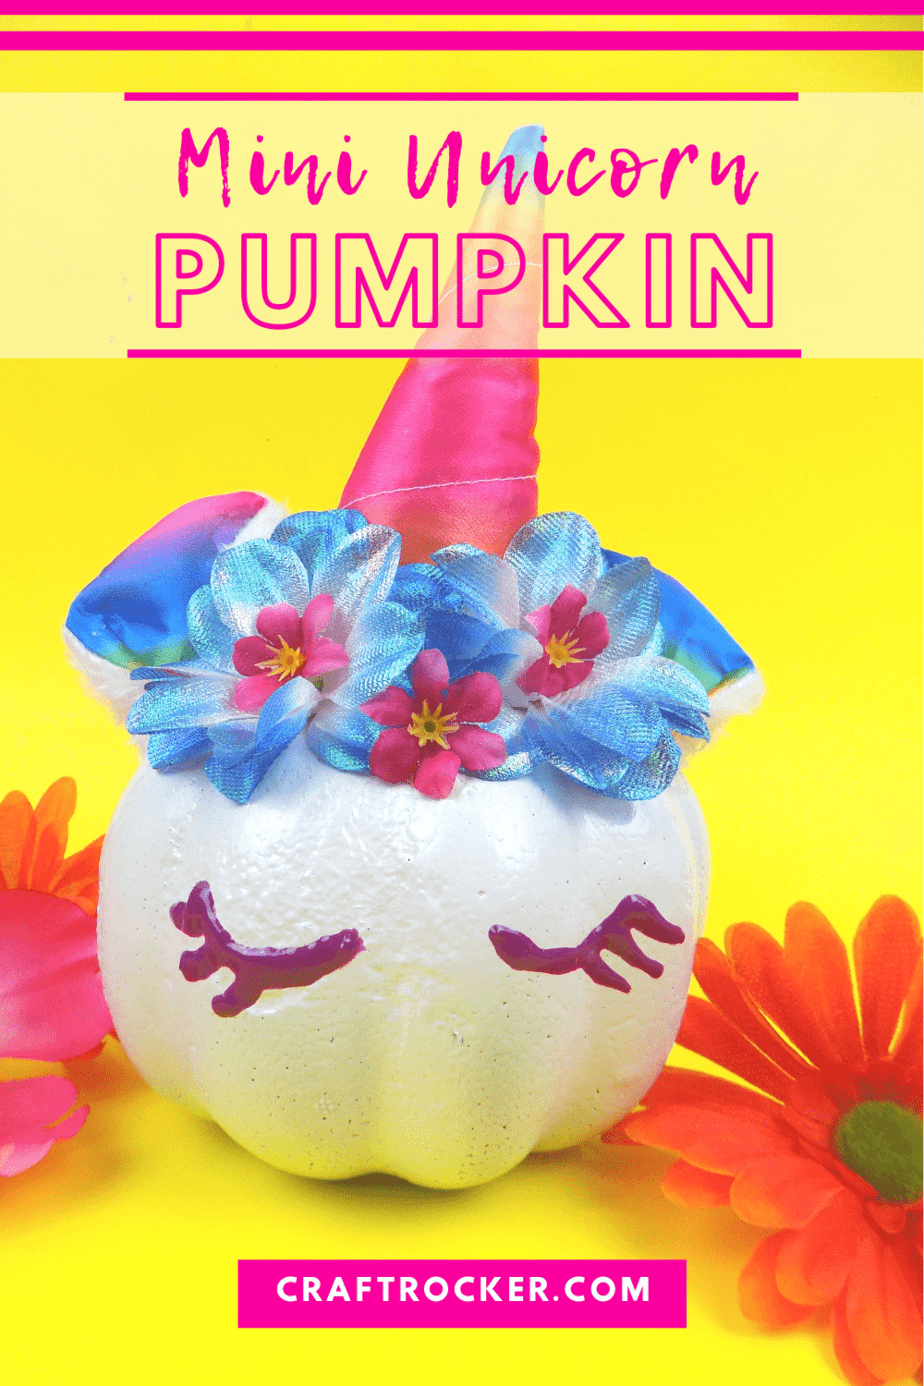
Don’t Forget to Pin It!
More Pumpkin Crafts to Check Out:
- Easy DIY Yarn Pumpkins
- Wood Painted Pumpkins Decor
- Popsicle Stick Halloween Characters
- Quick and Easy Decoupage Dollar Store Pumpkins – Our Crafty Mom

Unicorn headband. Genius!
Thanks, Cassi! It definitely makes it a super easy pumpkin decoration!