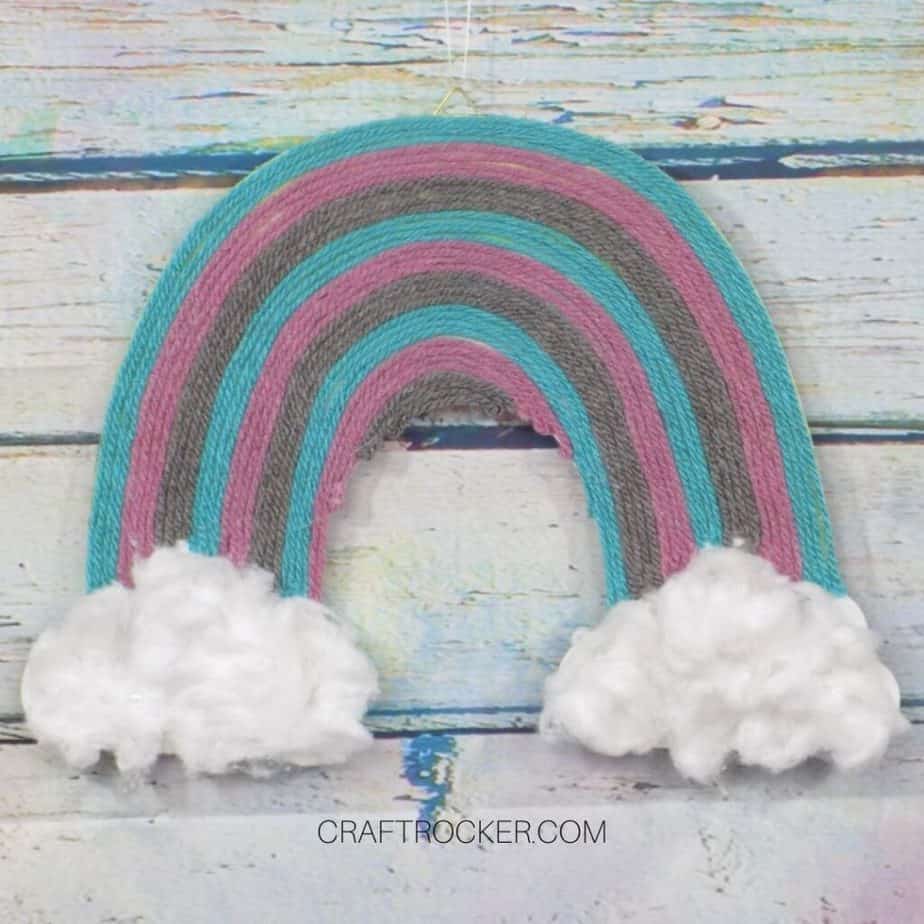
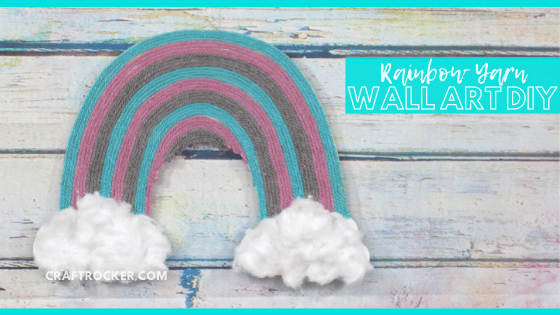
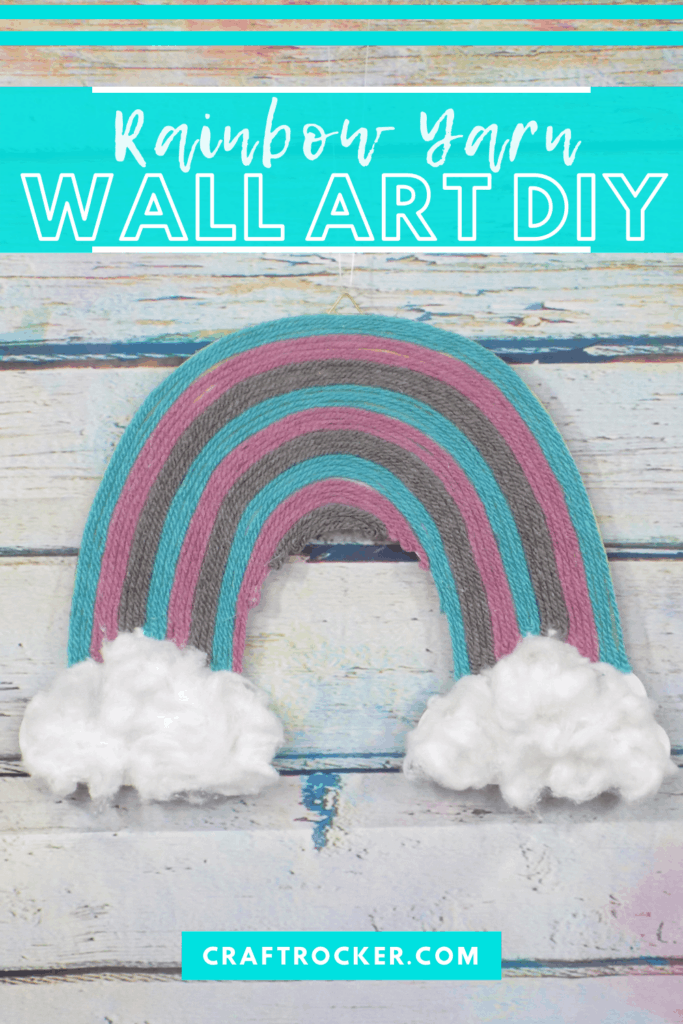
A piece of rainbow yarn wall art is the perfect way to add a cozy touch to your home décor. The muted colors and different textures add dimension and visual interest to any wall.
Affiliate links may be used in this post. Ordering a product through these links may result in a commission at no extra cost to you. Read the full disclosure here.
Jump to What You Want
Printable Rainbow Yarn Wall Art Tutorial
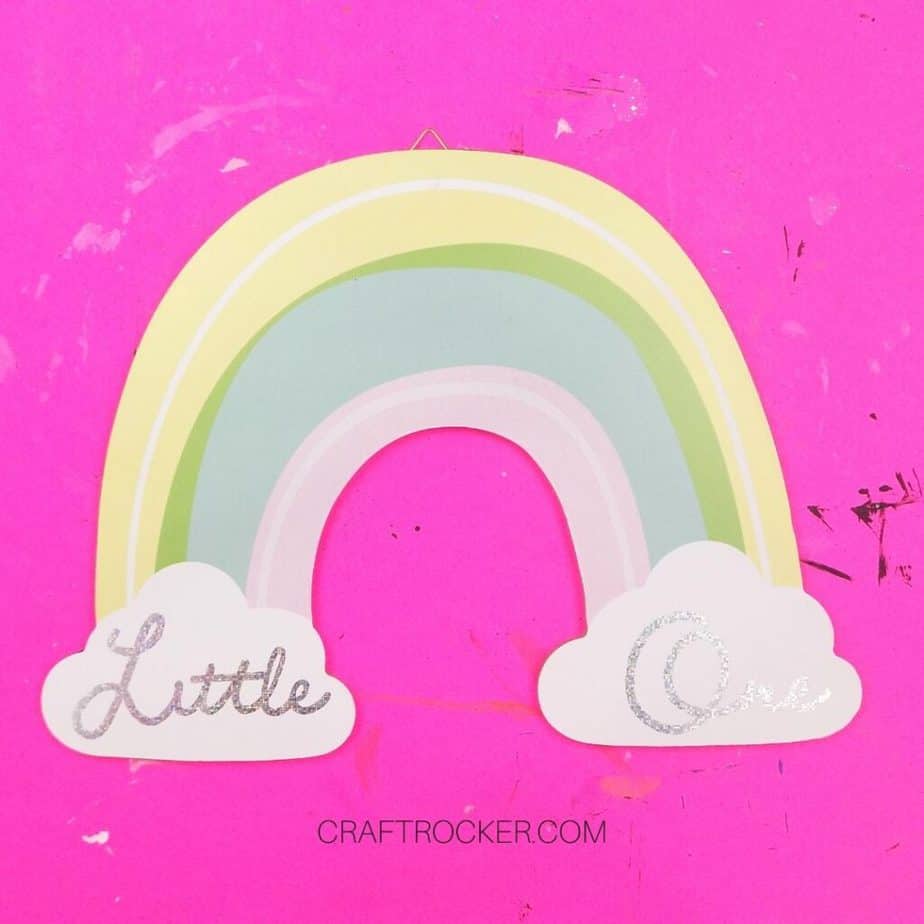
On a recent trip to the dollar store, I found this adorable rainbow wall art. It is themed more for nursery decor, though, and my youngest “baby” will be 7 this year.
I still really liked the basic idea so I decided to snatch it up and see if I could create a more neutral piece of wall art for our home.
Luckily, you never quite know what you’ll find at the Dollar Tree and I also found this super pretty yarn.
A little bit of brainstorming and some hot glue and this rainbow yarn wall art DIY came to be.
Rainbow Yarn Wall Art Materials
Wood Rainbow with Clouds Art (Found In-Store at Dollar Tree)
Hot Glue Gun and Glue Sticks
6-8 Cotton Balls
Step 1
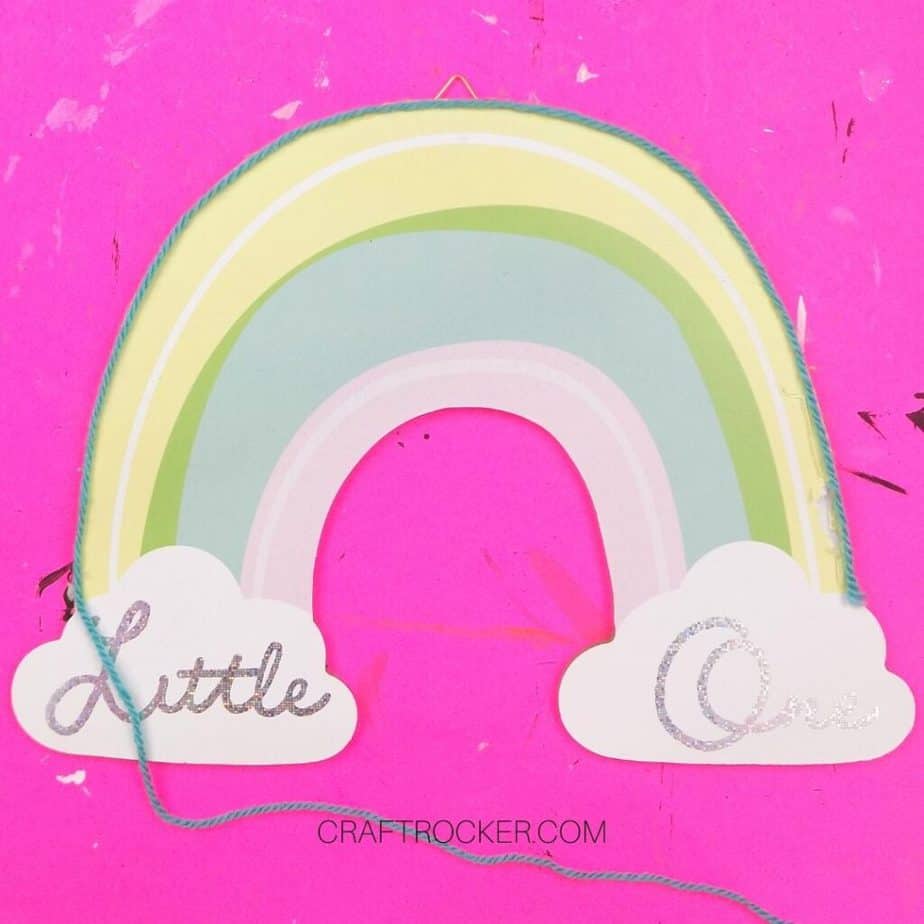
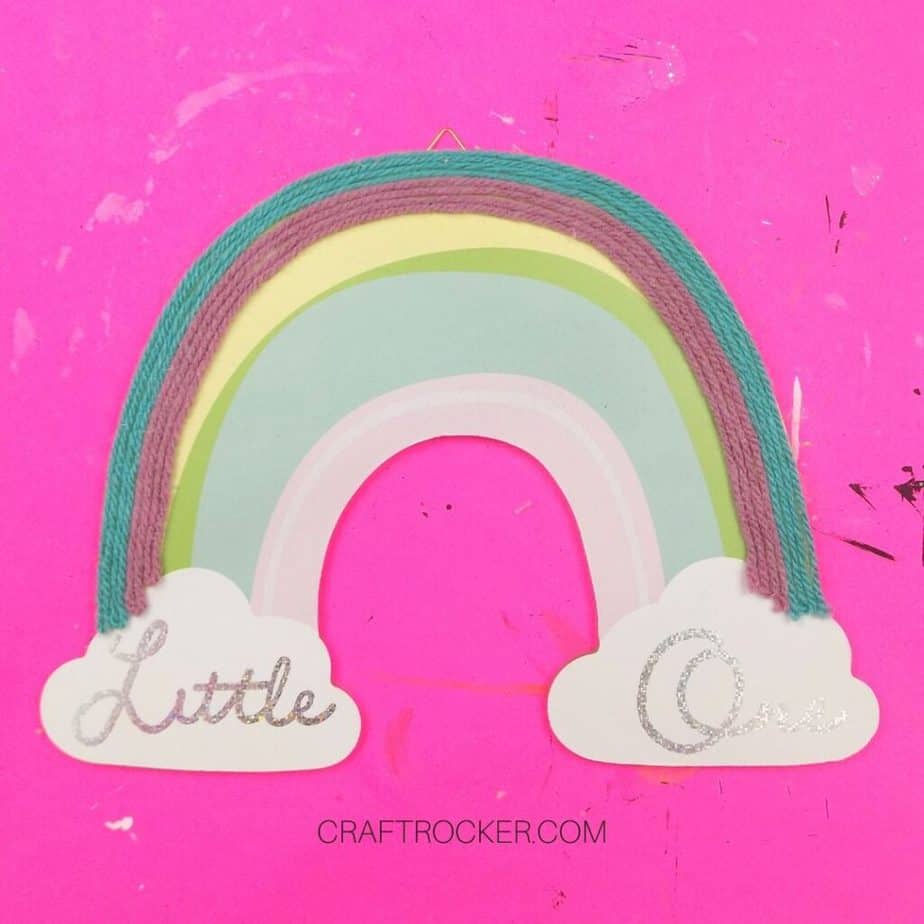
First, start by adding a short, thin line of hot glue to outer edge of your rainbow. Be sure to start at the top of the cloud so that you can see where they are later.
Then attach the end of your teal yarn to the glue. Keep the yarn as close to the edge as possible.
Step 2
Continue adding hot glue to the outer edge of your rainbow and attaching your teal yarn until you reach the opposite side. Then add a small line of hot glue just inside the attached yarn and begin attaching your yarn back towards the starting point.
Be sure to stay as close to the first line of yarn as possible when gluing. You don’t want any gaps in the yarn lines.
Step 3
After you have attached your teal yarn back and forth along your rainbow 4 times (there should be 4 single lines of yarn), trim the edge where you ended at the cloud.
Step 4
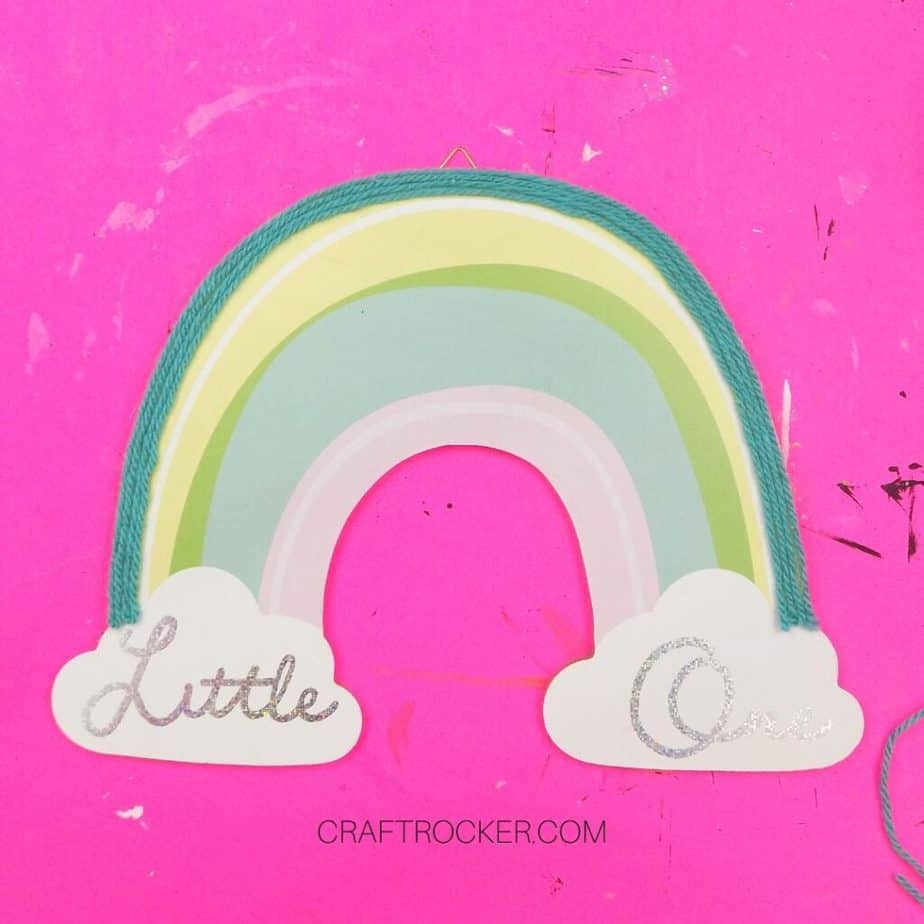
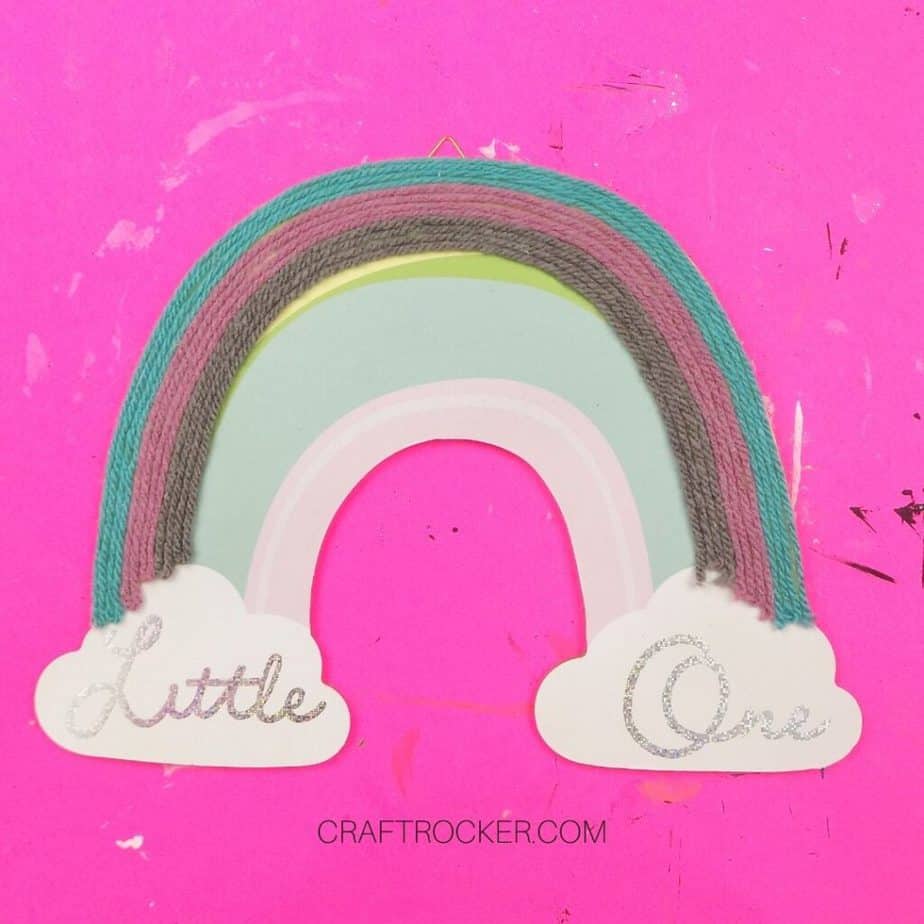
Next, move on to your lavender yarn and attach 4 rows of it the same way that you attached your teal yarn.

Step 5
Once you have hot glued 4 single lines of lavender yarn, again trim the edge. Then do the same with 4 single lines of gray yarn.
Step 6
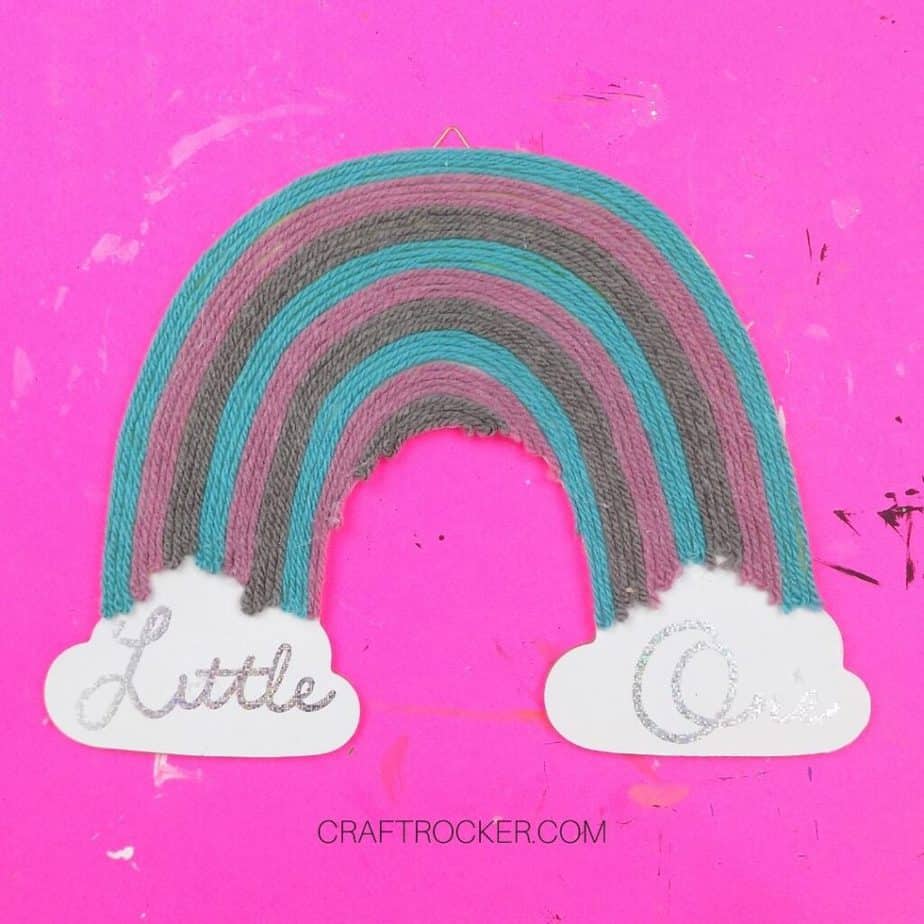
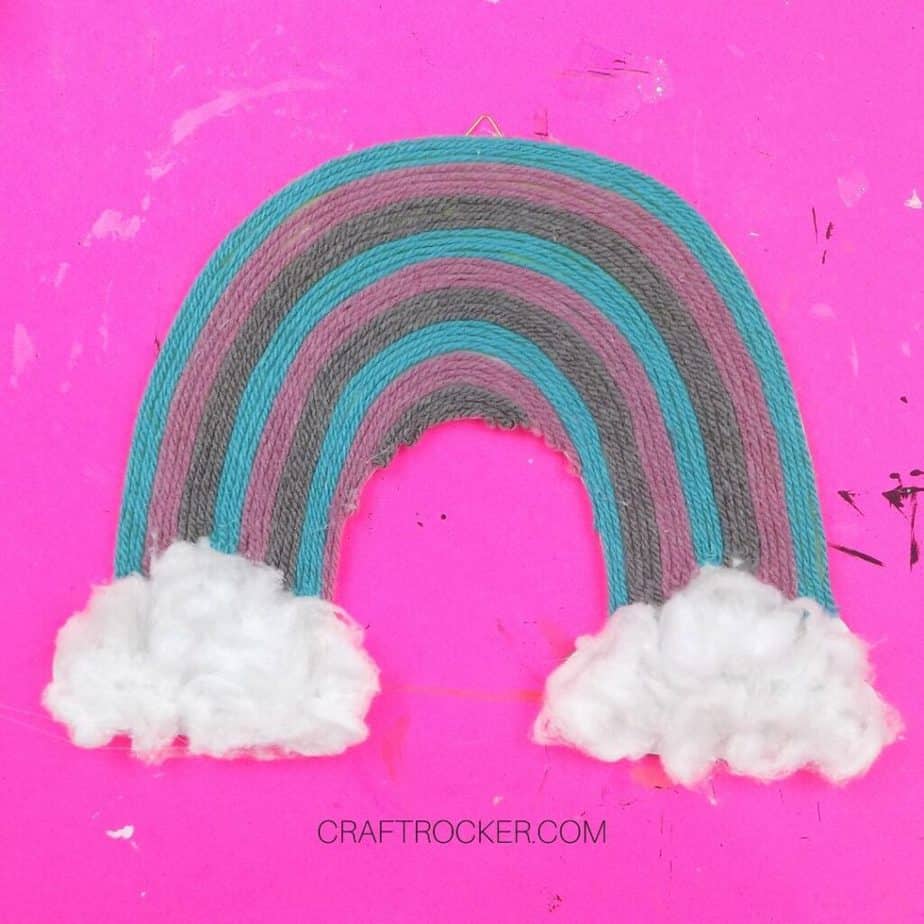
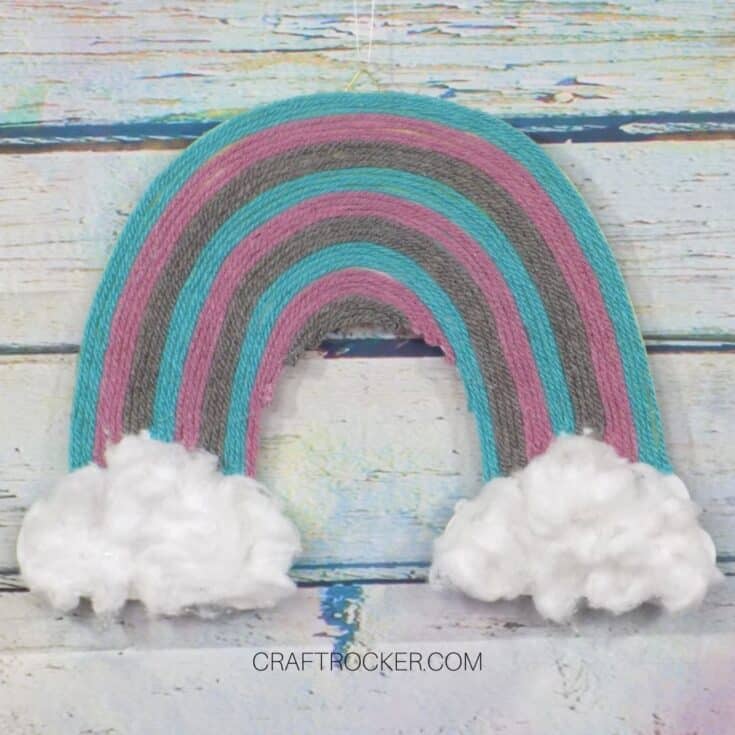
Continue repeating the pattern of 4 lines of each color of yarn until your entire rainbow section is completely covered.
Step 7
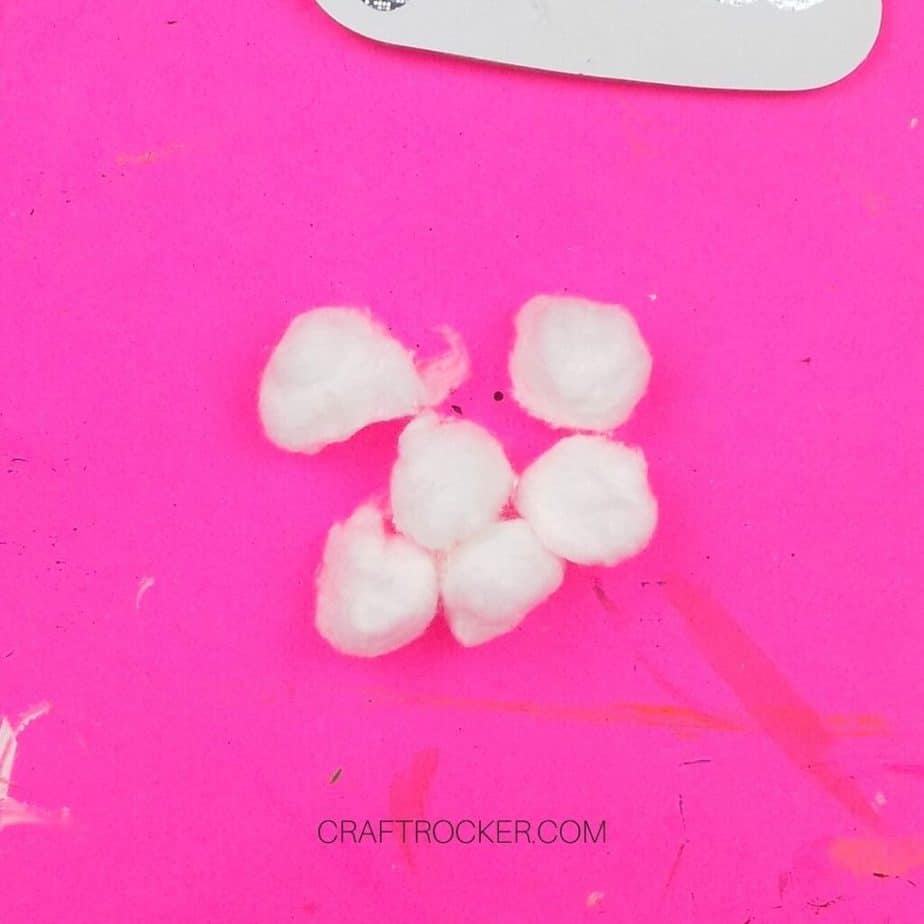
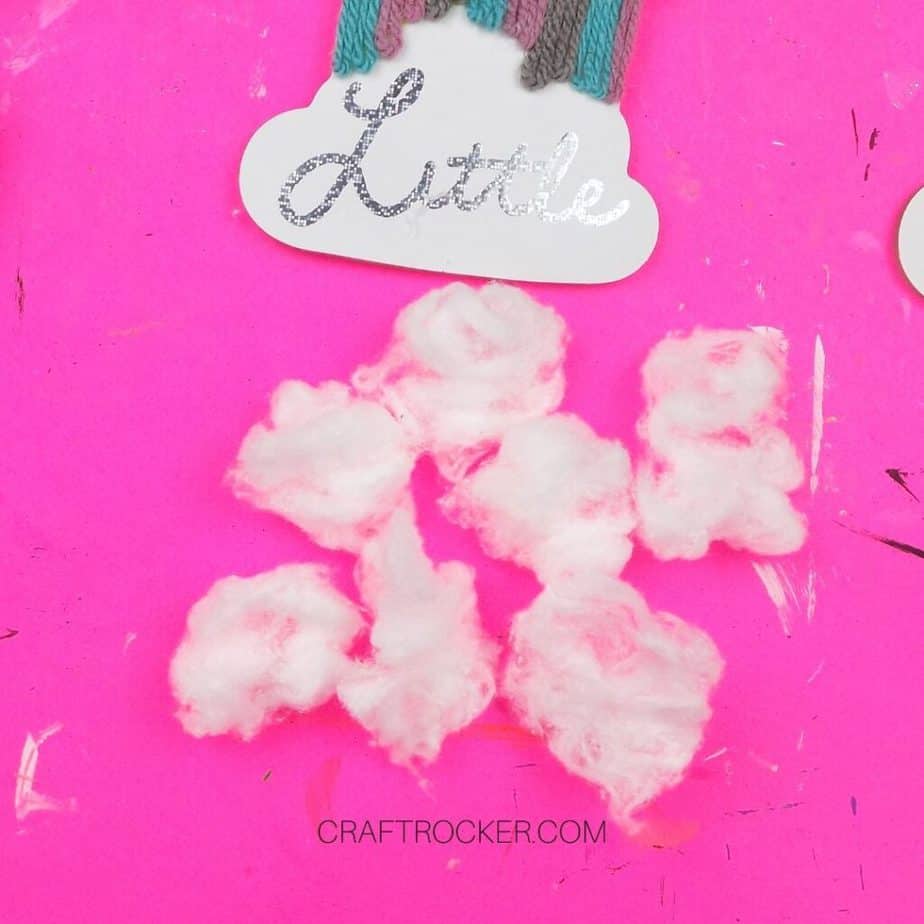
After all of your rainbow is covered, pull out 6-8 cotton balls and pull them apart so that they are big and fluffy.
Step 8
Lastly, hot glue 3-4 fluffed cotton balls to each cloud. Try to follow the shape of the clouds already on your wall art.
Tips and Tricks
There’s no need to pull off the decorative covering on the rainbow wall art. Leave the decoration on as a guide for placing both your yarn and the cotton balls.
While gluing down your yarn, don’t pull it taught. By gently pressing the yarn into the glue you keep consistent strips in your rainbow.
Only add short lines of hot glue at a time while attaching your yarn until your reach the center. Otherwise the glue will cool before your get the entire length of yarn attached because you are making such thin lines.
The rainbow art came with a wall hanger attached so you can hang it on a nail on the wall. Another option if you’d like to hang it on a door, is to add a small length of fishing line through the wall hanger and tie the ends together. Then you will have a way to hang it on a wreath hanger without detracting from the rainbow.
Printable Rainbow Yarn Wall Art Tutorial
Rainbow Yarn Wall Art DIY
Add a cozy touch to your home with this easy-to-make rainbow yarn wall art!
Materials
- Wood Rainbow with Clouds Art
- 3 Skeins of Yarn in Teal, Lavender, and Gray
- Hot Glue Gun and Glue Sticks
- 6-8 Cotton Balls
Instructions
- First, start by adding a short, thin line of hot glue to outer edge of your rainbow. Be sure to start at the top of the cloud so that you can see where they are later.
- Then attach the end of your teal yarn to the glue. Keep the yarn as close to the edge as possible.
- Continue adding hot glue to the outer edge of your rainbow and attaching your teal yarn until you reach the opposite side. Then add a small line of hot glue just inside the attached yarn and begin attaching your yarn back towards the starting point.
- Be sure to stay as close to the first line of yarn as possible when gluing. You don’t want any gaps in the yarn lines.
- After you have attached your teal yarn back and forth along your rainbow 4 times (there should be 4 single lines of yarn), trim the edge where you ended at the cloud.
- Next, move on to your lavender yarn and attach 4 rows of it the same way that you attached your teal yarn.
- Once you have hot glued 4 single lines of lavender yarn, again trim the edge. Then do the same with 4 single lines of gray yarn.
- Continue repeating the pattern of 4 lines of each color of yarn until your entire rainbow section is completely covered.
- After all of your rainbow is covered, pull out 6-8 cotton balls and pull them apart so that they are big and fluffy.
- Lastly, hot glue 3-4 fluffed cotton balls to each cloud. Try to follow the shape of the clouds already on your wall art.
Notes
- There’s no need to pull off the decorative covering on the rainbow wall art. Leave the decoration on as a guide for placing both your yarn and the cotton balls.
- While gluing down your yarn, don’t pull it taught. By gently pressing the yarn into the glue you keep consistent strips in your rainbow.
- Only add short lines of hot glue at a time while attaching your yarn until your reach the center. Otherwise the glue will cool before your get the entire length of yarn attached because you are making such thin lines.
- The rainbow art came with a wall hanger attached so you can hang it on a nail on the wall. Another option if you’d like to hang it on a door, is to add a small length of fishing line through the wall hanger and tie the ends together. Then you will have a way to hang it on a wreath hanger without detracting from the rainbow.
Now this rainbow yarn wall art is ready for a family living area. It is such a sweet little addition to a gallery wall and also a great way to add in additional textures for a truly unique display!
Don’t Forget to Pin It!
More DIY Home Décor Projects You’ll Love
Harry Potter Quote Wood Block + Free SVG
Hot Mess Canvas – What Is It and How to Make One
Yarn Wrapped Wire Word Art – My Pinterventures
