This bunny butts craft proves that decorating for Easter doesn’t have to be difficult or expensive. These are so easy to make and make a super cute addition to your mantle or Easter table.
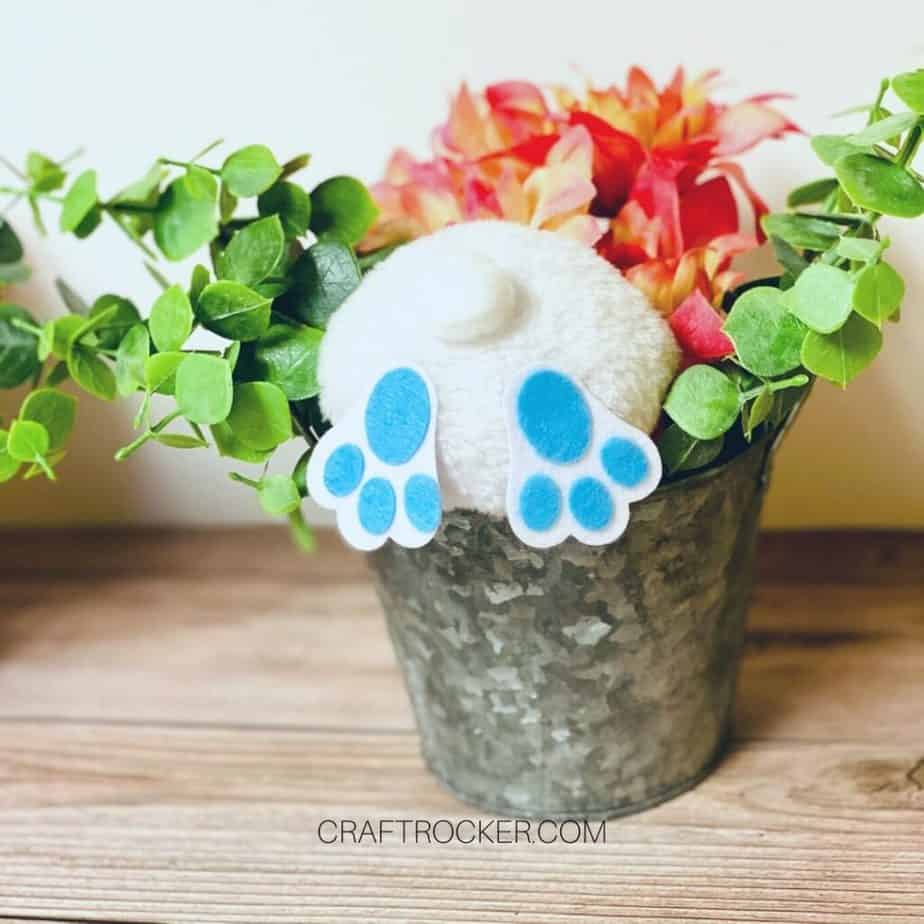
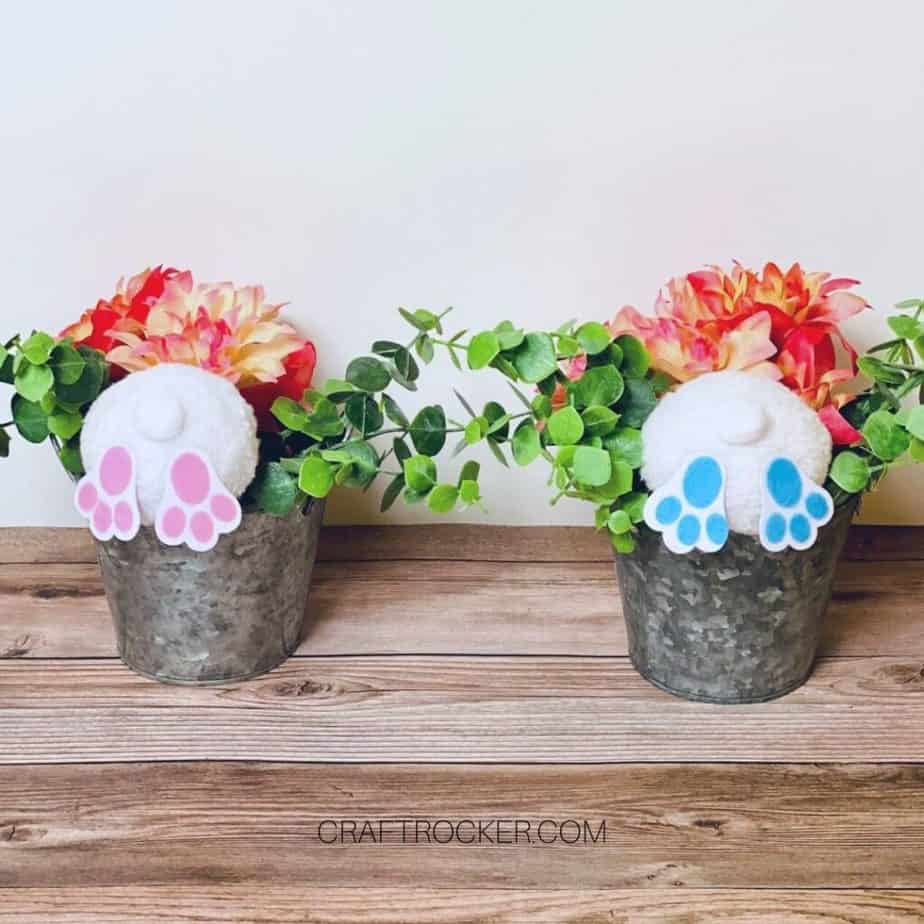
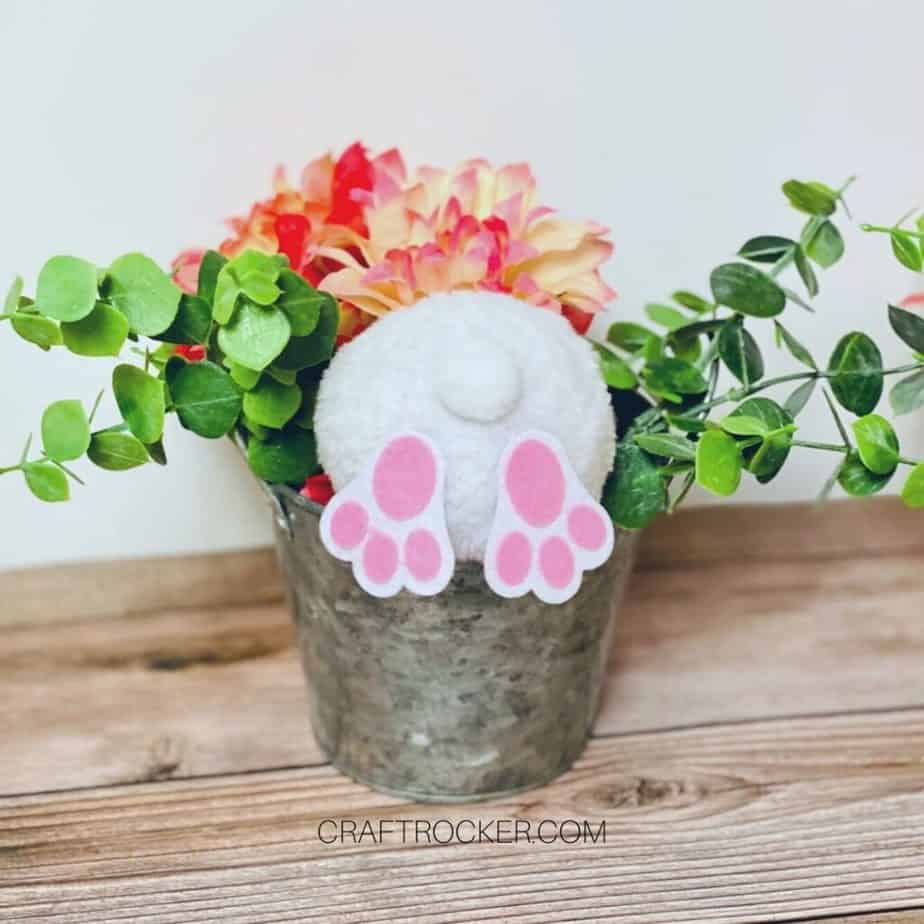
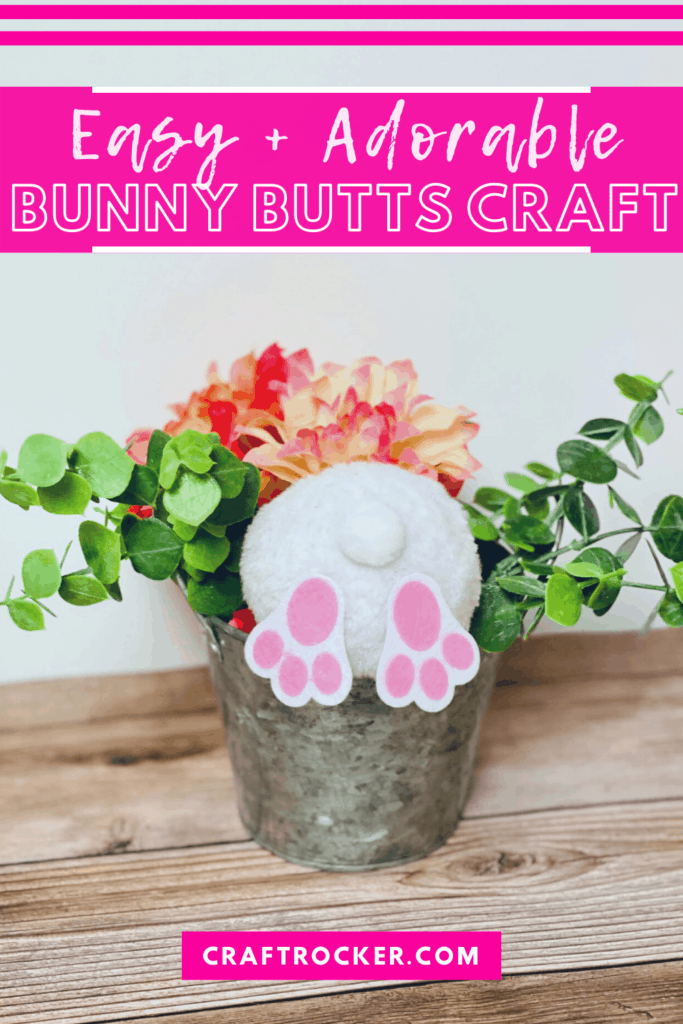
Dress them up even more by placing them in a small, galvanized bucket with flowers for quick and easy decor.
Affiliate links may be used in this post. Ordering a product through these links may result in a commission at no extra cost to you. Read the full disclosure here.
Jump to What You Want
Printable Bunny Butts Tutorial
I know that things are slowly starting to open back up but the truth is that our Easter is going to look different this year.
Last year it was the beginning of the pandemic and we didn’t really know what to expect. The big family Easter kept getting pushed back and rescheduled all month long before we finally realized it simply wasn’t going to happen.
Fast-forward to this year and we’re more prepared that a big family gathering isn’t in the cards. Unfortunately, because of all of our holiday engagements, this is a holiday I haven’t really decorated for in the past.
This year, I want to add a little cheery pizazz to our home without breaking the bank on decorations.
That’s where these freaking adorable little bunny butts come in. They’re an easy Dollar Tree Easter craft that comes together in minutes and looks great on the table for an intimate family dinner at home.
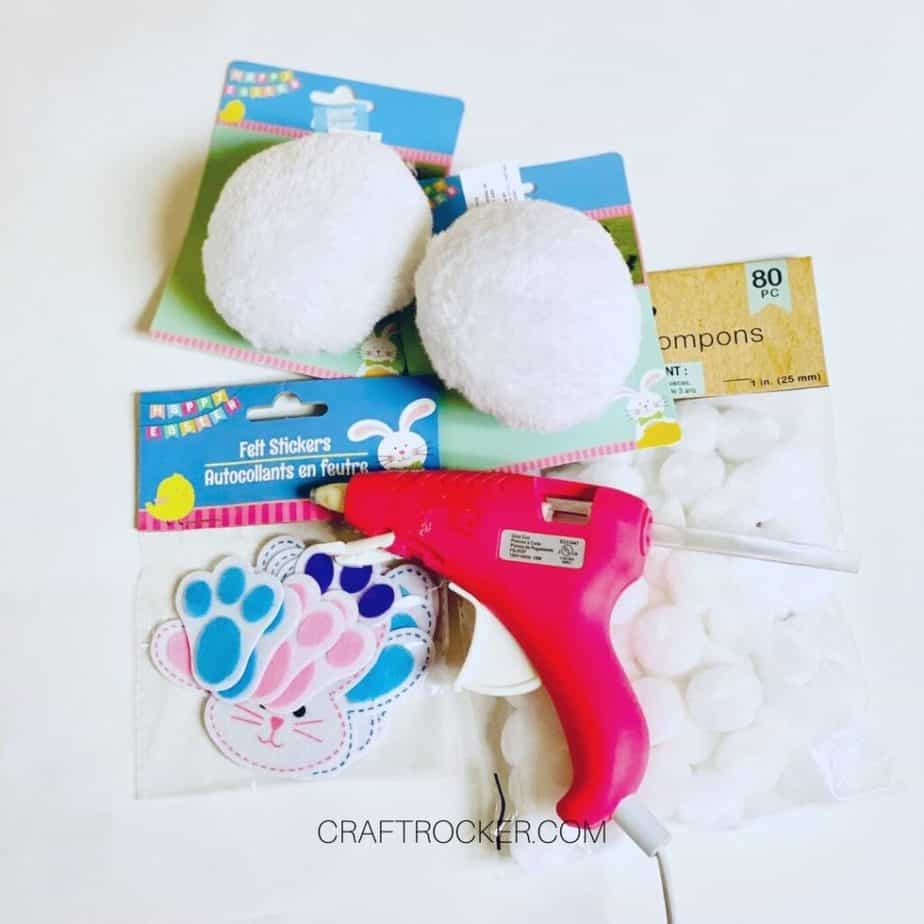
Bunny Butts Craft Materials
Dollar Tree White Pompoms
Hot Glue Gun
Dollar Tree Easter Felt Stickers
2 Dollar Tree Kids Bunny Tails
Step 1
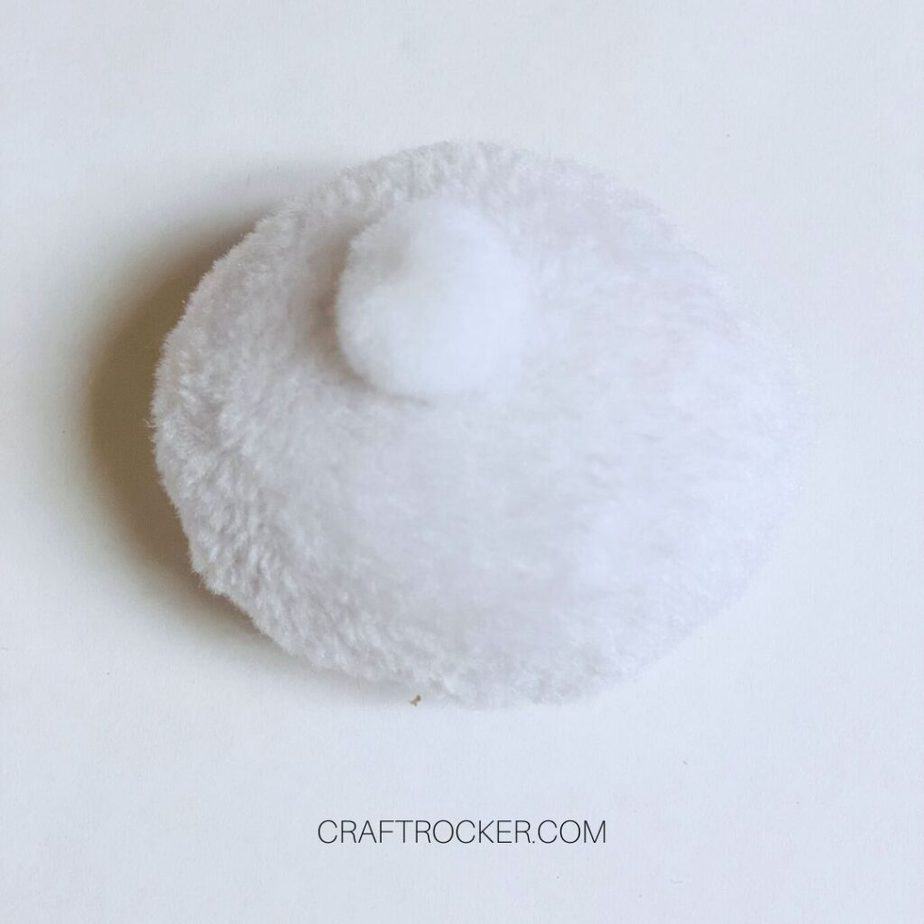
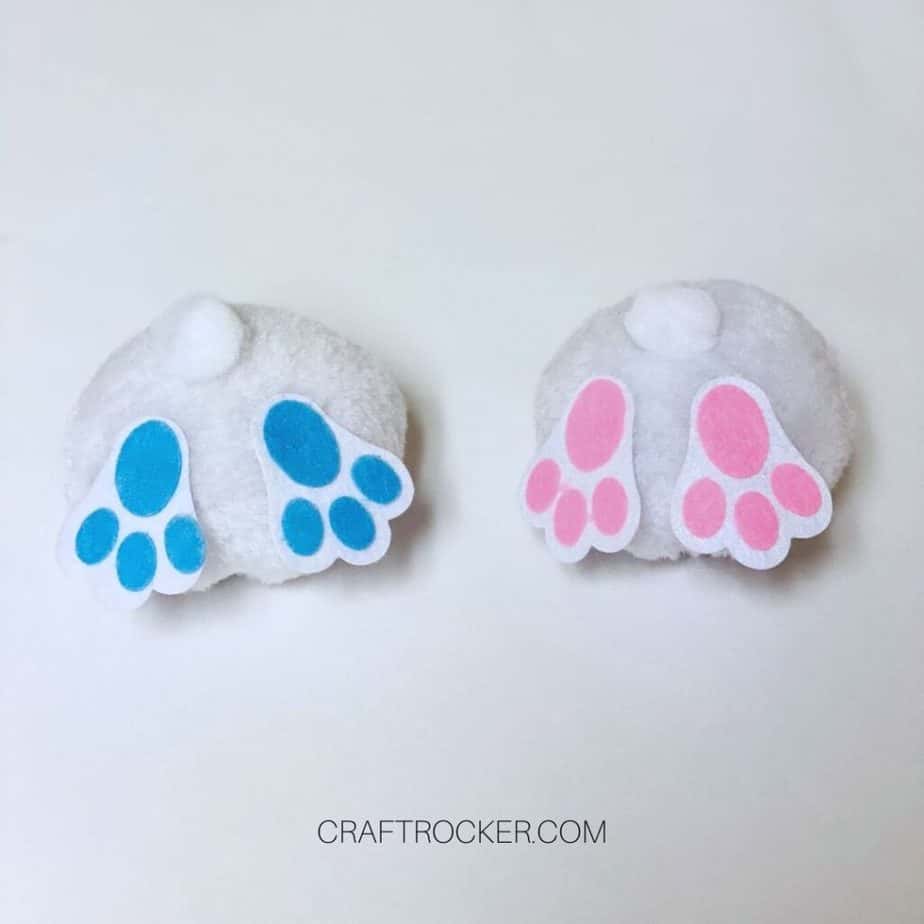
First, remove your bunny tail from the packaging and add a small amount of hot glue a small pompom to the center.
Press the small pompom firmly onto the bunny tail and hold a few seconds while the glue cools.
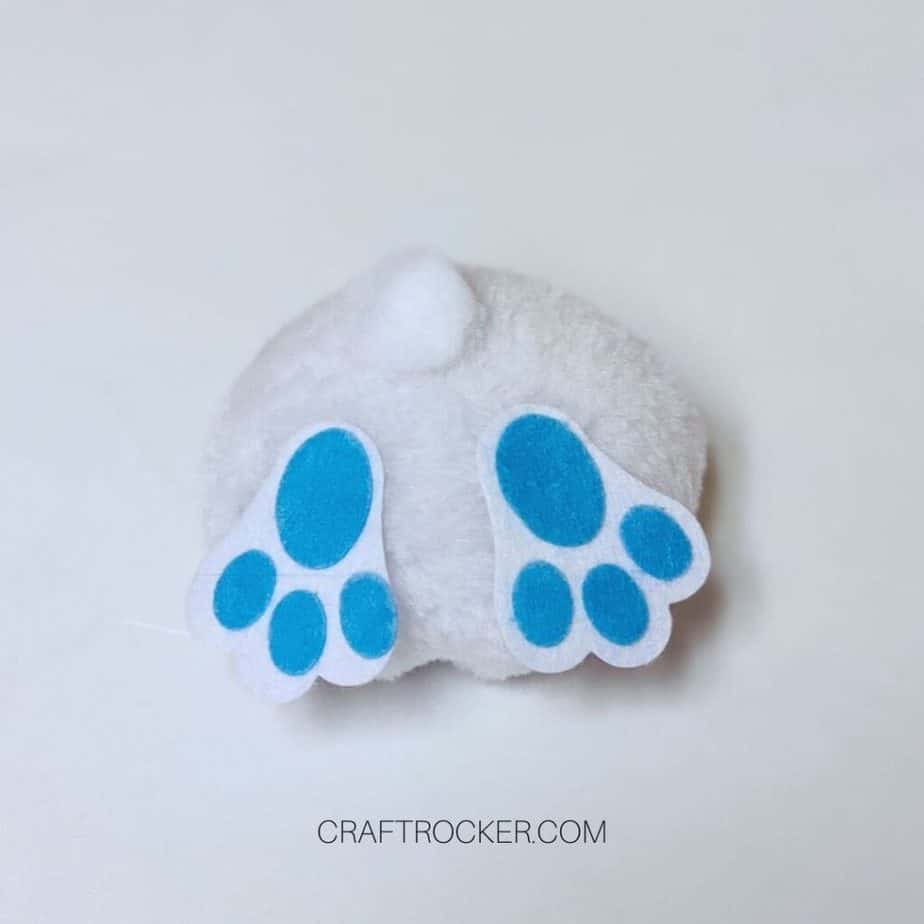

Step 2
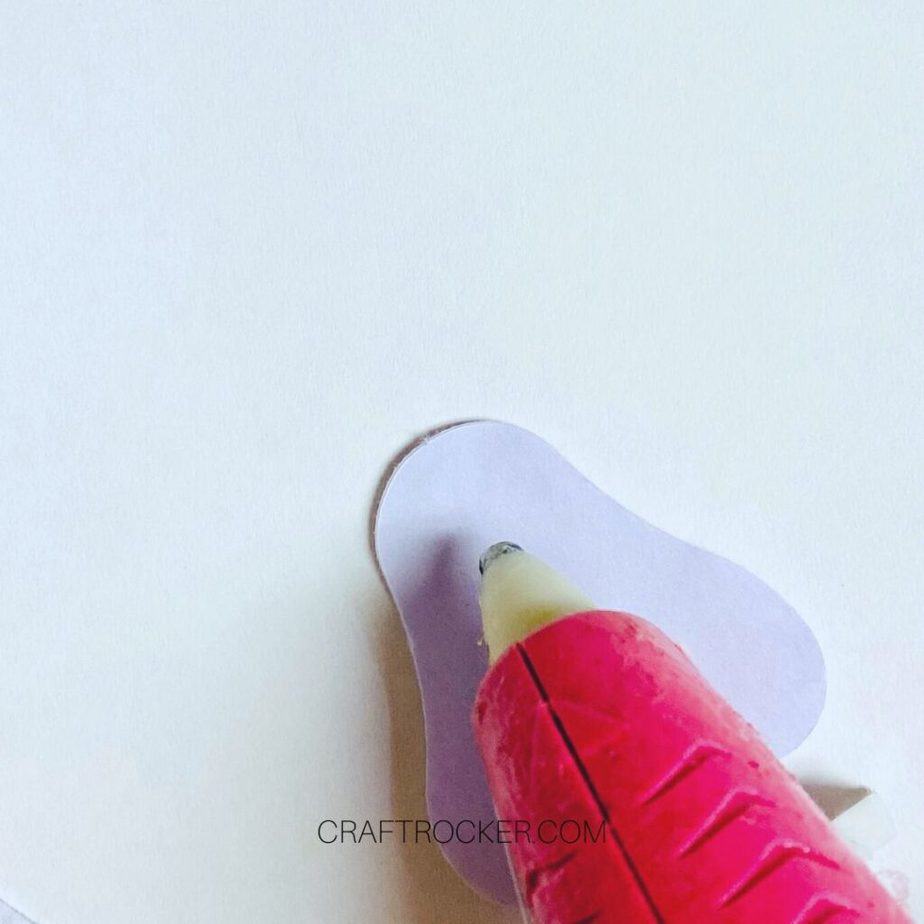
Next add a small amount of the hot glue to 2 of the sticker feet and press each one firmly to the bottom front of the bunny tail so that it sticks.
Again, hold each foot in place for a few seconds while the glue cools.
Step 3 (Optional)
Lastly, add your bunny butts to a floral display or planter. I used faux flowers but you can totally put these in a live floral arrangement too.
Tips and Tricks
There is a piece of paper covering the bunny feet stickers. I left that on so that the sticker wouldn’t stick to things because they were going in larger displays. However, you have to be careful not to pull the feet off of the backing when placing them.
Adapt this craft for kiddos by swapping out the hot glue for non-toxic liquid glue. Be sure to set them in a safe place to dry where they won’t get accidentally bumped, though. You also might want to prop them slightly so that all of the glued pieces stay in place while drying.
These are also a great addition if you want to make up special little treat buckets to deliver to family and friends this holiday. Get a small decorative bucket from the Dollar Tree and fill it with treats and toys. Then plop your bunny butt on top and wrap it with cellophane for an adorable surprise gift.
Printable Bunny Butts Tutorial
Easy and Adorable Bunny Butts Craft

Dress up your Easter table or mantle on a budget with this super easy and adorable bunny butts crafts!
Materials
- Dollar Tree White Pompoms
- Hot Glue Gun
- Dollar Tree Easter Felt Stickers
- 2 Dollar Tree Kids Bunny Tails
Instructions
- First, remove your bunny tail from the packaging and add a small amount of hot glue a small pompom to the center. Press the small pompom firmly onto the bunny tail and hold a few seconds while the glue cools.
- Next add a small amount of the hot glue to 2 of the sticker feet and press each one firmly to the bottom front of the bunny tail so that it sticks. Again, hold each foot in place for a few seconds while the glue cools.
- Lastly, add your bunny butts to a floral display or planter. I used faux flowers but you can totally put these in a live floral arrangement too.
Notes
- There is a piece of paper covering the bunny feet stickers. I left that on so that the sticker wouldn’t stick to things because they were going in larger displays. However, you have to be careful not to pull the feet off of the backing when placing them.
- Adapt this craft for kiddos by swapping out the hot glue for non-toxic liquid glue. Be sure to set them in a safe place to dry where they won’t get accidentally bumped, though. You also might want to prop them slightly so that all of the glued pieces stay in place while drying.

It seriously doesn’t get much easier than this cute little bunny butts craft. Four dollars and you have 2 cute spring accessories plus leftover materials for the kids’ craft stash.
Don’t Forget to Pin It!
More Easter Ideas to Check Out
DIY Easter Basket – Domestically Creative
