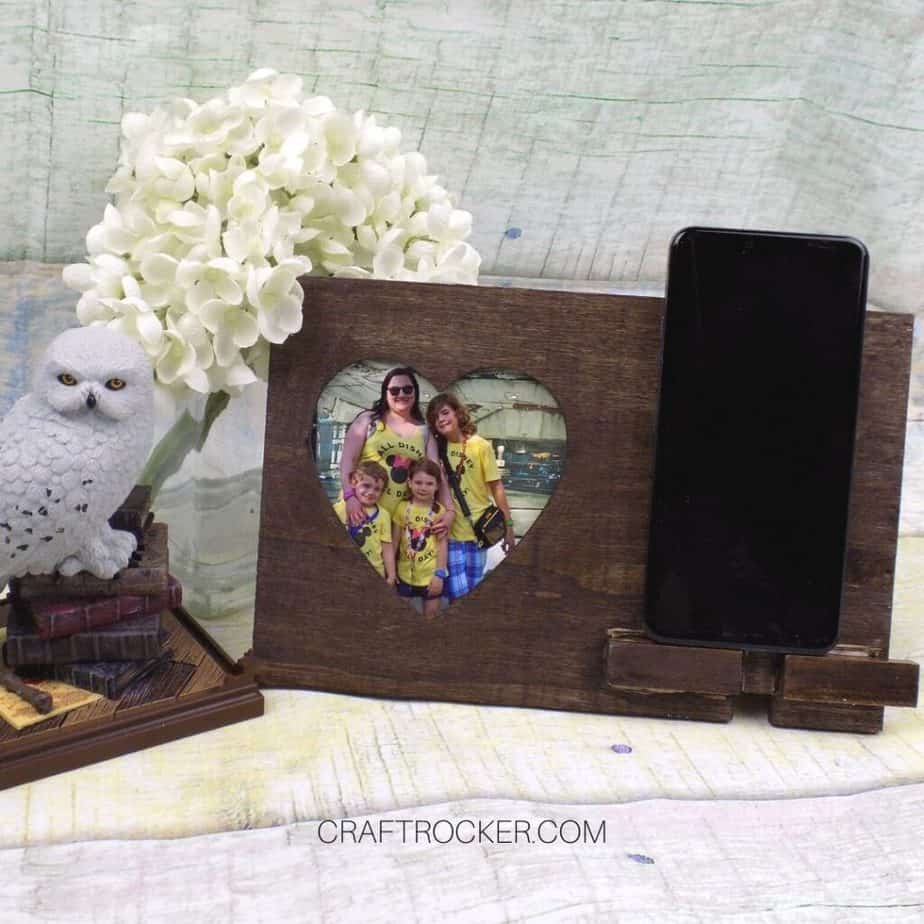
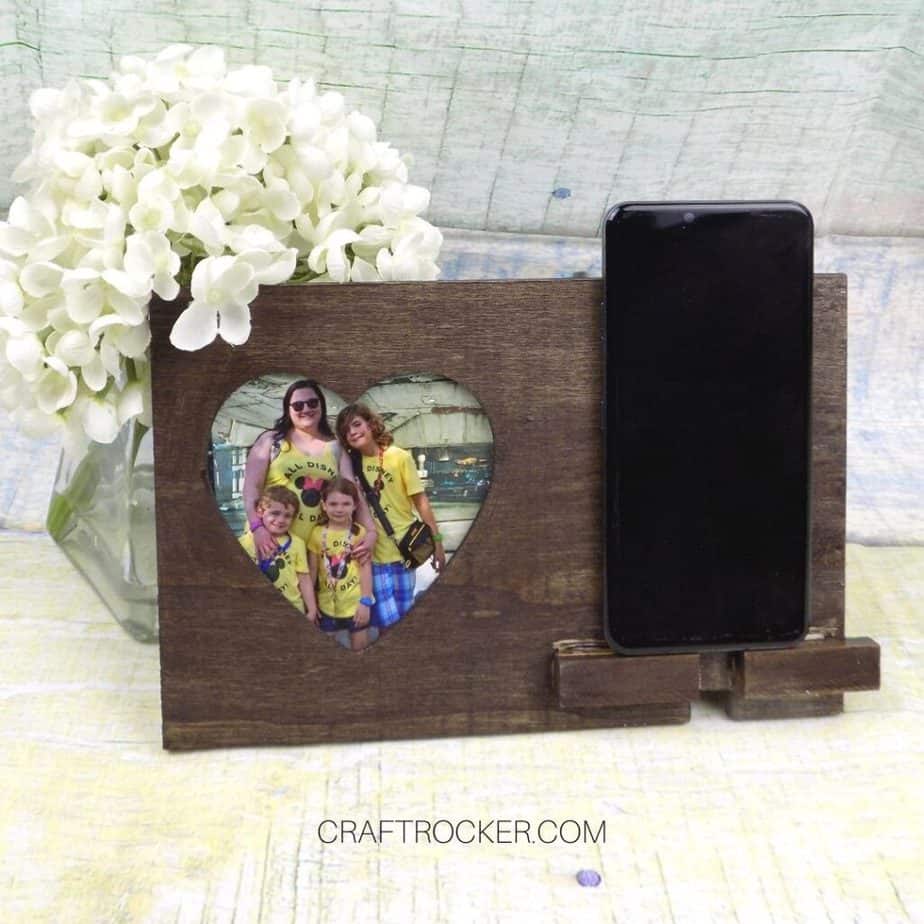
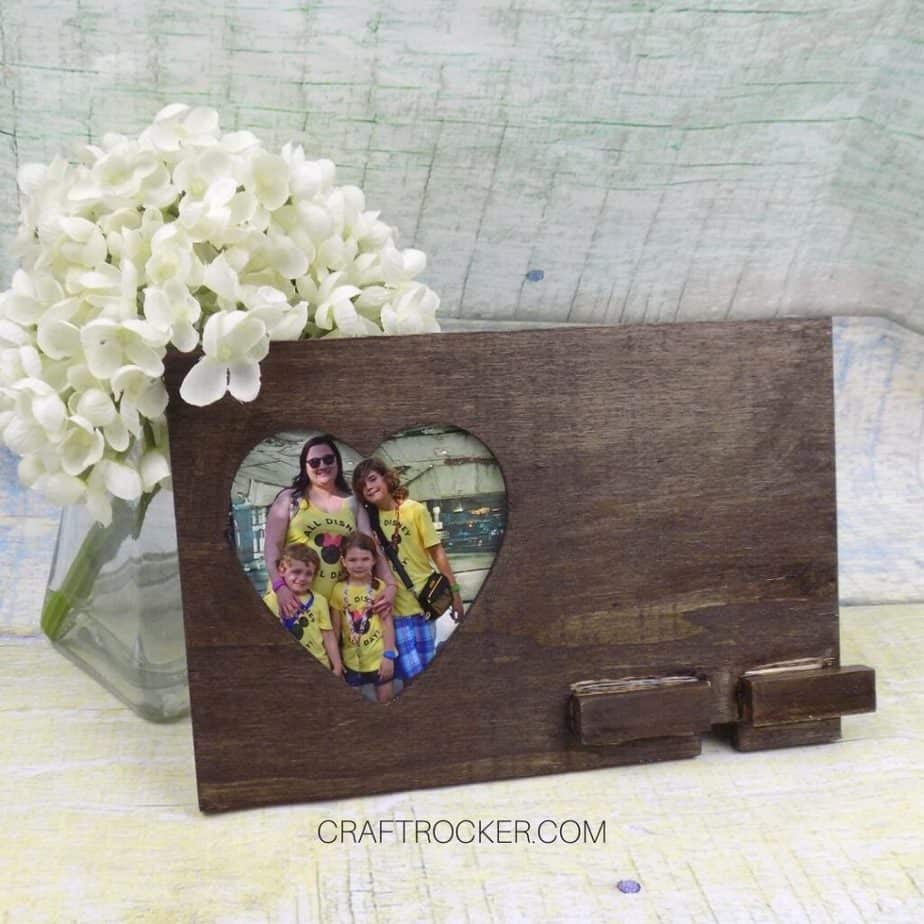
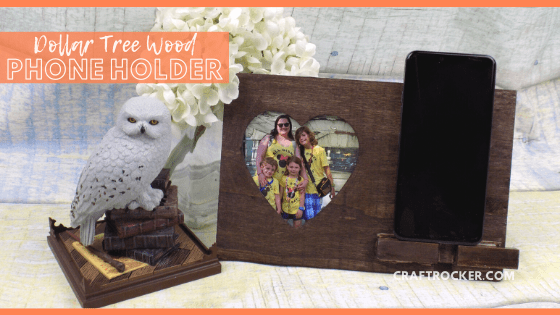
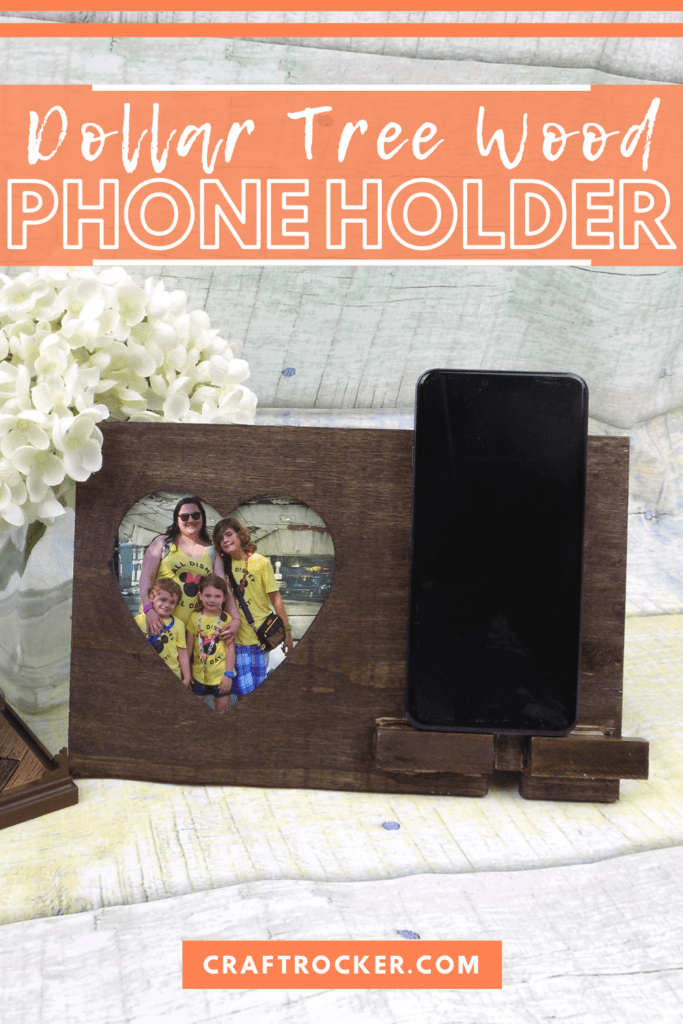
This Dollar Tree wood phone holder requires no fancy power tools or equipment to make. It also makes an awesome budget-friendly gift!
Affiliate links may be used in this post. Ordering a product through these links may result in a commission at no extra cost to you. Read the full disclosure here.
Jump to What You Want
Dollar Tree Wood Phone Holder How-To
Printable Dollar Tree Wood Phone Holder Tutorial
I wanted to make a wood phone holder but I wanted to figure out a way to do it without using power tools.
We have all the fancy stuff like a table saw and jigsaw, not to mention the standard drills and etcetera but not everyone does.
Not to mention, if you’re making this as a surprise gift for hubs, it can be hard to use those tools without him getting involved. What is it about dudes deciding to insert themselves when you pick up a power tool?
This phone holder is made with a few dollar store finds and basic (ie: quiet) tools so that you can keep the surprise in tact.

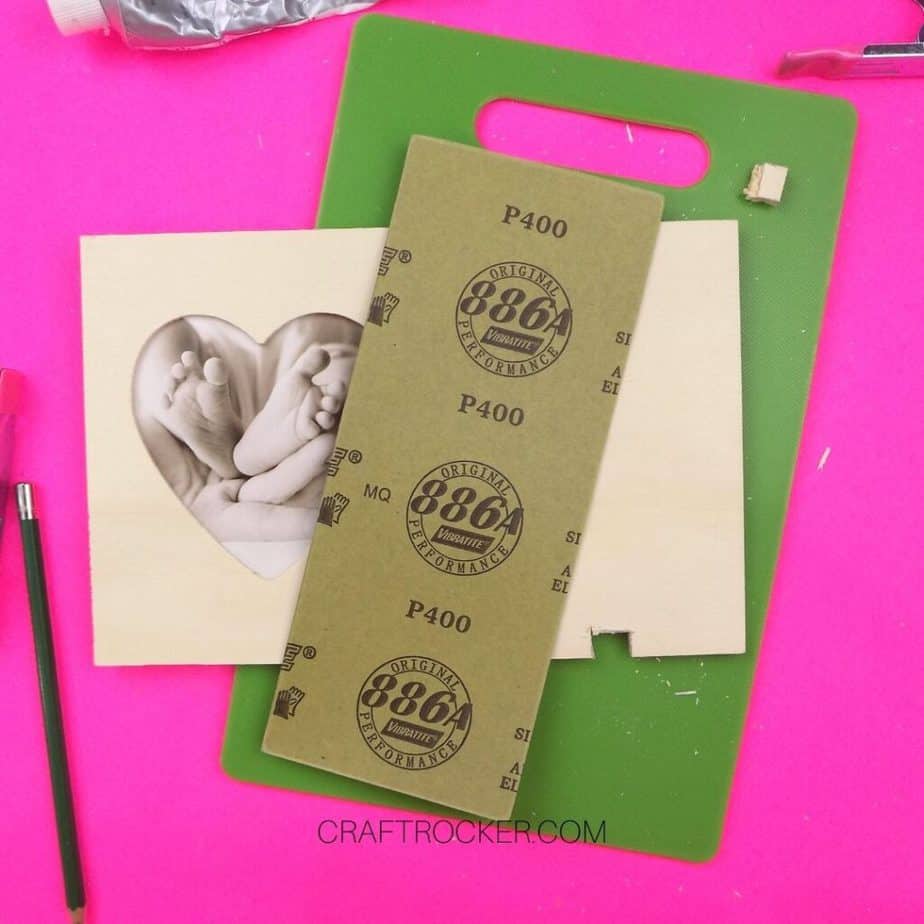
Dollar Tree Wood Phone Holder Materials
Wide Wood Heart Frame (Dollar Tree)
Utility Knife
Pencil
Mini Wood Stacking Block Game (Dollar Tree)
Clamps (I used the large 2 pack from Dollar Tree but wider clamps work better)
Brown Acrylic Paint
Paintbrush
Paper Towels
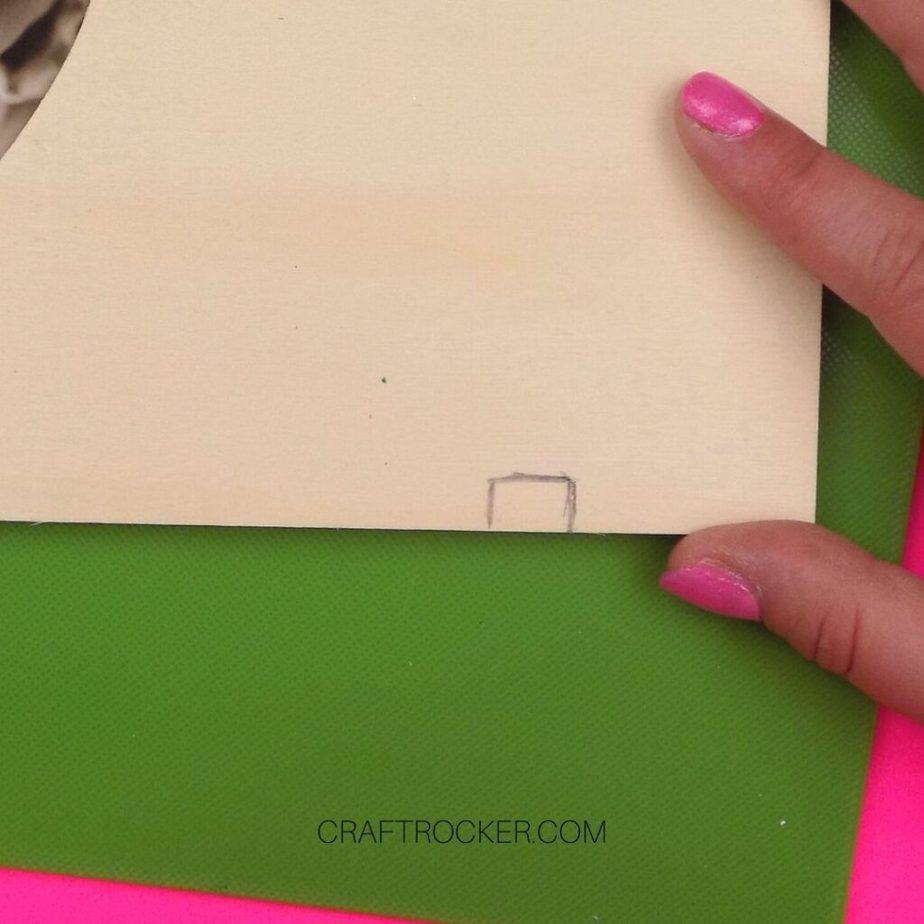
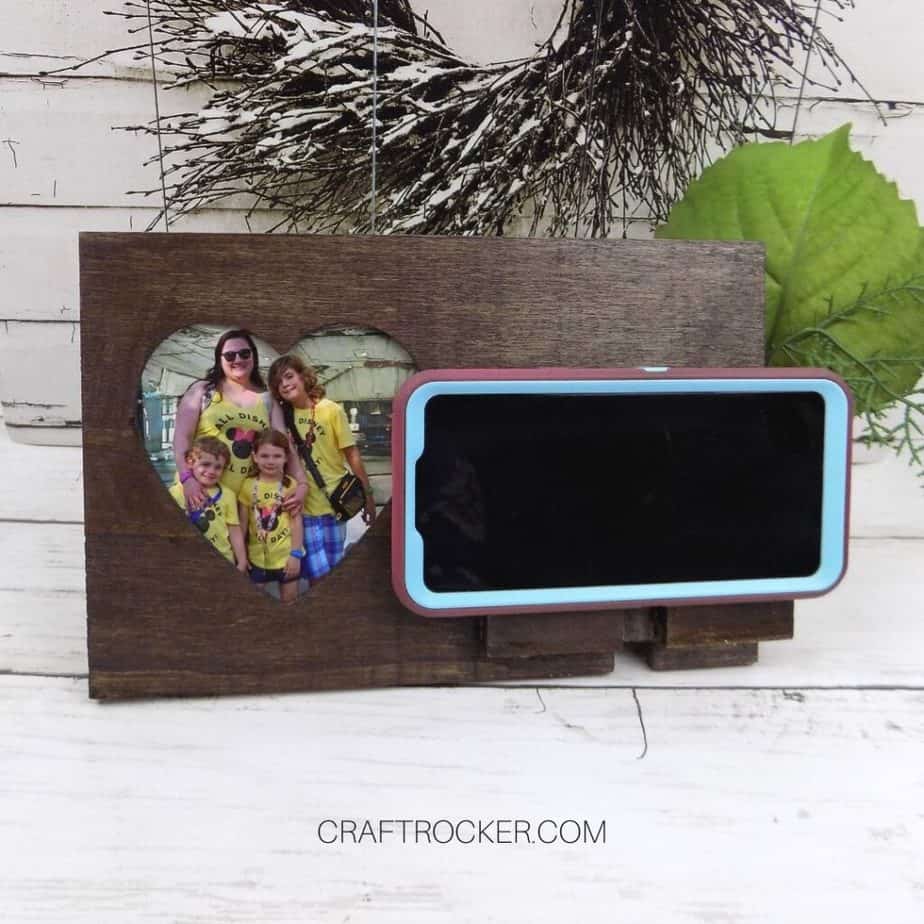
Step 1 – Cut Cord Hole from Frame
First, use your pencil to draw a small rectangle at the bottom edge on the right of your frame. This is where the charging cord will go through the frame for your phone.
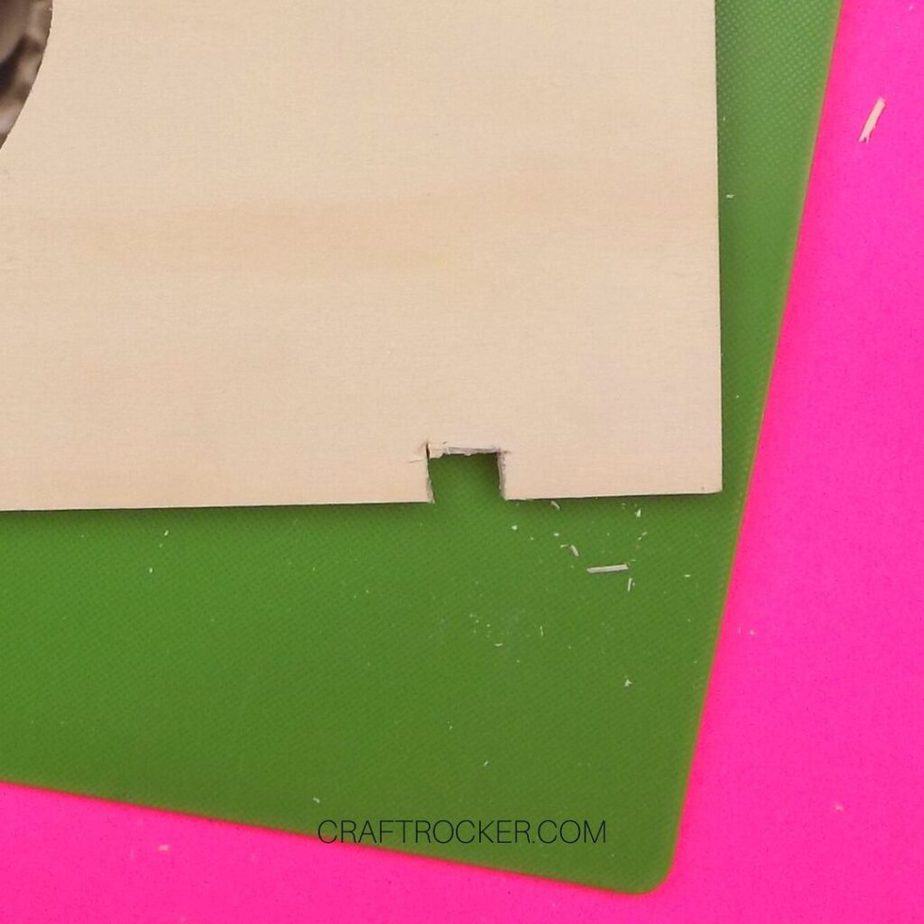
Then place your frame on a cutting board and use your utility knife to cut out the rectangle.
Lastly, sand the rectangle so that the edges are smooth.
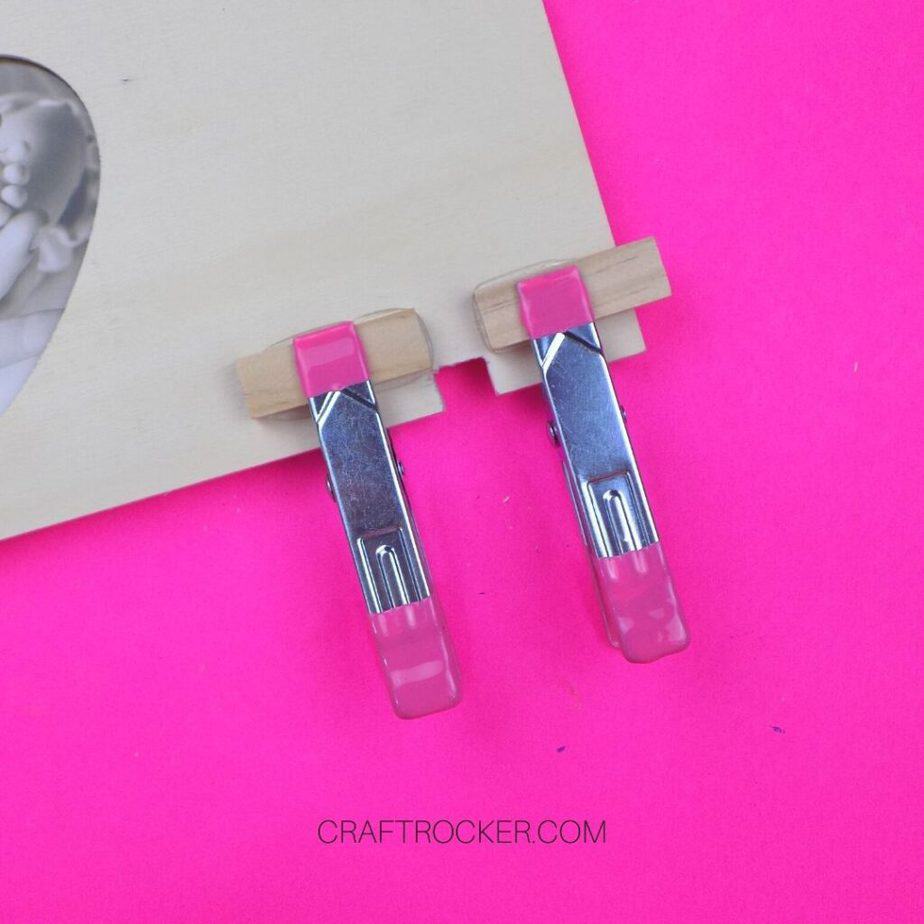
Step 2 – Attach Wood Ledges
After your cord hole is finished, add a small amount of E6000 to 2 of your stacking block game pieces.
Then press them to either side above your rectangle. Use your clamps to hold the pieces in place while they dry.
Be sure to wipe any excess glue from the edges and then set aside your frame to dry completely before moving on.
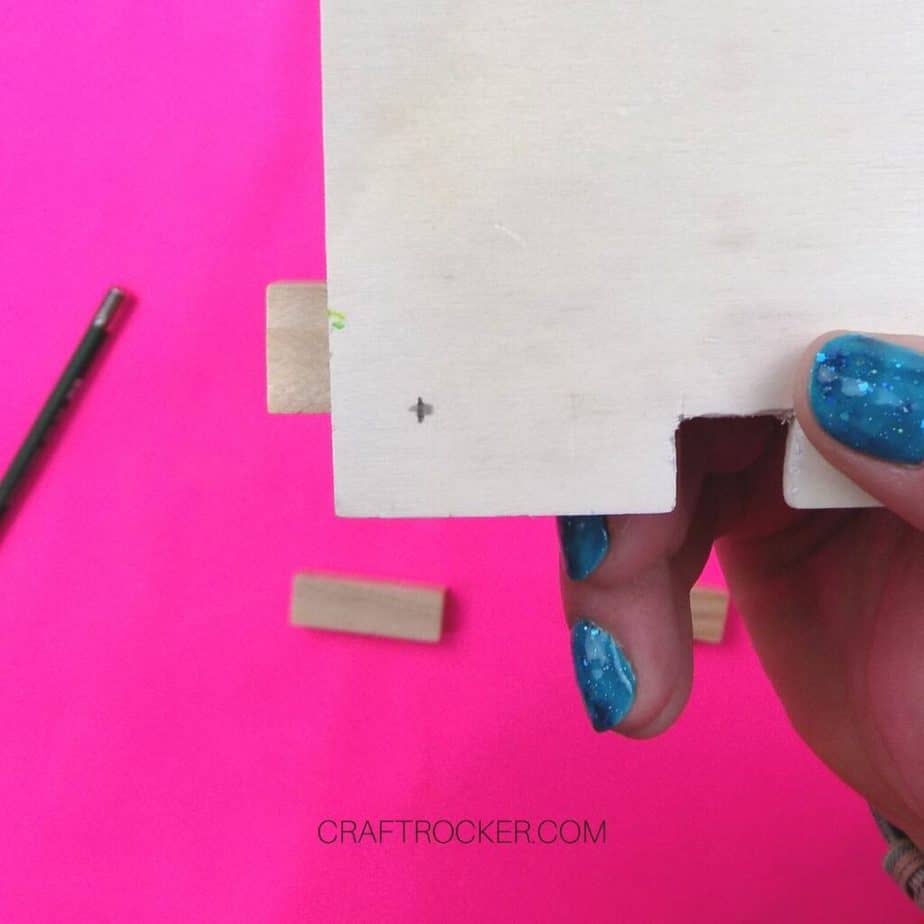

Step 3 – Attach Back Legs to Frame
After your front pieces are dry, flip your frame over and measure about 1/2 inch from the left and right edges and mark with your pencil.
Next, attach 2 more wood blocks on either side with E6000 at the measured marks.
Again, clamp them to your frame and be sure to wipe the excess glue from the edges.
Set aside to dry completely before moving on.
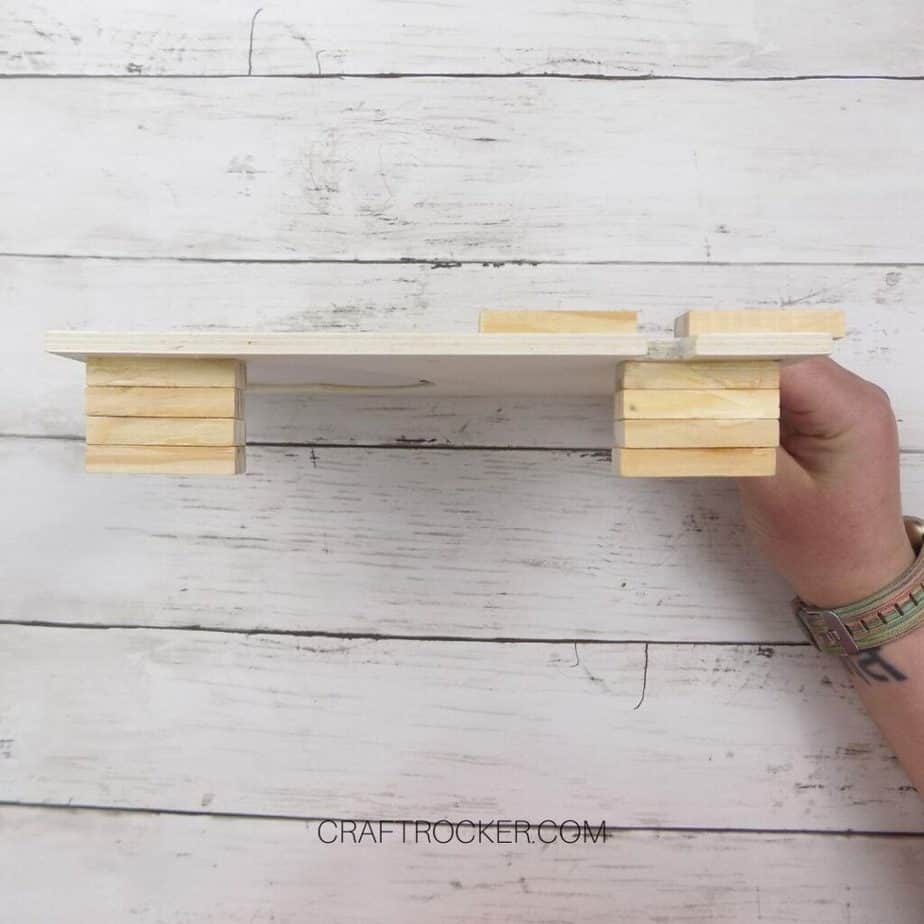
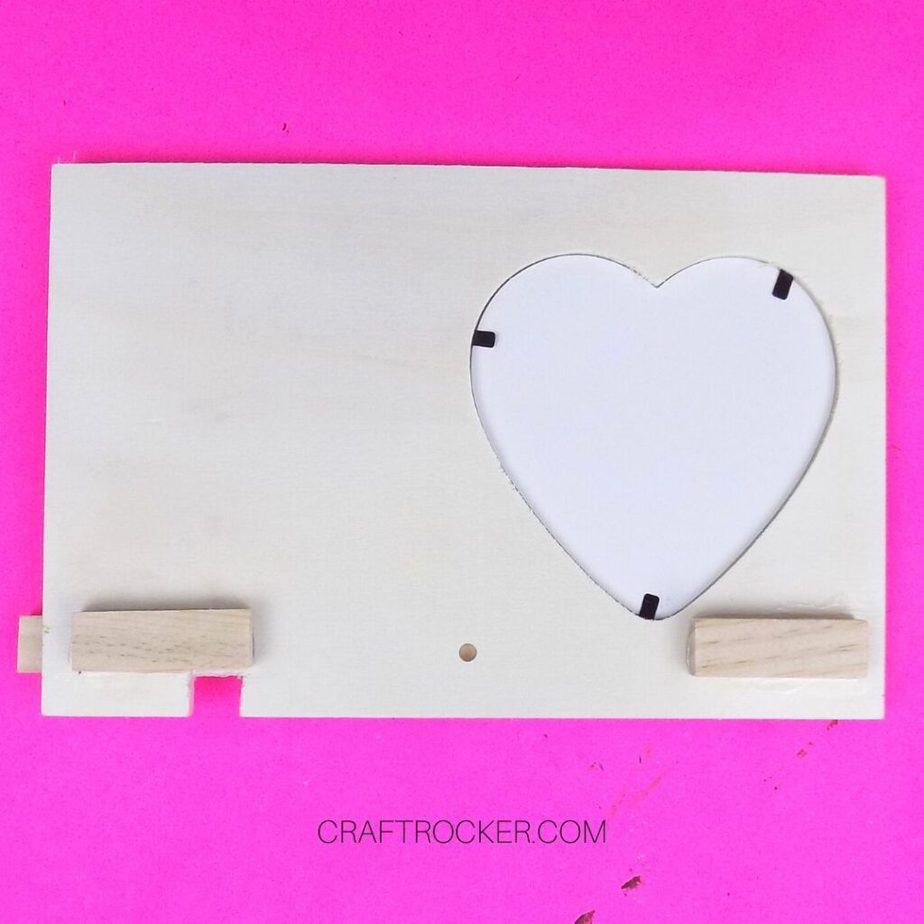
Step 4 – Continue Adding Back Legs
If you have wider clamps than I used, you can do all of the remaining wood blocks at once. Otherwise add each piece one at a time.
Add E6000 and wood blocks until each side until you have 4 blocks on each side.
Remember to wipe the excess glue from the blocks before setting aside to dry.
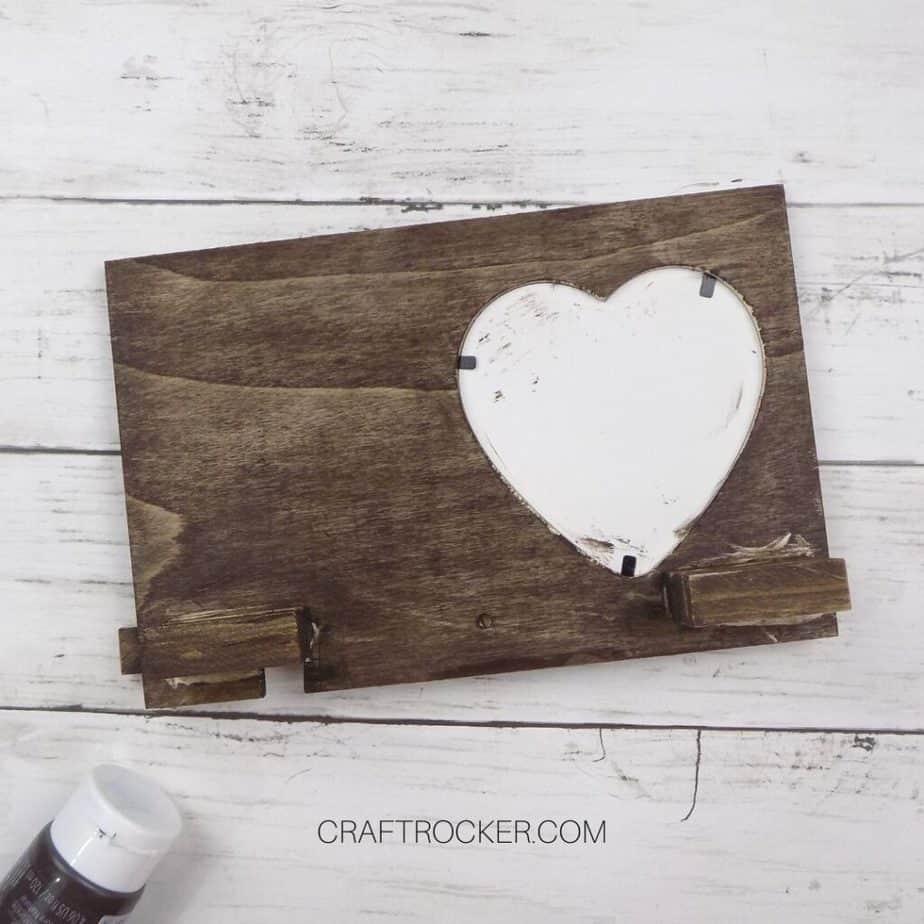
Step 5 – Stain Your Phone Holder
After all of the pieces are attached to your phone holder, cover your frame one side at a time with brown acrylic paint.
Then wipe off the excess with paper towels so that the wood grain shows through the paint.
Once each side is finished, set it aside to dry. This won’t take long because you wipe off a lot of the paint.
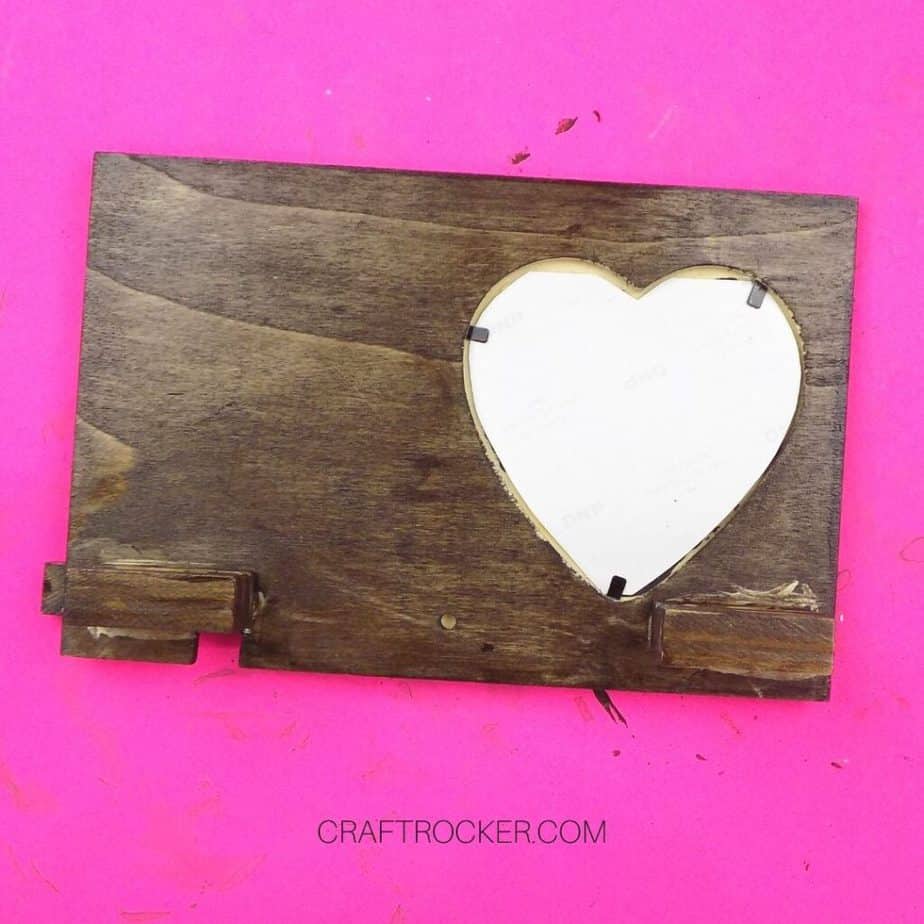
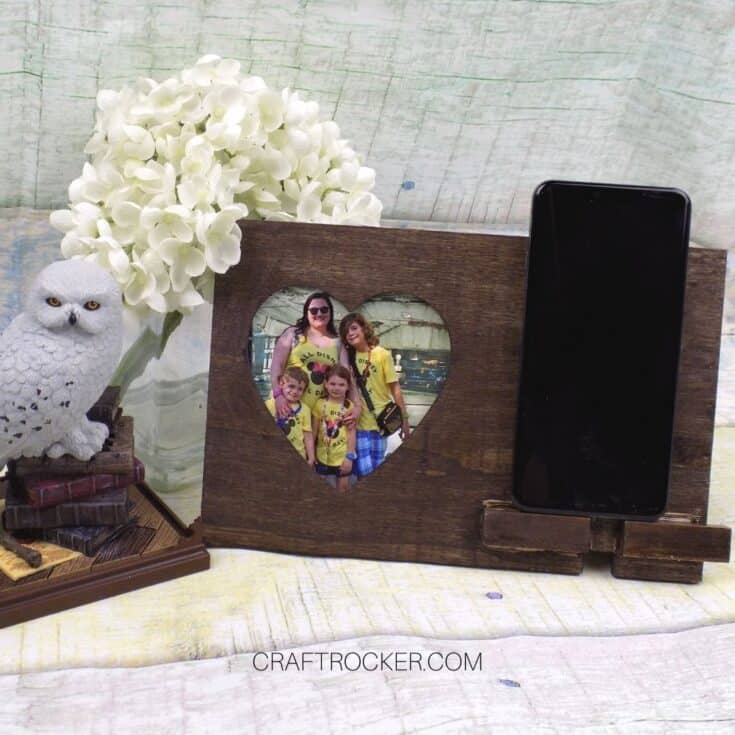
Step 6 – Seal Your Phone Holder
When your paint it dry, seal your entire phone holder with acrylic spray sealant and allow it to dry.
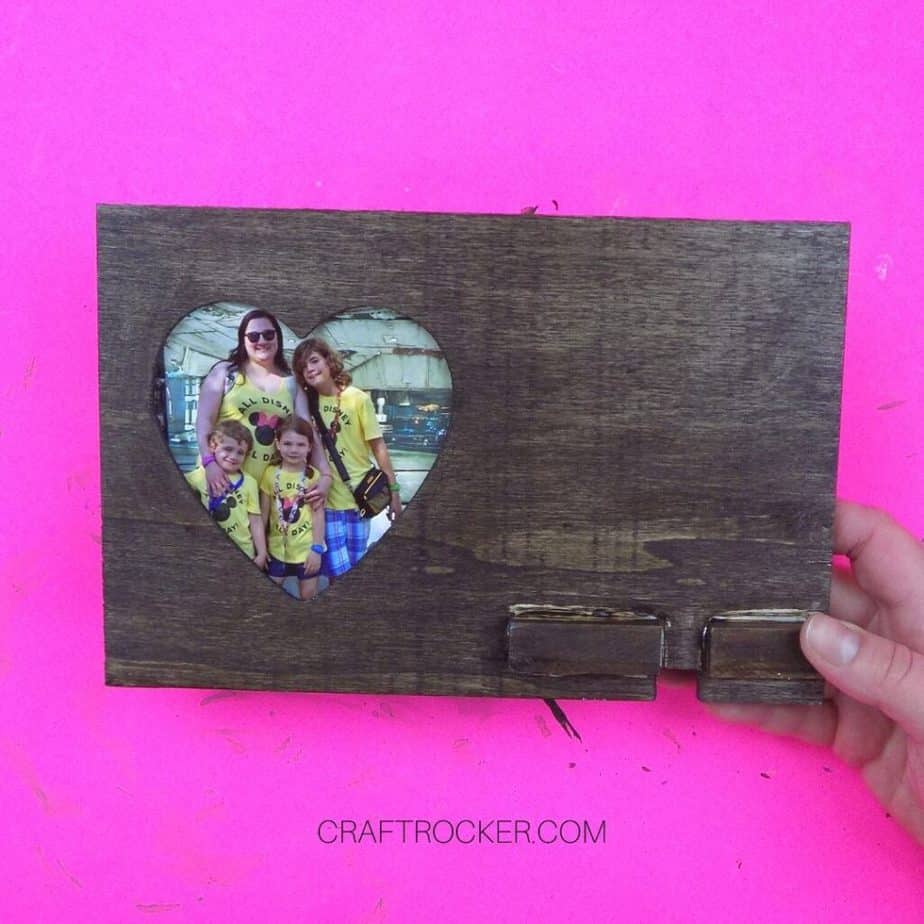
Step 7 – Add Your Photo
Lastly, use the paper insert in your frame as a stencil to cut out a photo in the correct size and shape for your frame.
Then add the photo to the photo frame and enjoy!
Tips and Tricks
The paint won’t stick as well to the areas that have glue so ensure that you wipe the excess glue each time you add a wood block.
This project goes faster if you have wood clamps because then you can add all of your wood blocks on the back at once. If you don’t have any, don’t go out and buy some. You can make this without them, simply add one block at a time and allow to dry 24 hours before adding the next one.
Be sure not to skip the sealing. It’s important to protect your phone holder and also makes it easier to clean.
To clean your phone holder, wipe with a damp cloth.
Printable Dollar Tree Wood Phone Holder Tutorial
Dollar Tree Wood Phone Holder
This Dollar Tree wood phone holder requires no fancy power tools or equipment to make. It also makes an awesome budget-friendly gift!
Materials
- Wide Wood Heart Frame (Dollar Tree)
- Utility Knife
- Pencil
- Sand Paper
- Mini Wood Stacking Block Game (Dollar Tree)
- E6000 Glue
- Clamps
- Brown Acrylic Paint
- Paintbrush
- Paper Towels
- Spray Acrylic Sealant
Instructions
- First, use your pencil to draw a small rectangle at the bottom edge on the right of your frame. This is where the charging cord will go through the frame for your phone.
- Then place your frame on a cutting board and use your utility knife to cut out the rectangle.
- Lastly, sand the rectangle so that the edges are smooth.
- After your cord hole is finished, add a small amount of E6000 to 2 of your stacking block game pieces.
- Then press them to either side above your rectangle. Use your clamps to hold the pieces in place while they dry.
- Be sure to wipe any excess glue from the edges and then set aside your frame to dry completely before moving on.
- After your front pieces are dry, flip your frame over and measure about 1/2 inch from the left and right edges and mark with your pencil.
- Next, attach 2 more wood blocks on either side with E6000 at the measured marks.
- Again, clamp them to your frame and be sure to wipe the excess glue from the edges.
- Set aside to dry completely before moving on.
- If you have wider clamps than I used, you can do all of the remaining wood blocks at once. Otherwise add each piece one at a time.
- Add E6000 and wood blocks until each side until you have 4 blocks on each side.
- Remember to wipe the excess glue from the blocks before setting aside to dry.
- After all of the pieces are attached to your phone holder, cover your frame one side at a time with brown acrylic paint.
- Then wipe off the excess with paper towels so that the wood grain shows through the paint.
- Once each side is finished, set it aside to dry. This won’t take long because you wipe off a lot of the paint.
- When your paint it dry, seal your entire phone holder with acrylic spray sealant and allow it to dry.
- Lastly, use the paper insert in your frame as a stencil to cut out a photo in the correct size and shape for your frame.
- Then add the photo to the photo frame and enjoy!
Notes
- The paint won’t stick as well to the areas that have glue so ensure that you wipe the excess glue each time you add a wood block.
- Be sure not to skip the sealing. It’s important to protect your phone holder and also makes it easier to clean.
- To clean your phone holder, wipe with a damp cloth.
Can you believe how easy this Dollar Tree wood phone holder is to make? I love how it turned out and I can’t wait to surprise the dads with it!
The best part is that it is totally budget-friendly so you can easily make multiples for the people in your life. It’s also a practical, clutter-free gift for the person who has everything!
Don’t Forget to Pin It!
More Dollar Tree Crafts to Make!
Upcycled Bottle Caps Magnetic Tray
How to Make a Basket from a Dollar Store Sun Hat
How to Make a Terrarium from Dollar Tree Frames – Our Crafty Mom
