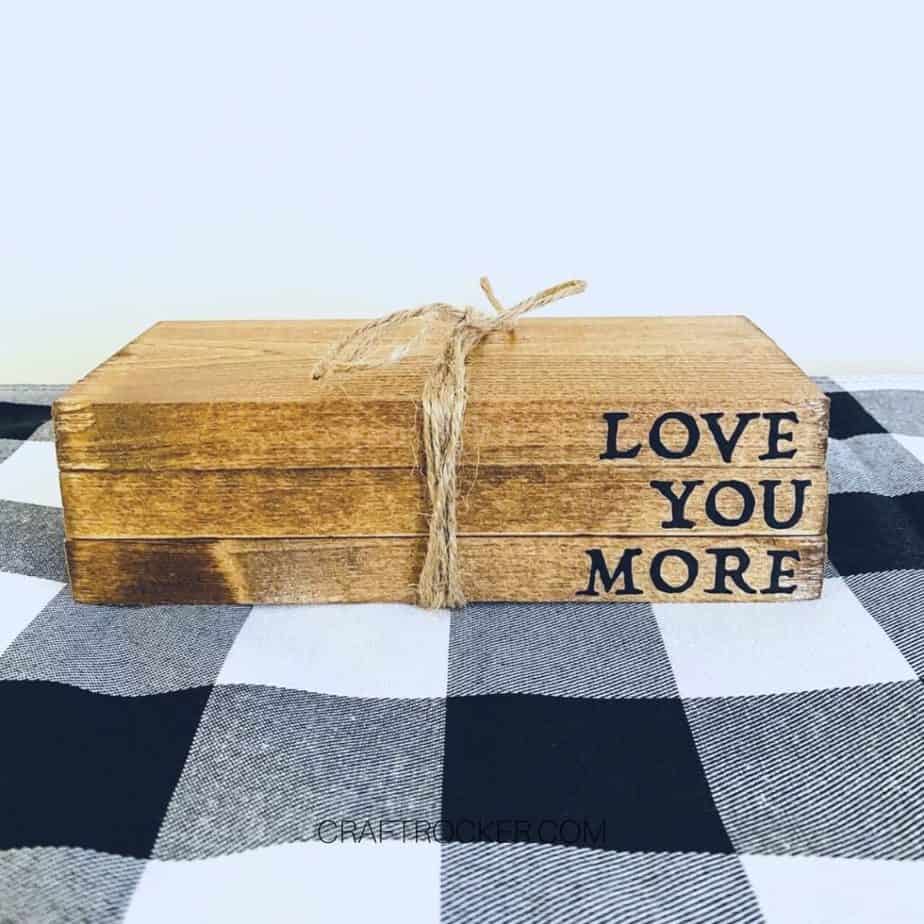
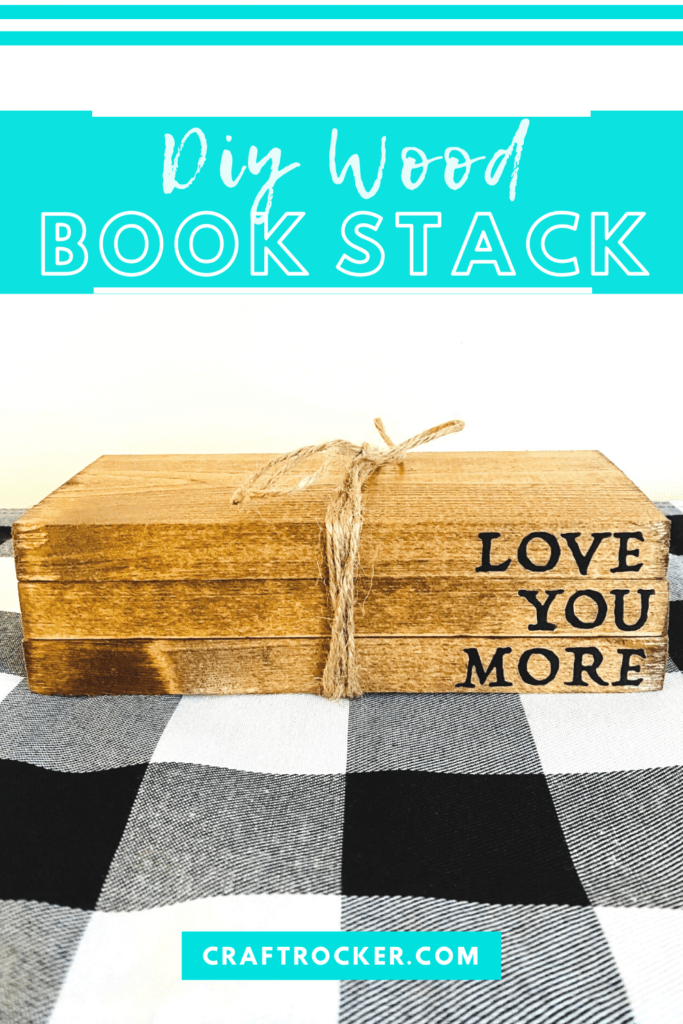
Add a beautiful, customized piece of décor to your home with this DIY wood book stack. It’s so easy to make and great if you don’t want to paint on actual books.
Affiliate links may be used in this post. Ordering a product through these links may result in a commission at no extra cost to you. Read the full disclosure here.
Jump to What You Want


This is such a beautiful DIY that comes together quickly and easily. The longest part is waiting for the stain to dry which is totally hands off.
Once it’s finished, you’ll have an awesome decoration that you’re excited to display.
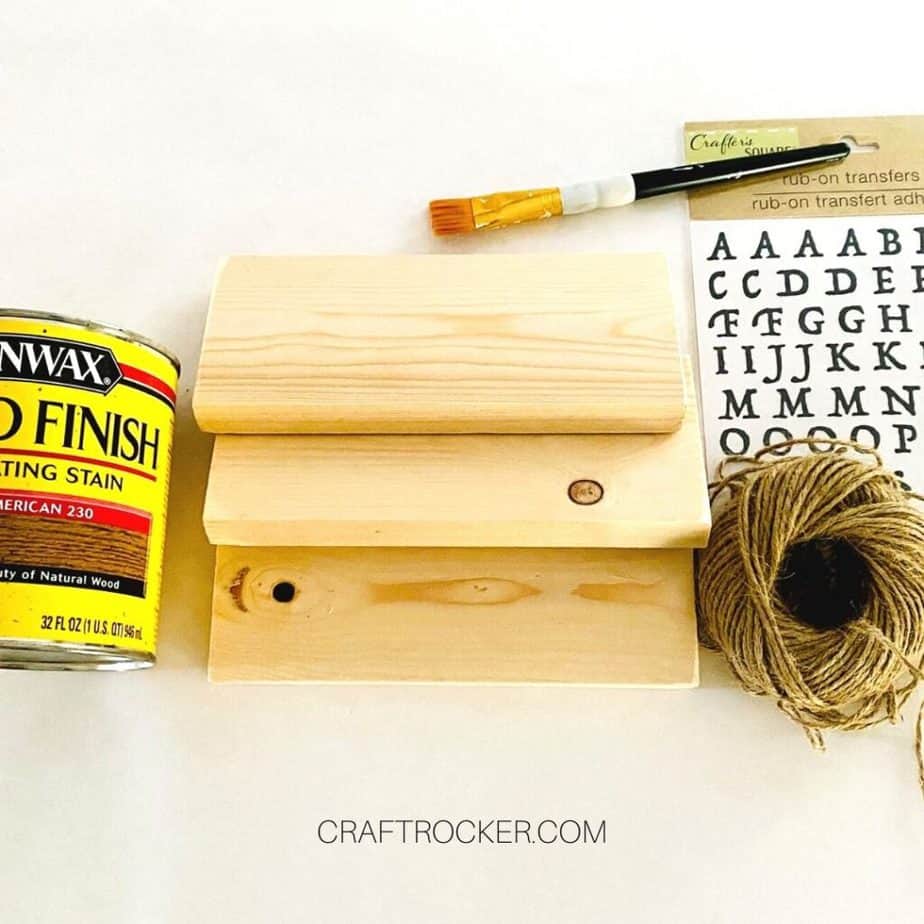
DIY Wood Book Stack Supplies
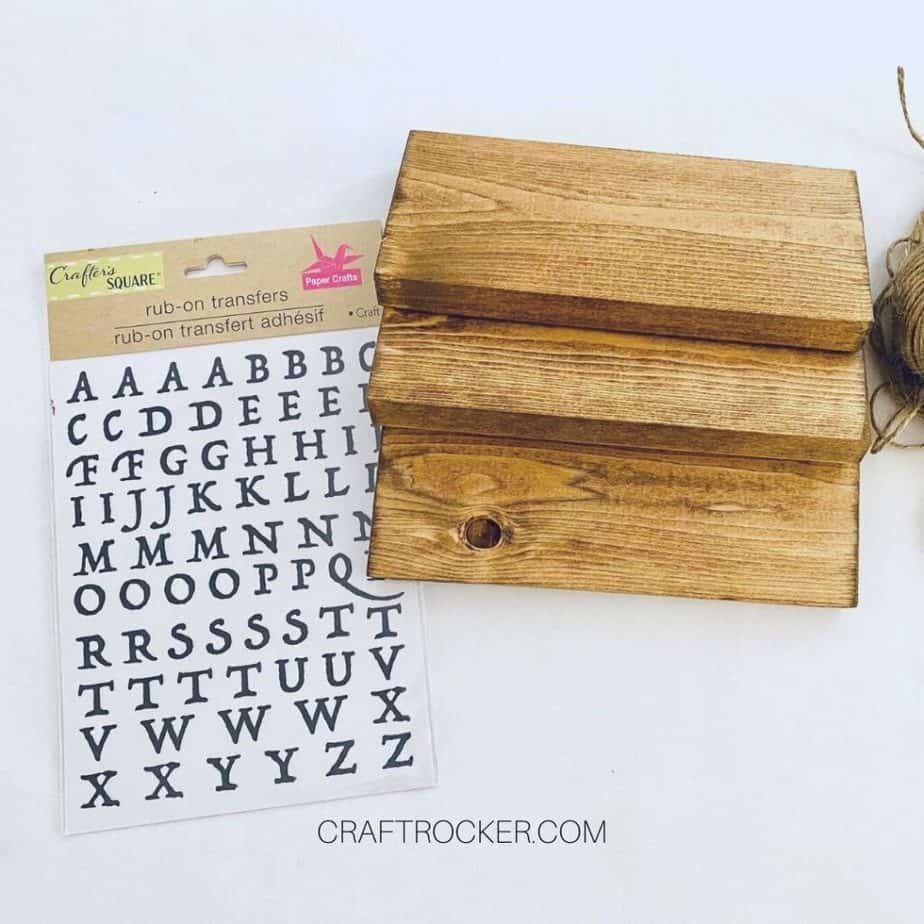
3 Wood Pieces 3.5 inches wide x 8 inches length (I used pine as it was the cheapest at Home Depot)
Dollar Tree Rub on Transfers
Dollar Tree Jute Twine
Paint Brush
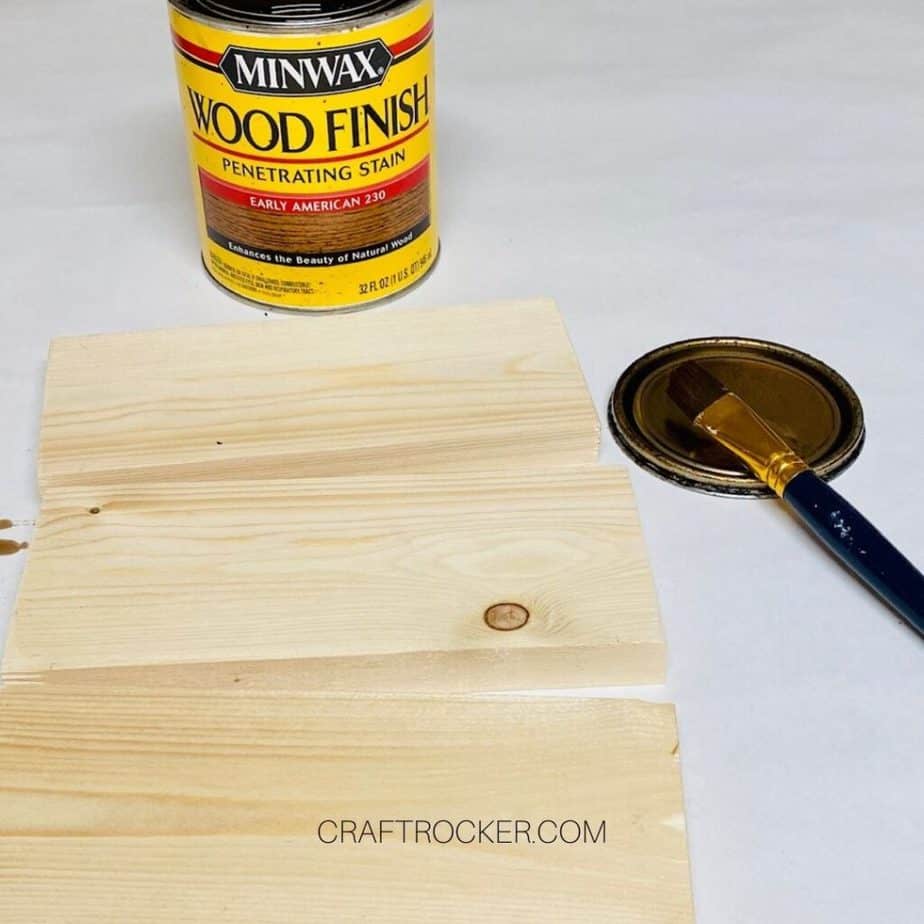
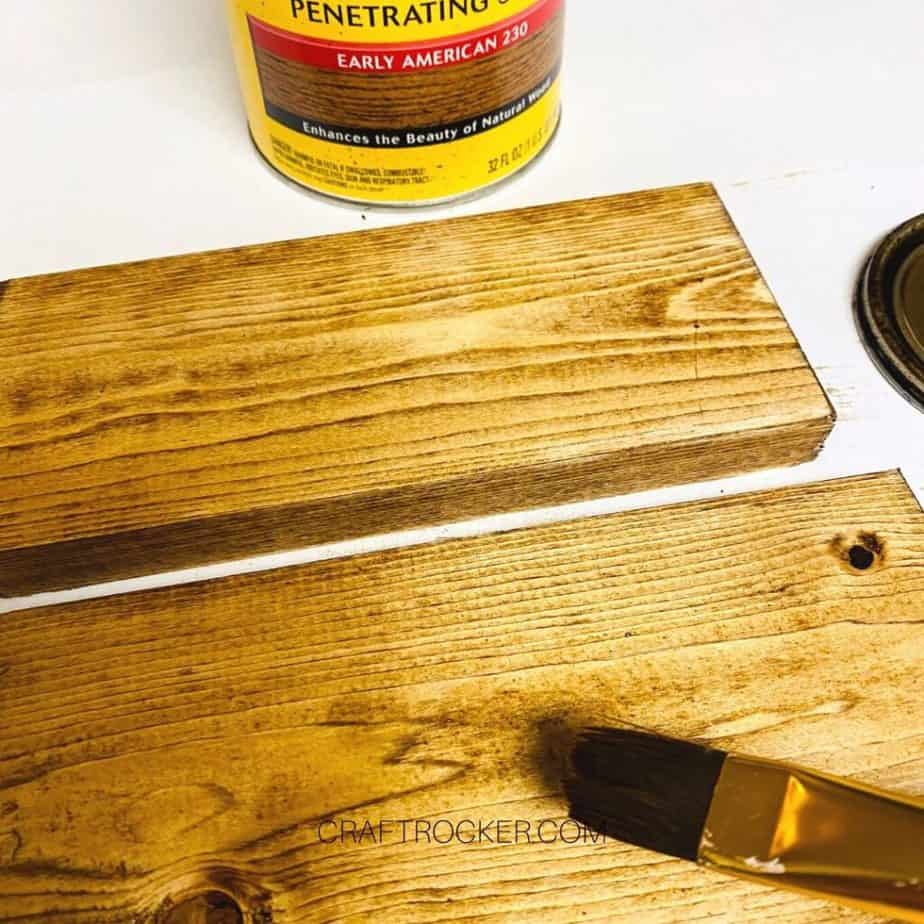

Step 1
First, start by staining the wooden pieces. Then let them dry overnight.

Step 2
After your wood pieces are dry, apply the rub-on transfers to the narrow long edges of each block with the words you want.
Make sure that you keep them aligned so that the phrase reads easily from top to bottom.

Step 3
Lastly, wrap your wood books together with twine. I recommend wrapping the twine around multiple times before knotting it.
Tips and Tricks
You can sand the edges of your wood blocks for a smoother look. If you choose to sand them, do so before starting step 1 above.
You can totally use scrap wood for this project. If you choose to use scrap wood, I definitely recommend sanding the pieces before starting the project.
Because this project uses rub-on transfers, I highly recommend sealing your wood pieces with a spray sealant. It will help your project last longer and makes it more durable for cleaning.
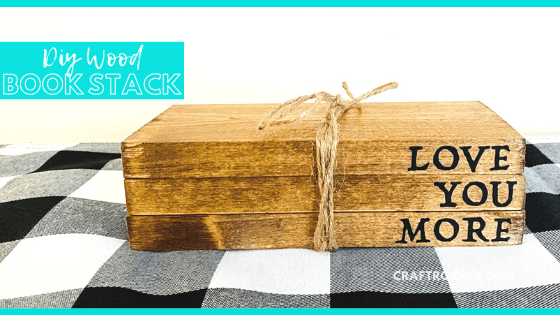
This DIY wood book stack is seriously beautiful! It’s not only easy to make and gorgeous piece of home décor, but also a great craft to make and sell.
The small price tag and high-end look are perfect for selling, gifting, or displaying.
DIY Wood Book Stack

Materials
- 3 Wood Pieces 3.5 inches wide x 8 inches length
- Early American Stain
- Dollar Tree Rub on Transfers
- Dollar Tree Jute Twine
- Paint Brush
Instructions
- First, start by staining the wooden pieces. Then let them dry overnight.
- After your wood pieces are dry, apply the rub-on transfers to the narrow long edges of each block with the words you want.
- Make sure that you keep them aligned so that the phrase reads easily from top to bottom.
- Lastly, wrap your wood books together with twine. I recommend wrapping the twine around multiple times before knotting it.
Notes
You can sand the edges of your wood blocks for a smoother look. If you choose to sand them, do so before starting step 1 above.
You can totally use scrap wood for this project. If you choose to use scrap wood, I definitely recommend sanding the pieces before starting the project.
Because this project uses rub-on transfers, I highly recommend sealing your wood pieces with a spray sealant. It will help your project last longer and makes it more durable for cleaning.
Don’t Forget to Pin It!
More Projects You’ll Love
Easy and Cheap Personalized Candles
Home Sweet Home Chalkboard Sign – Domestically Creative
