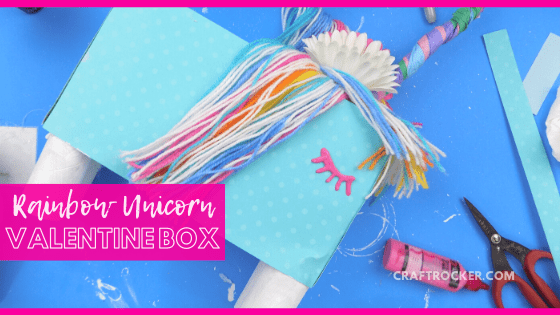
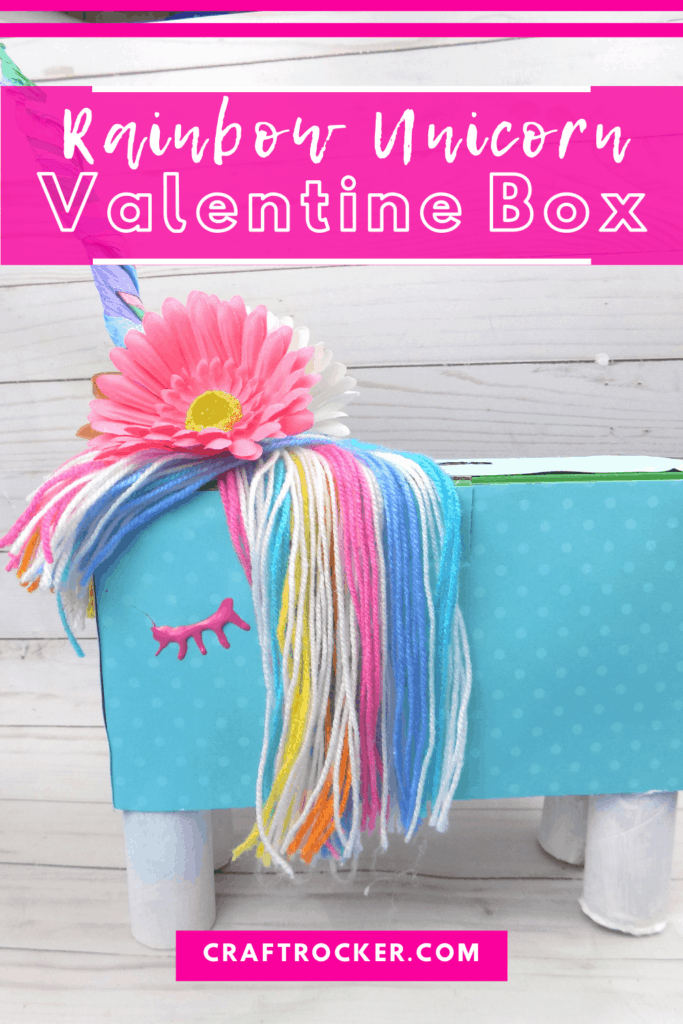
Create this rainbow unicorn Valentine box for your magic-loving kids this Valentine’s Day from a recycled apple sauce box!
Affiliate links may be used in this post. Ordering a product through these links may result in a commission at no extra cost to you. Read the full disclosure here.

Jump to What You Want


My daughter loves unicorns and rainbows and bright glittery fun things in general. That’s why I wanted to surprise her with a unicorn Valentine box for her class party.
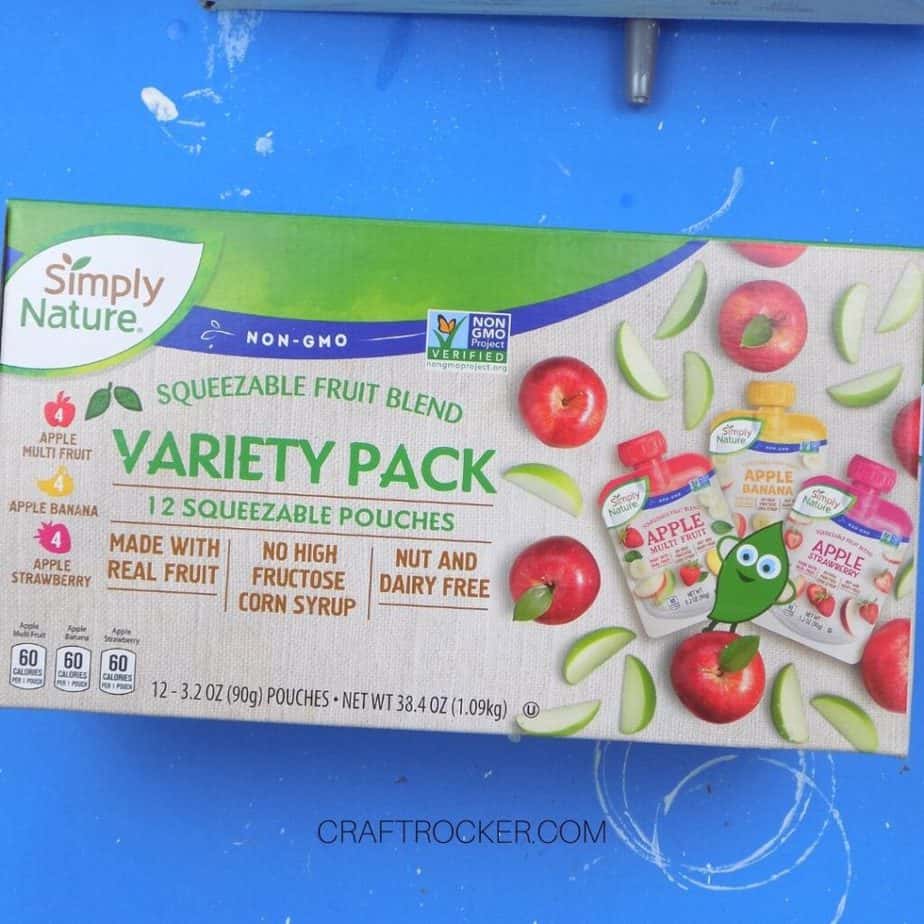
Luckily, my kids also love those apple sauce pouches so I always have these awesome large boxes on hand for craft projects.
They’re perfect for decorating to hold all of those Valentine’s Day treats!
Even better, it’s easier to make than you might think with this step-by-step tutorial.
Materials for Rainbow Unicorn Valentine Box
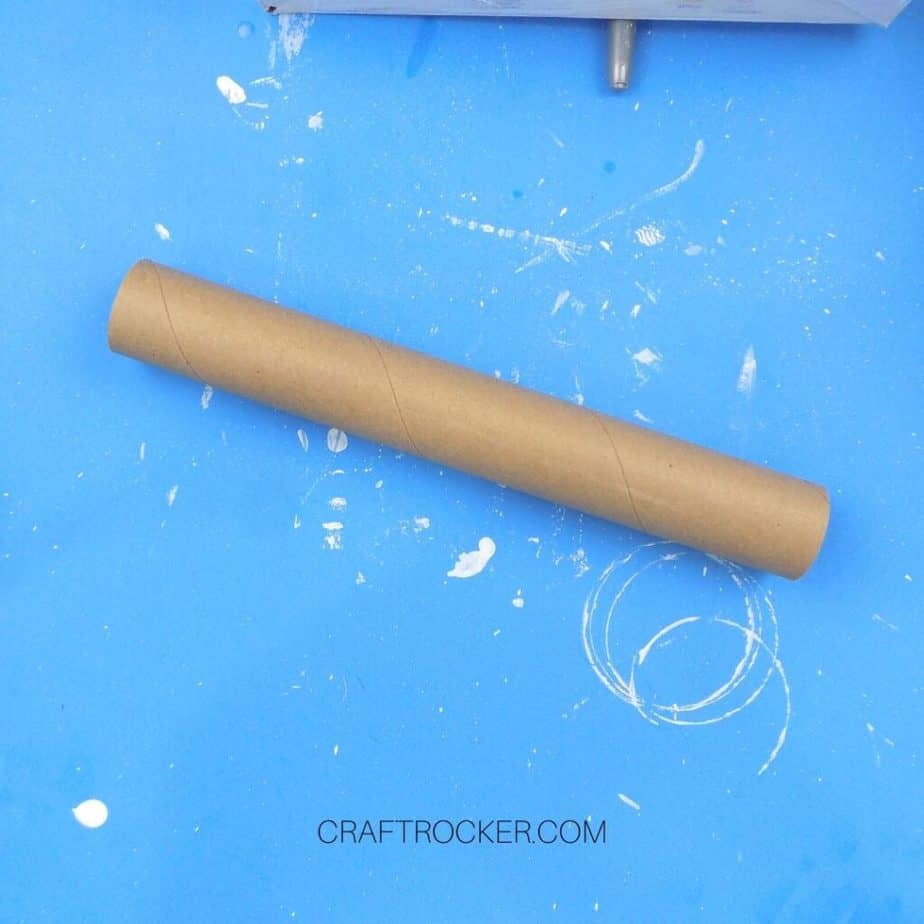
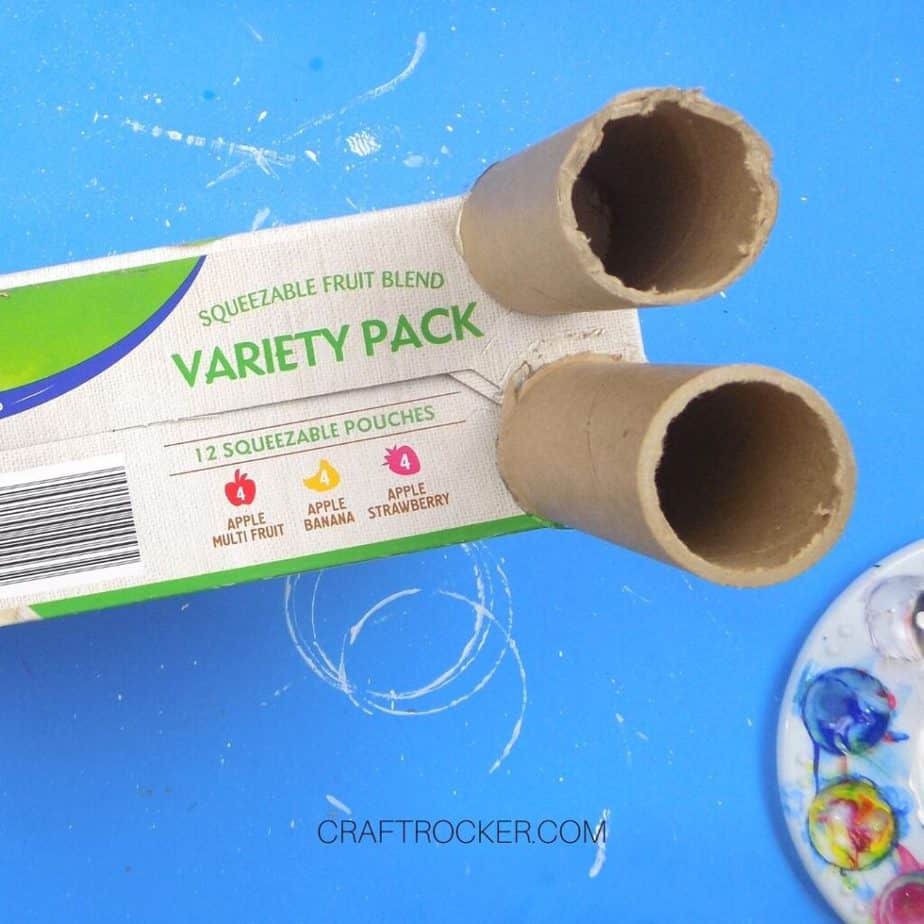
Empty Paper Towel Tube (the thicker it is, the better)
Large Apple Sauce Pouch Box (or box of similar size and shape)
Utility Knife or XActo Knife
Ruler
Hot Glue Gun and Glue Sticks
2 Sheets of 12×12 Teal Scrapbook Paper
Scissors
White Acrylic Paint
Large, Flat Paint Brush
4 Sheets of Tissue Paper in Pink, Lavender, Green, and Light Blue
Rainbow Yarn
Large Pink and White Faux Flowers
Pink Puffy Fabric Paint
Step 1
First, cut your paper towel tube into 2 equal halves.
Step 2
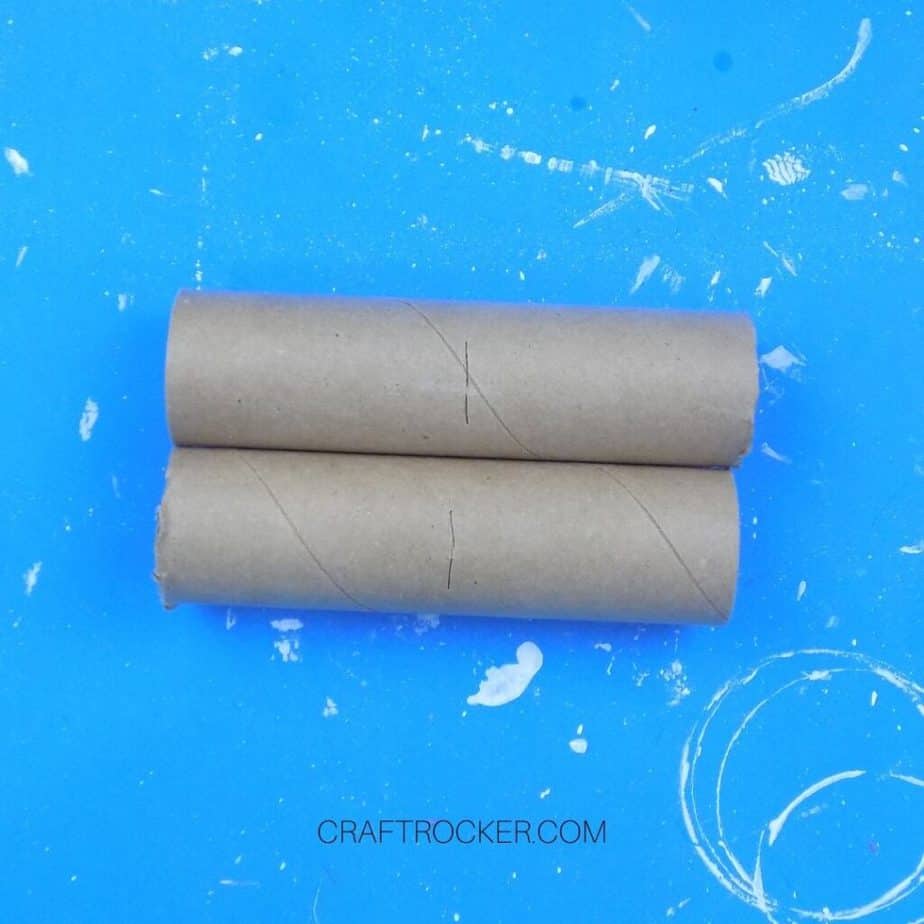
Then measure each half to find the center and cut them in half again at the center mark.
Step 3
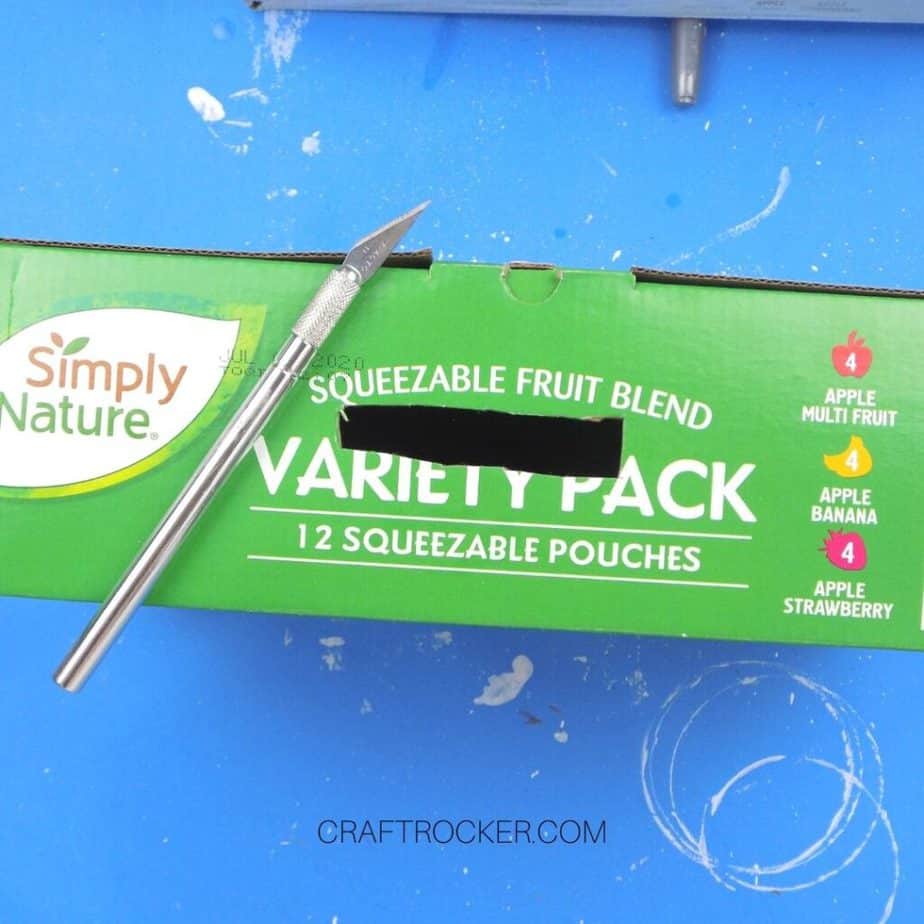
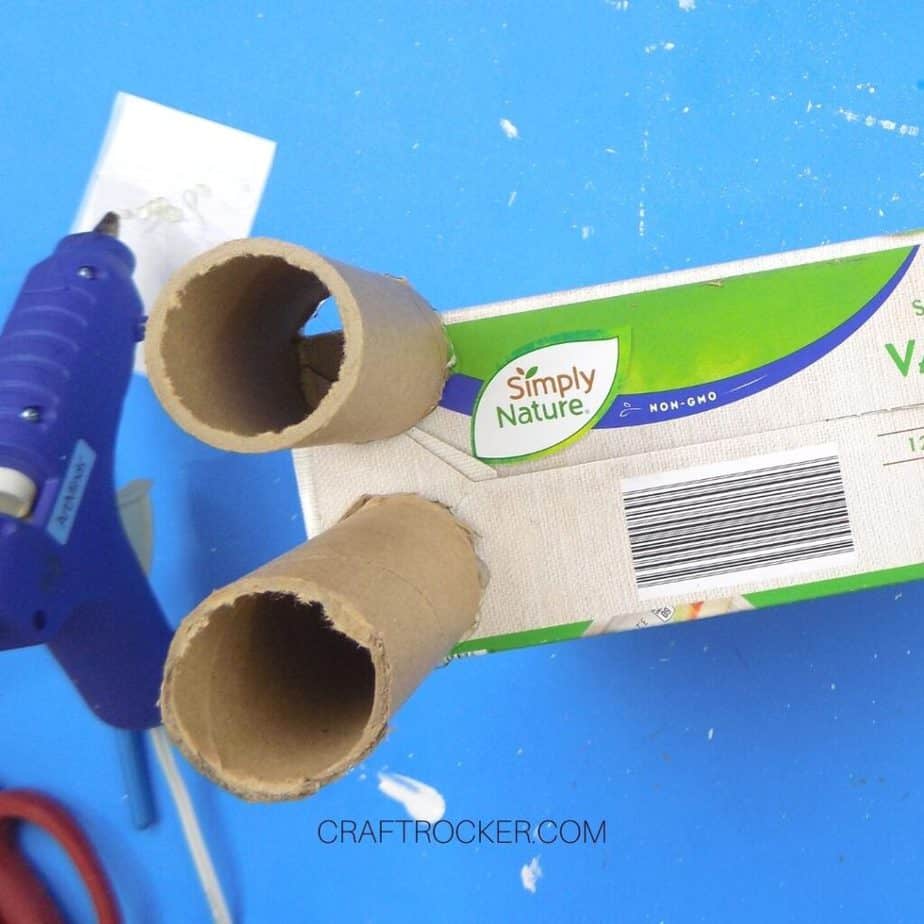
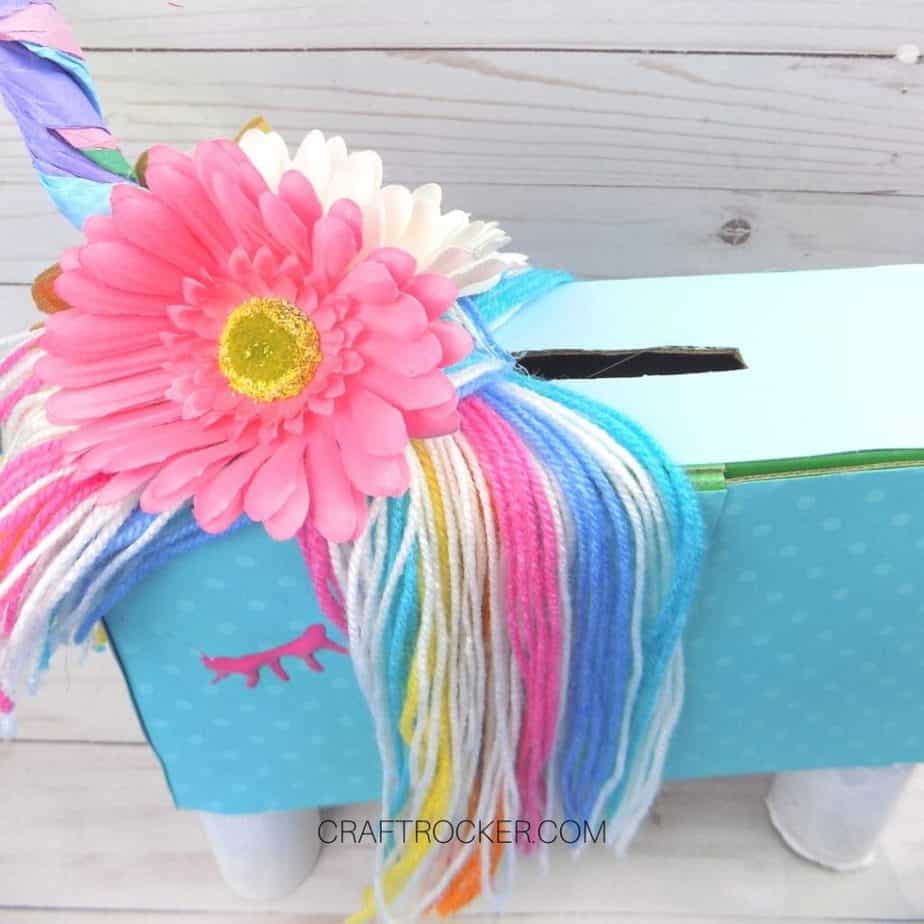
Set your cut tubes aside and use your utility knife to cut a rectangle in the lid of your apple sauce pouches box.
Make sure that you cut it large enough to fit Valentines through.
Step 4
After your rectangle is cut, flip your box over and hot glue 1 piece of your cut cardboard tube into each corner of the the box.
See the picture above for reference.

Step 5
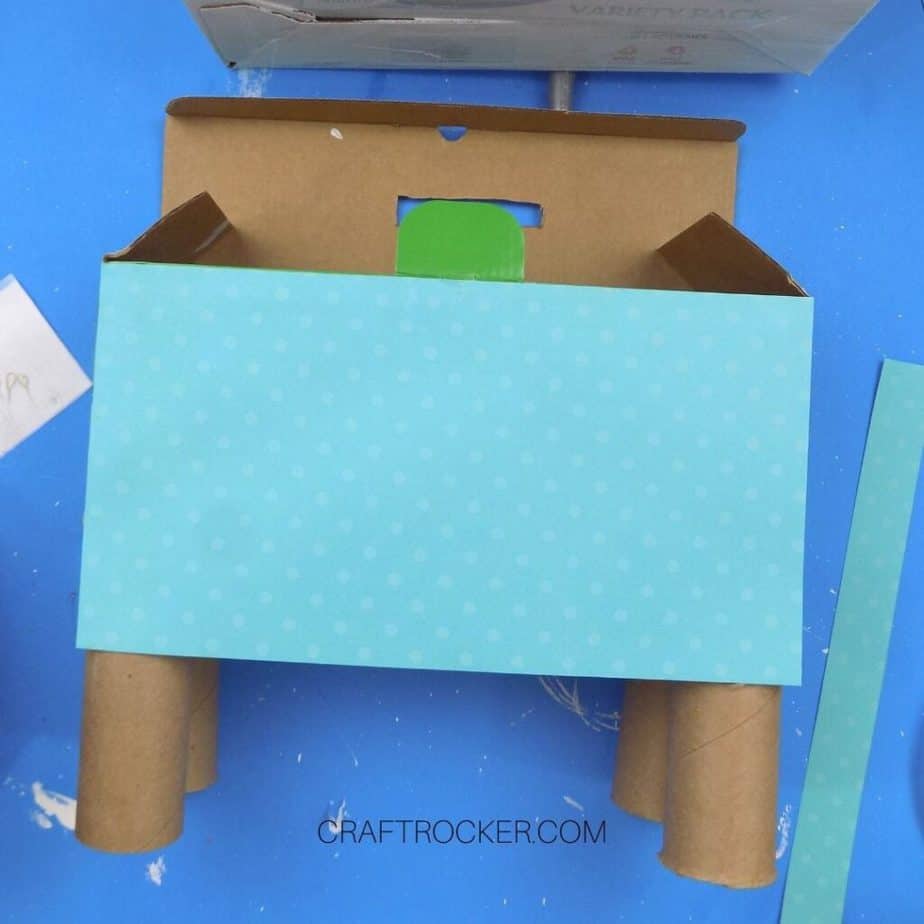
Next, trace the large side of your box onto the back side of 1 sheet of the teal scrapbook paper.
Then cut it out and glue it to the corresponding side of the box.
Step 6
Repeat on all sides of your box until each side has a piece of paper glued to it except for the bottom of the box.
Step 7
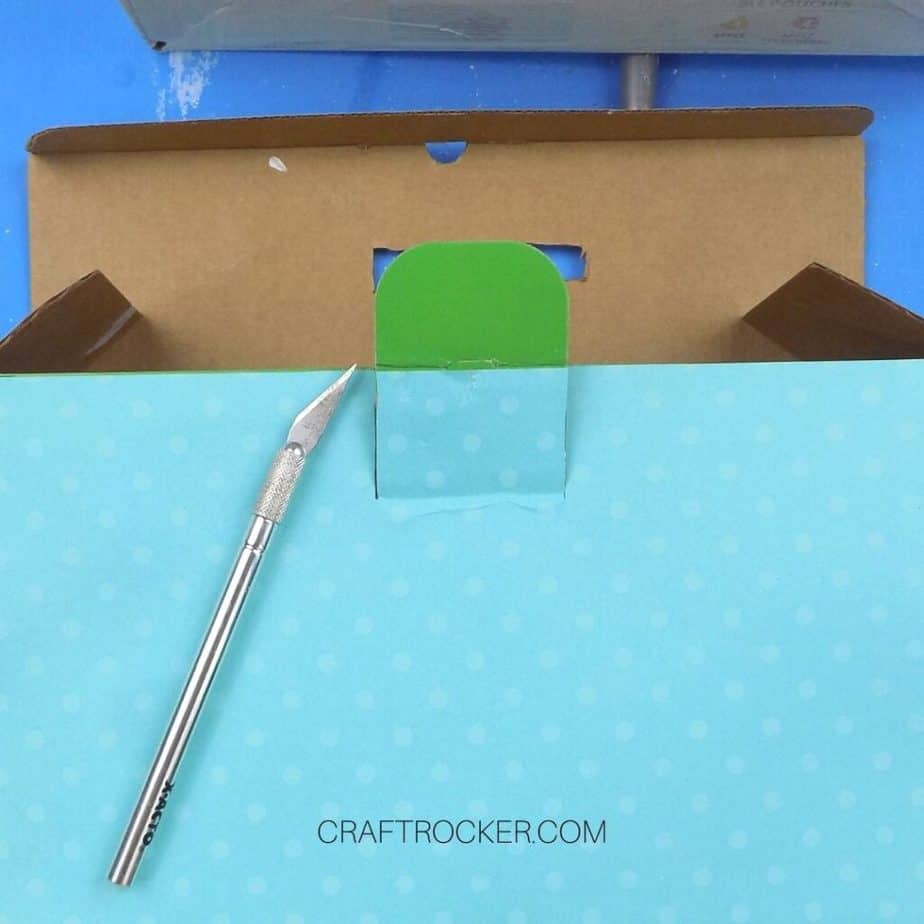
Then, go back and make sure that the necessary holes and lines are cut in the appropriate places with your utility knife.

Step 8
Next, paint the bottom of your box and the attached cardboard tubes with white acrylic paint.
You may need multiple coats to fully cover it. After painting, set it aside to dry.
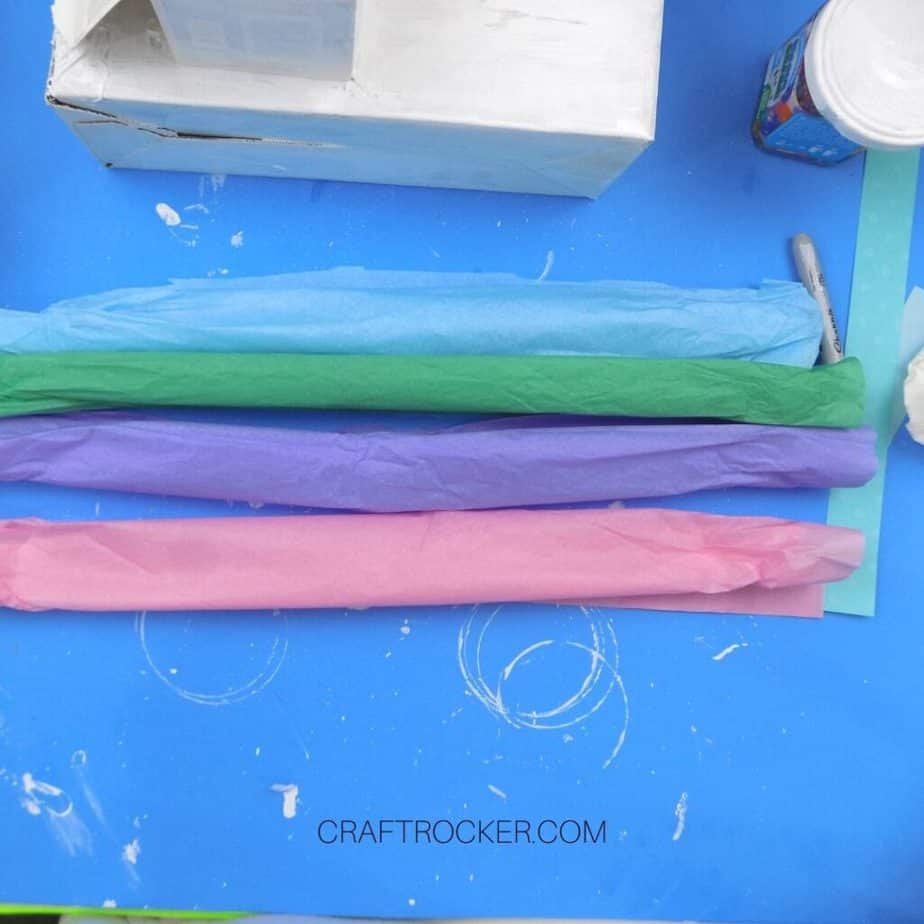
Step 9
While your box dries, pull out your sheets of tissue paper and roll them up as you see pictured above.
Each roll should be about 20 inches long.
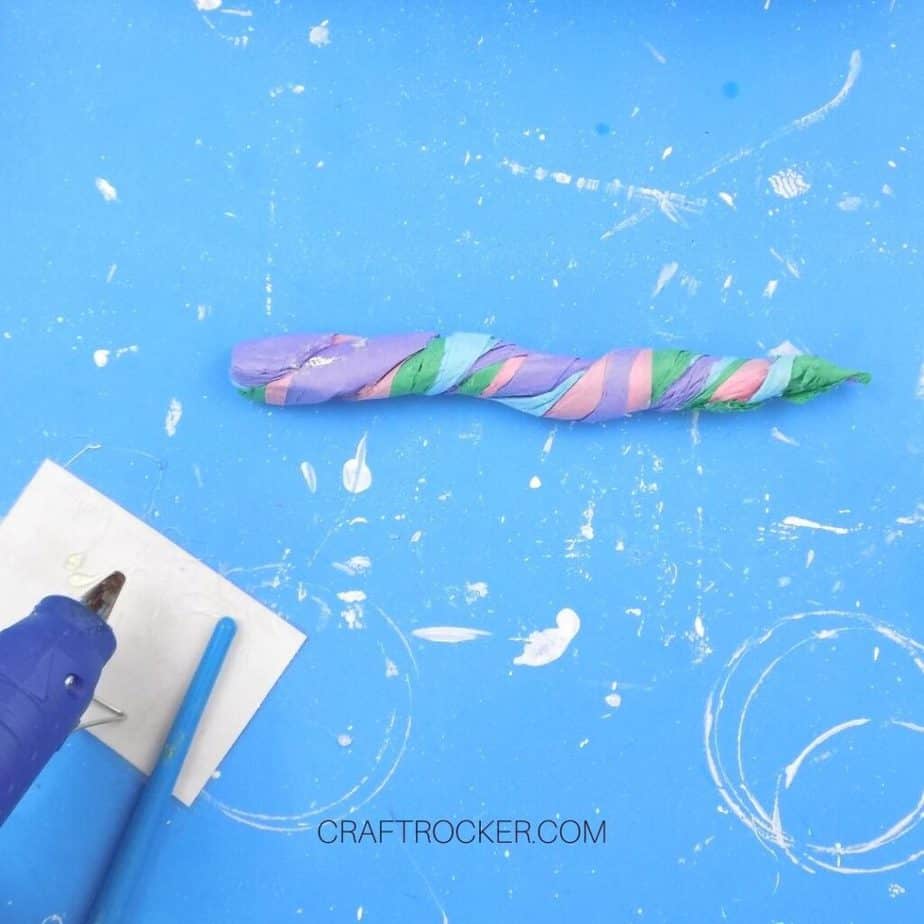
Step 10
Then twist the colorful rolls of tissue paper together to form a unicorn horn that it pointed at one end.
Try to keep the base thicker and carefully secure it with hot glue. Hold the end in place until the glue has cooled to make sure that it stays together.
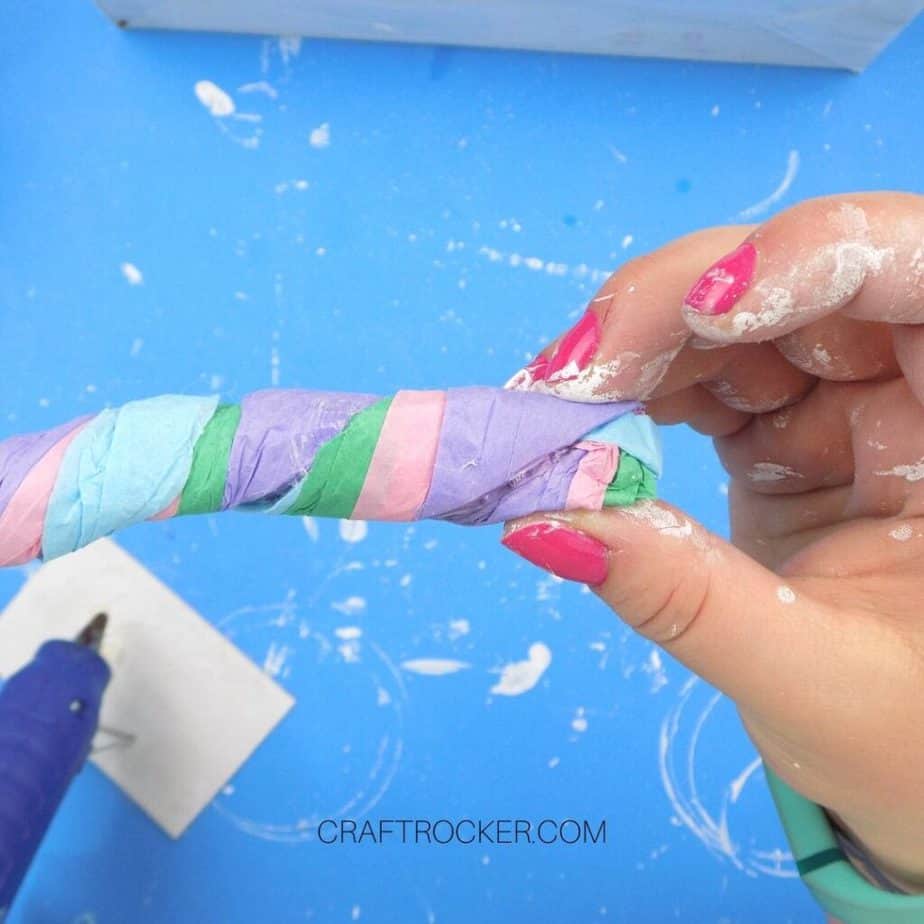
Step 11
After the glue is cool, hot glue the horn to the top of your box towards one of the shorter edges.
Leave some space between the edge and your horn though.
Again, you need to hold it in place until the hot glue cools and it is securely in place.
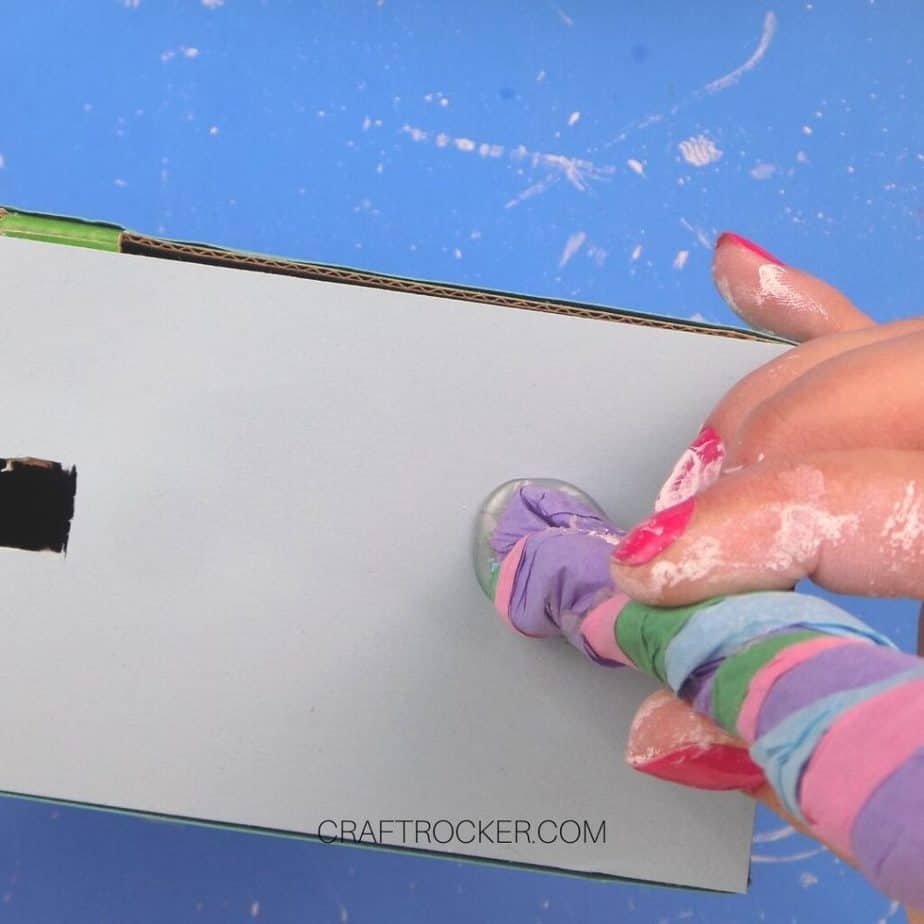
Step 12
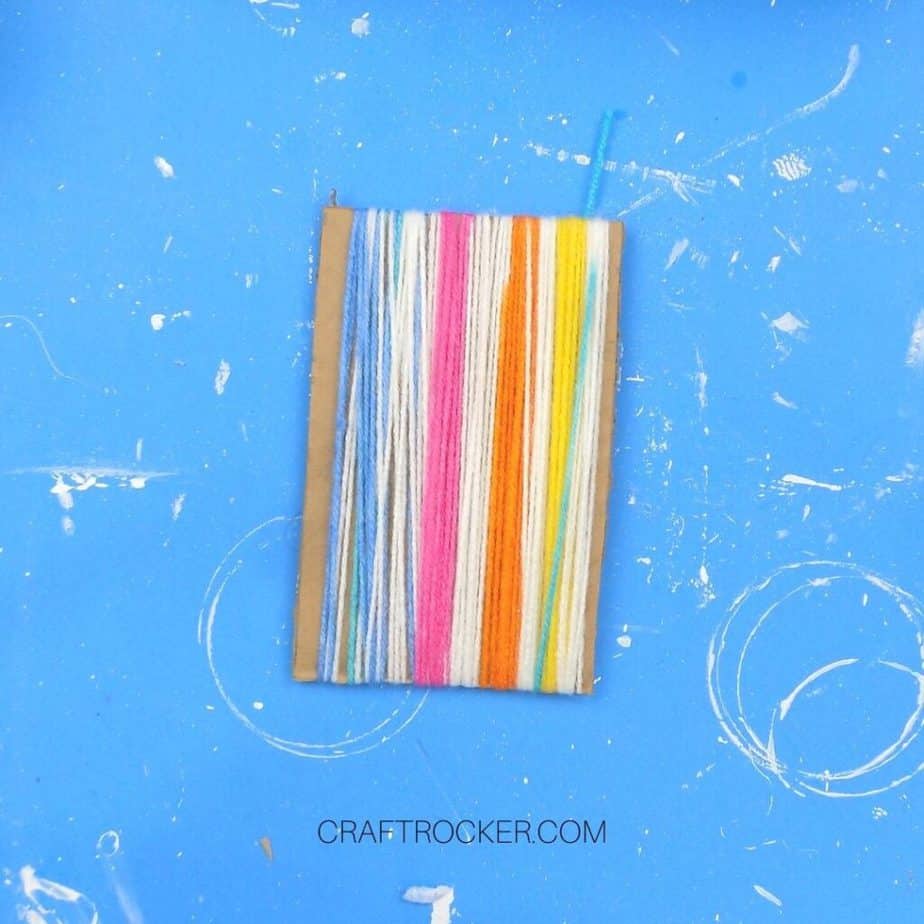
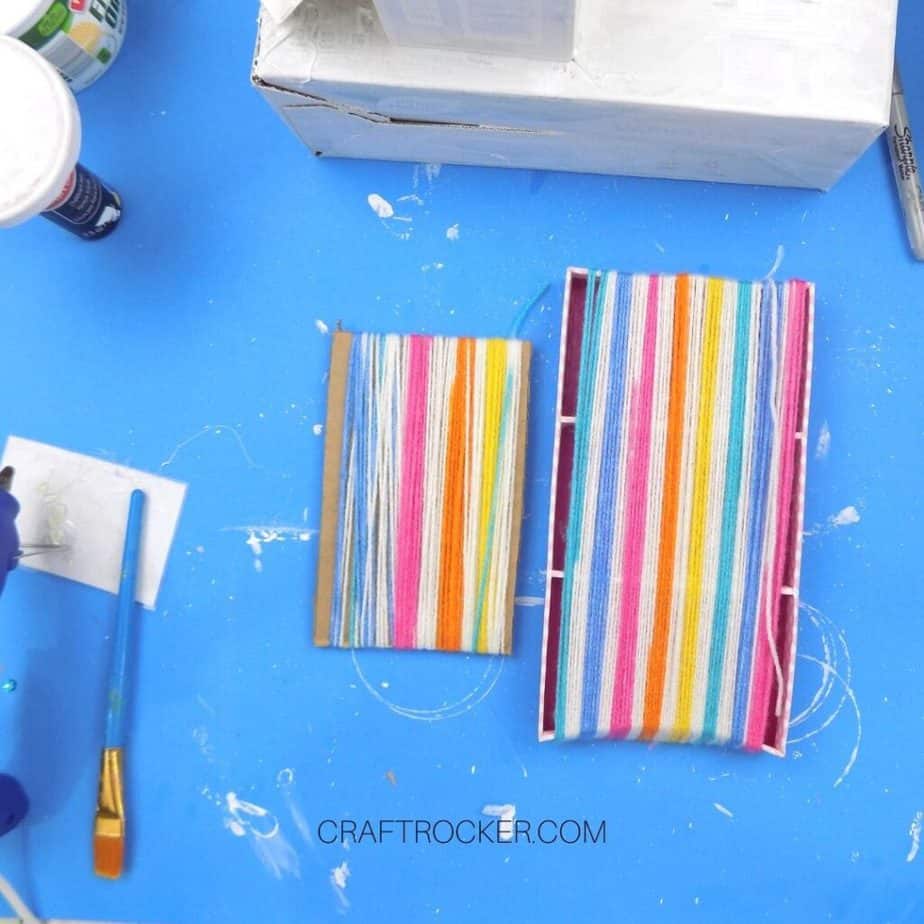
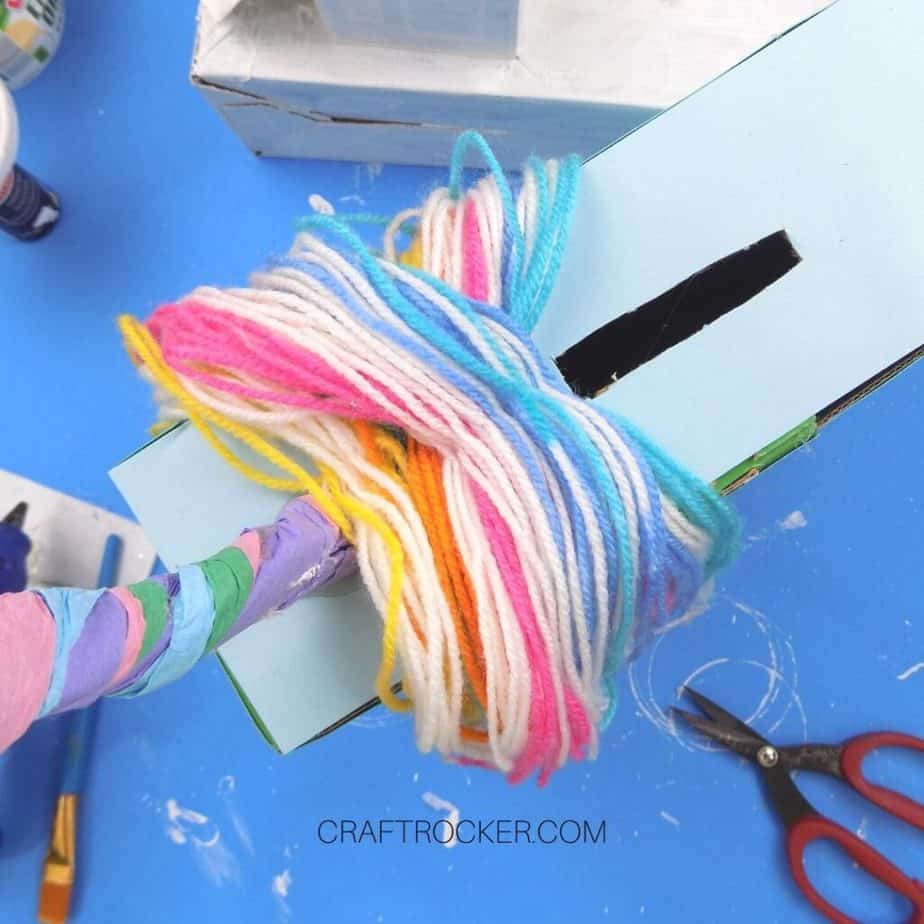
Next, wrap your rainbow yarn around 2 pieces of cardboard. Any 2 pieces will work as long as one piece is longer than the other by an inch or 2.
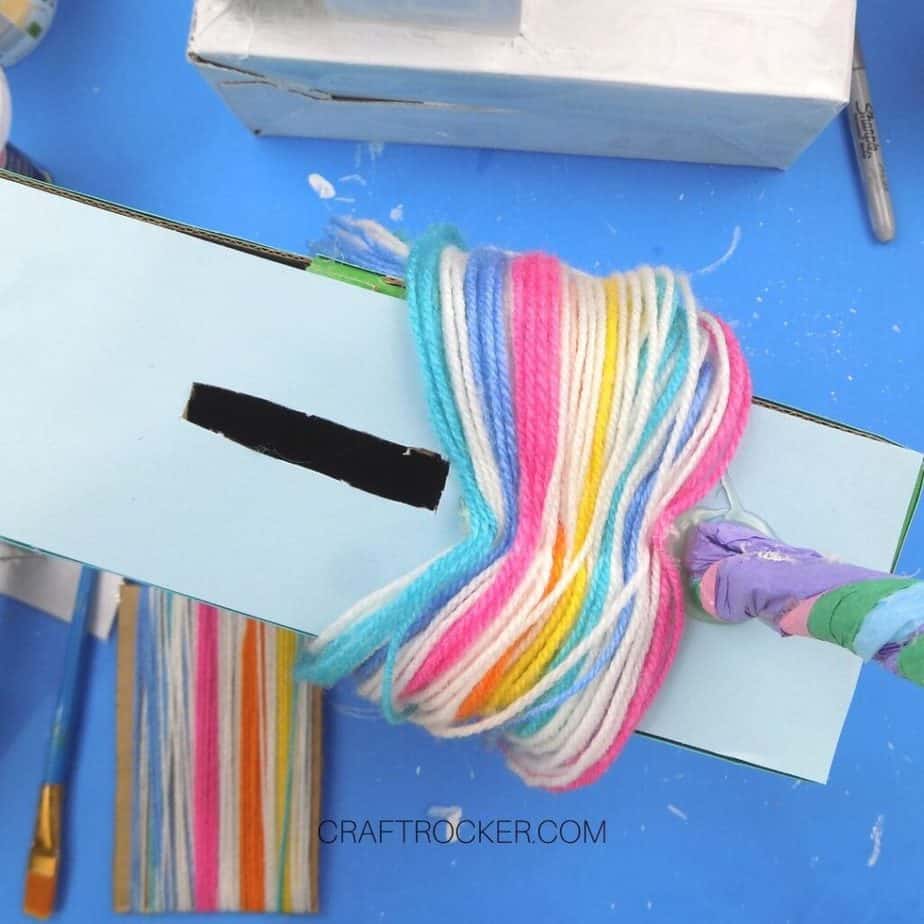
Step 13
Once your yarn is wrapped, carefully cut through the yarn on one of the shorter edges of the longest wrapped cardboard.
Then hot glue the center of your yarn pieces to the top of your box between the horn and the cut out rectangle.
Tip:
This is easiest if you hold your yarn in place to the piece of cardboard after you cut it and use it to press the yarn centers into the line of hot glue.
Step 14
Then cut the ends of your yarn on the second, small cardboard piece and hot glue the center of them on top of the long yarn on your box.
Be sure to press it firmly to make sure that it is well secured. Then pull the short yarn pieces forward on the box to form bangs.
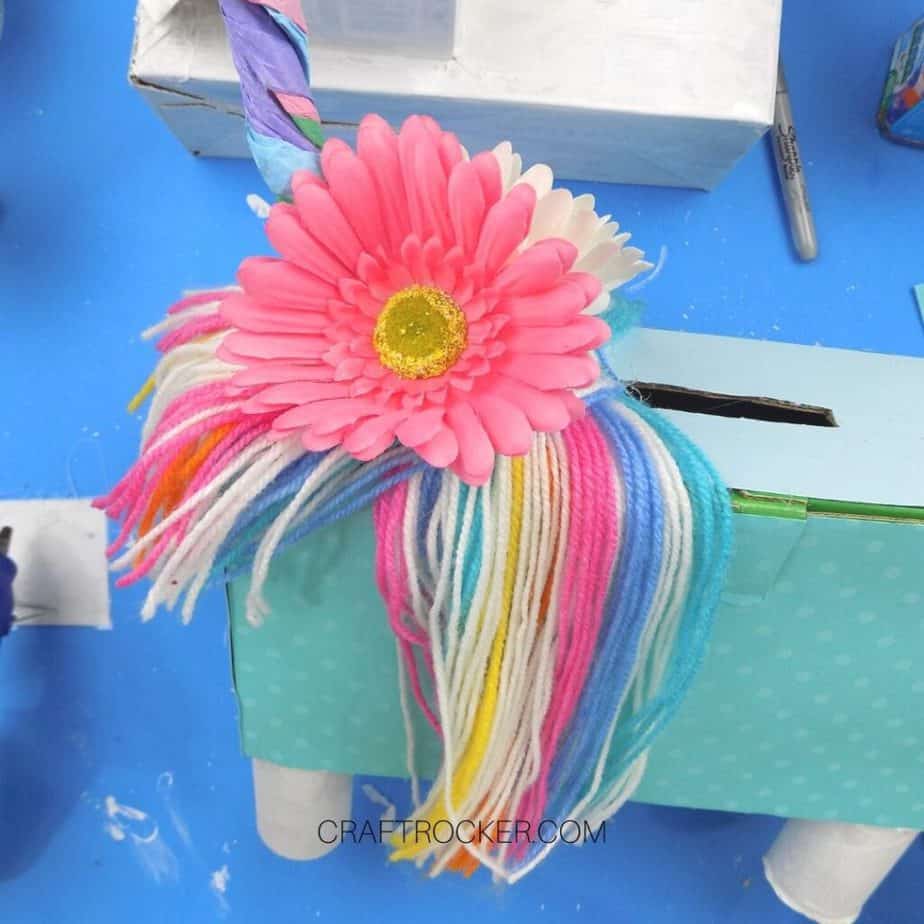
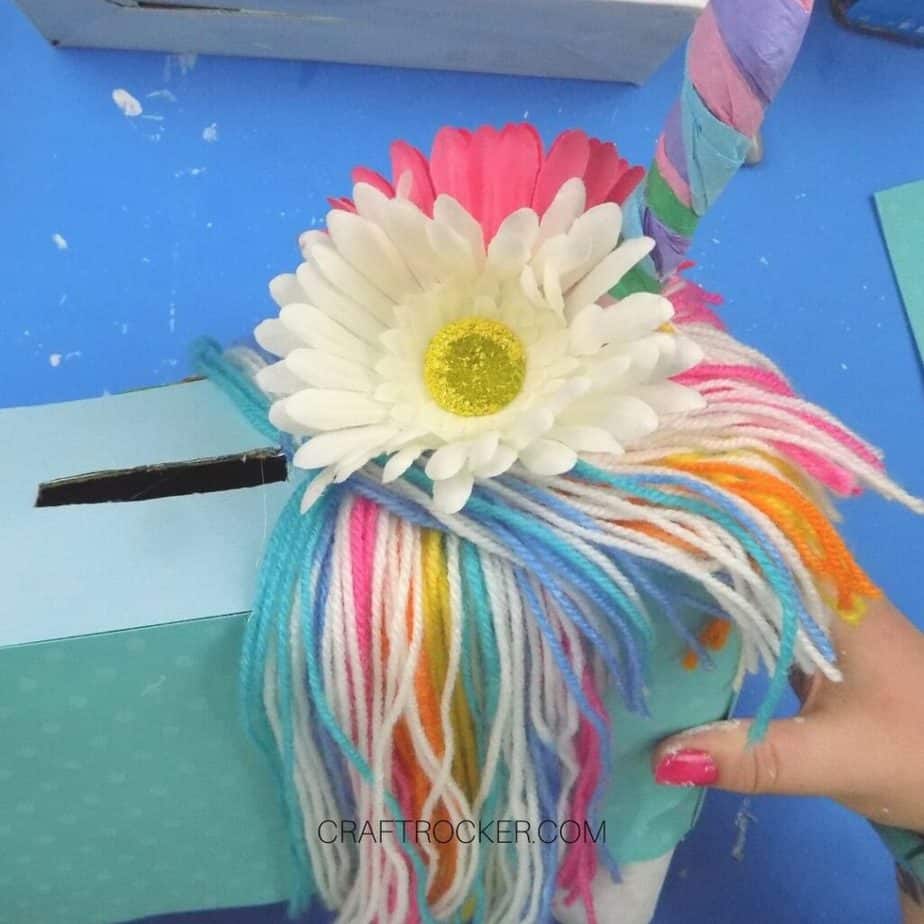
Step 15
After your yarn is attached to your unicorn box, hot glue your flowers by the base of your horn.
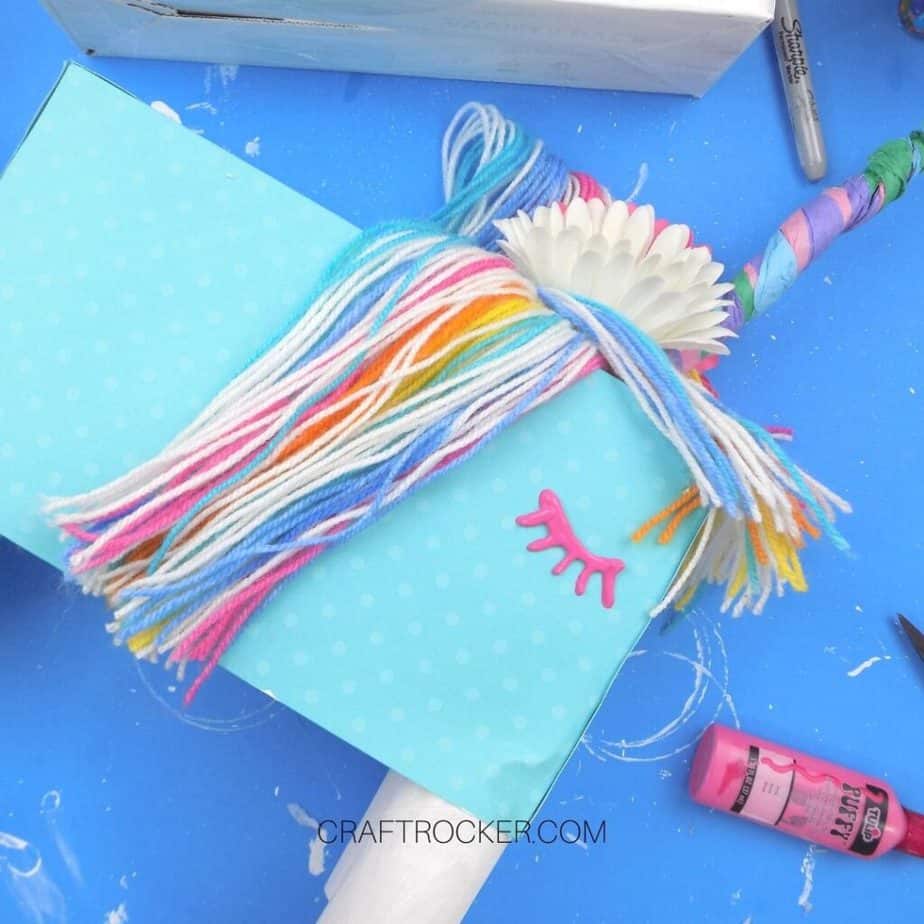
Step 16
Lastly, add eyes to either side with your pink puffy fabric paint. See the photo above for reference.
Allow your paint to dry completely before using it.
Tips for Success
Do yourself a favor and check that the box opens and closes appropriately after you add the scrapbook paper before attaching anything else. It’s much easier to cut the paper before the other details are added.
When attaching the yarn, use your cardboard pieces as a tool to press the centers of the strands into the line of hot glue on your box. Once they are attached in the right spot, you can go back with your fingers to press them more firmly into the glue.
Prevent the eyes from running by only painting one side at a time and letting that side dry completely before flipping it over and painting the second. If you set the box right-side up before the paint is dry, it will run and pool messing up your design.
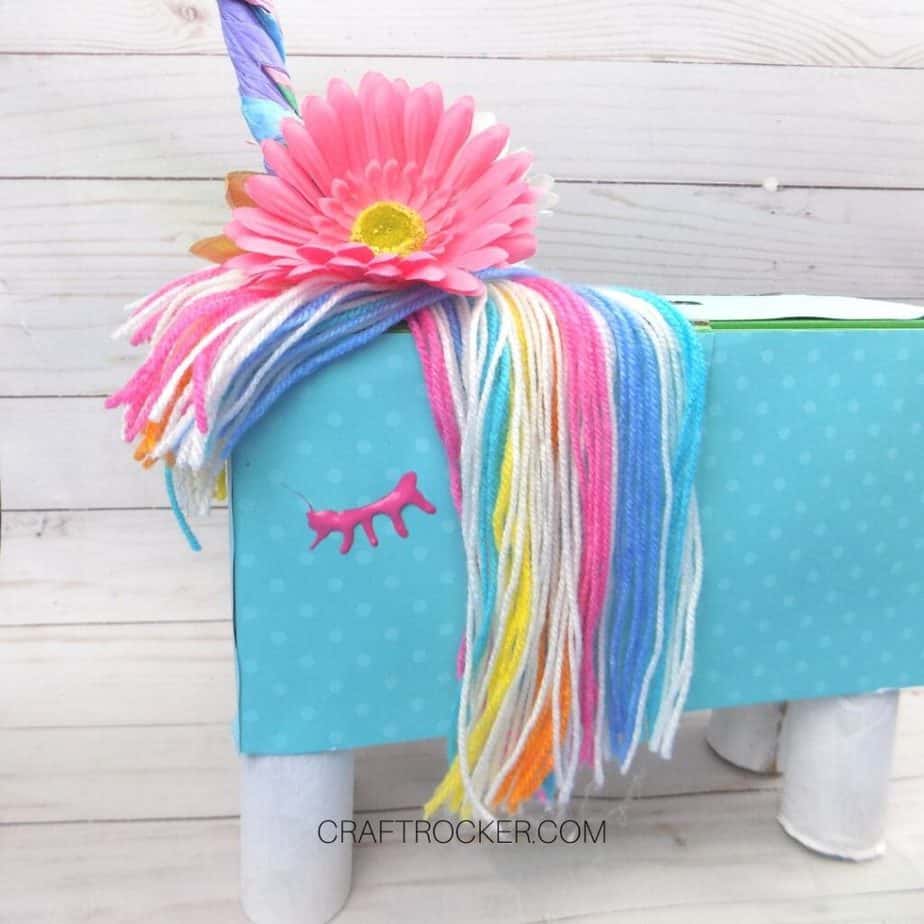
This rainbow unicorn Valentine box is so adorable! It’s perfect for your little unicorn lover.
The latched lid also makes it super easy to access all of the Valentine’s treats later.
Don’t Forget to Pin It!
More Crafty Ideas for You
How to Make Tissue Paper Pom Poms
4 DIY Budget Friendly Valentines Decorations – Cookies, Coffee, and Crafts
