Make this easy DIY Easter egg topiary on a budget with a quick trip to the Dollar Tree! It’s so easy to make and comes together in a flash with your handy dandy hot glue gun.
Affiliate links may be used in this post. Ordering a product through these links may result in a commission at no extra cost to you. Read the full disclosure here.

Jump to What You Want
How to Make a DIY Easter Egg Topiary
Printable Easter Egg Topiary Tutorial
Easter is literally less than 3 weeks away and I am loving crafting for it this year.
Our home is going to be bursting with color for a totally cheerful and fun holiday together. Even the baskets are bright and colorful!
I want to infuse the atmosphere with a light and airy joy that brings us together for fun and celebration. Frankly, I think we all need some of that right now.

What’s awesome is that projects like this Easter egg topiary let me accomplish that on a budget, plus, hello, I get to craft! Yay!
Follow this easy step-by-step tutorial to make your own gorgeous holiday décor this season while saving money for those basket-stuffers.

DIY Easter Egg Topiary Materials
Dollar Tree Safety Cone (make sure you get the large one, not the mini set of them)
Reindeer Moss – Dollar Tree
Regular Moss – Dollar Tree
Hot Glue Gun and Glue Sticks
5 packages of Dollar Tree Easter Eggs
Waverly White Chalk Paint (Optional – I painted the cone white in case you could see any but the moss covered everything well)
Paint brush (Optional – if you paint the cone)

Step 1 – Paint Your Safety Cone (Optional)
First, paint your safety cone white with the Waverly white chalk paint. Make sure that you allow the paint to dry completely before moving on.

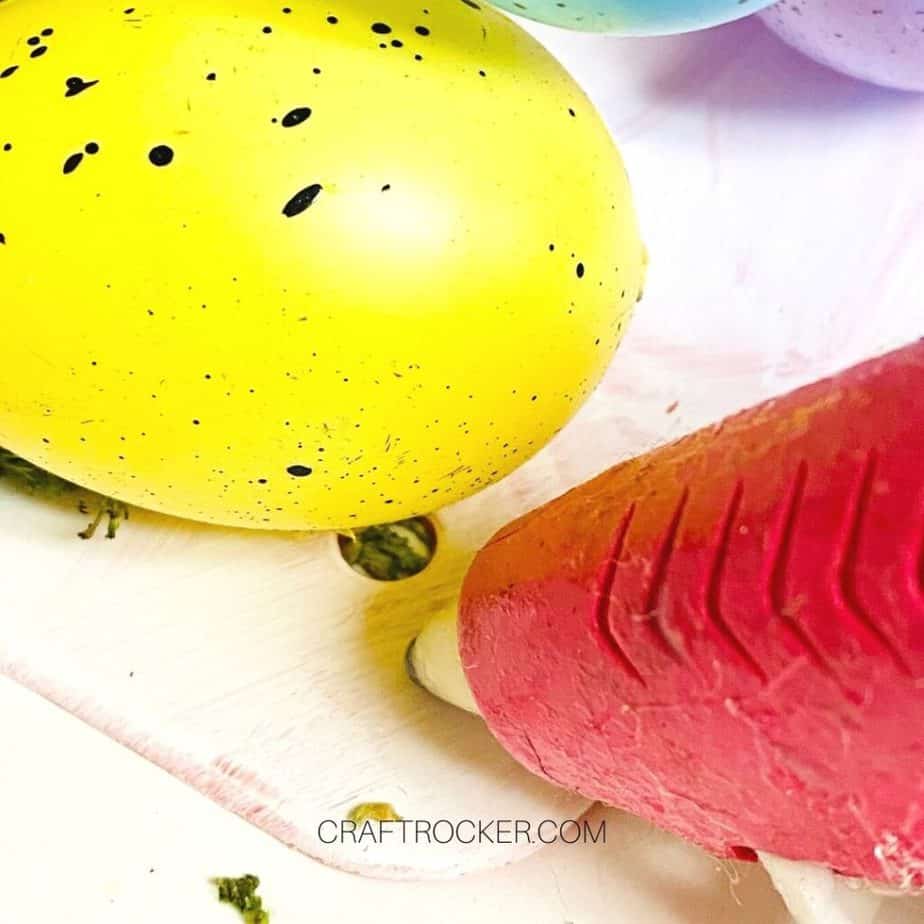
Step 2 – Glue on Your Eggs
After the paint is completely dry, add hot glue to the eggs and place them randomly on the safety cone. Try to spread them out so that your entire cone has eggs on it from every angle.


Step 3 – Add Your Moss
Once all of the eggs are glued on, start adding the moss to fill in between the eggs. Attach your moss by placing hot glue directly on the cone and then press the moss on top.
Continue until all the areas of your cone in between the eggs are covered with moss.

Tips and Tricks
Make sure you make this project on a protected workspace. The moss can be very messy and I’d hate for you to get it all over your table and floor. More work to clean up later.
If an egg comes off while you are gluing your moss to the cone, don’t panic. Simply glue it back to the cone with more hot glue. That’s one of the perks of using inexpensive materials to make this project.
Some stores didn’t have the reindeer moss. If that is the case for you then regular moss will totally work for this topiary. Simply keep in mind that the end result might not look exactly as pictured in the tutorial, but will still be beautiful.

Printable DIY Easter Egg Topiary Tutorial
Easy DIY Easter Egg Topiary

This easy DIY Easter egg topiary is a gorgeous addition to your spring mantle this season. Even better, all the materials you need to make it can be found at your local Dollar Tree!
Materials
- Dollar Tree Safety Cone (make sure you get the large one, not the mini set of them)
- Reindeer Moss - Dollar Tree
- Regular Moss - Dollar Tree
- Hot Glue Gun and Glue Sticks
- 5 packages of Dollar Tree Easter Eggs
- Waverly White Chalk Paint (Optional - I painted the cone white in case you could see any but the moss covered everything well)
- Paint brush (Optional - if you paint the cone)
Instructions
- First, paint your safety cone white with the Waverly white chalk paint. Make sure that you allow the paint to dry completely before moving on. This step is optional.
- After the paint is completely dry, add hot glue to the eggs and place them randomly on the safety cone. Try to spread them out so that your entire cone has eggs on it from every angle.
- Once all of the eggs are glued on, start adding the moss to fill in between the eggs. Attach your moss by placing hot glue directly on the cone and then press the moss on top.
- Continue until all the areas of your cone in between the eggs are covered with moss.
Notes
- If an egg comes off while you are gluing your moss to the cone, don’t panic. Simply glue it back to the cone with more hot glue. That’s one of the perks of using inexpensive materials to make this project.
- Some stores didn’t have the reindeer moss. If that is the case for you then regular moss will totally work for this topiary. Simply keep in mind that the end result might not look exactly as pictured in the tutorial, but will still be beautiful.

This easy DIY Easter egg topiary is a gorgeous addition to your spring mantle this season. Use it to create a beautiful spring vignette or make 2 of them and bookend your mantle decorations by placing one on either side.
Don’t Forget to Pin It!

More Easter Crafts to Check Out
Easy and Adorable Bunny Butts Craft
Whimsical Easter Bunny Flower Pail Décor – Intelligent Domestications
