Easily make your own custom resin phone holders with these step-by-step tutorials!
Affiliate links may be used in this post. Ordering a product through these links may result in a commission at no extra cost to you. Read the full disclosure here.
Jump to What You Want
My husband has his phone going a lot. Whether he’s washing dishes or waiting for queries to run on the computer, he usually has a podcast or show going in the background.
I wanted to give him a convenient way to display his phone while he does this because currently he sits it flat on a counter or at his desk.
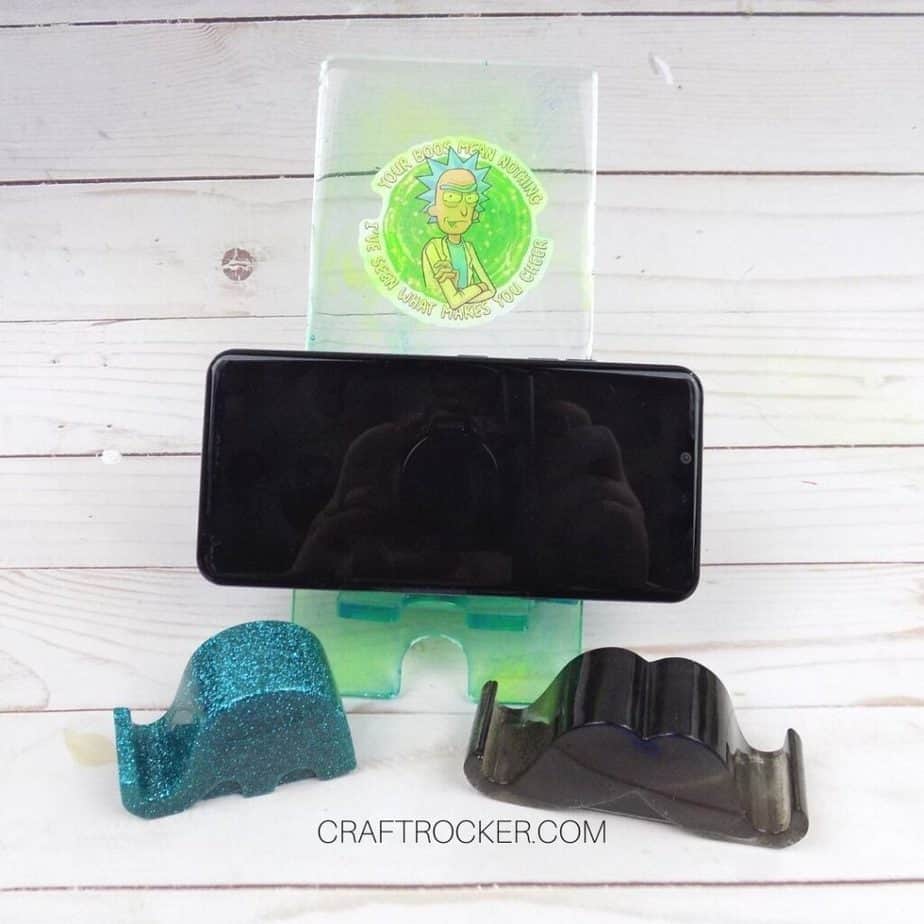
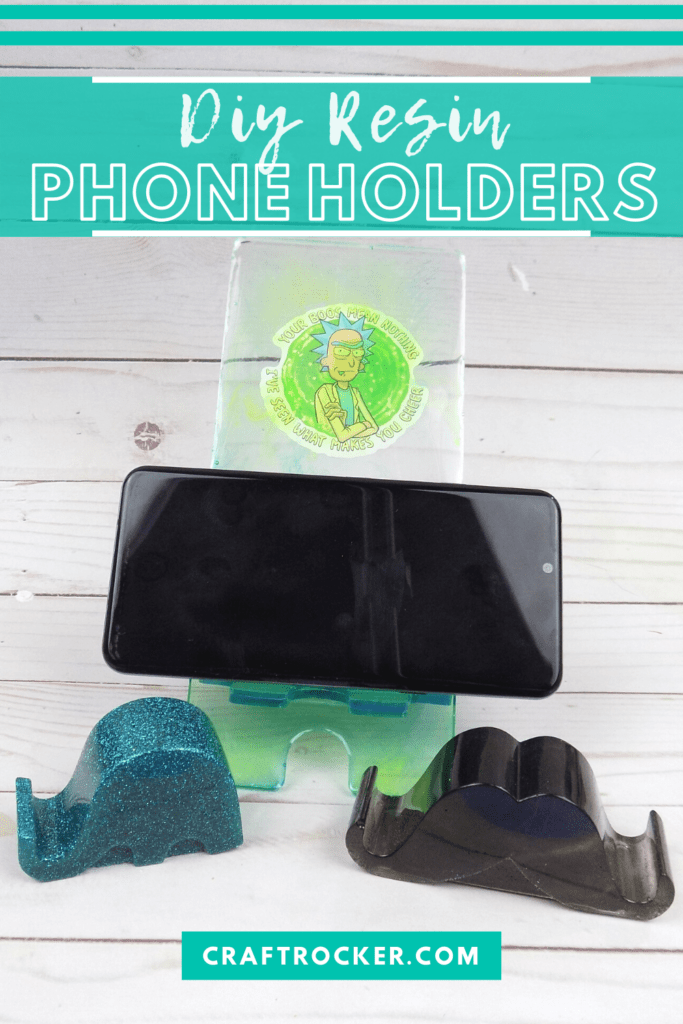
Of course, he’s also totally into Rick and Morty so that was a fun way to personalize it just for him.
I see a Hello Kitty one for me in the future, for sure. Until then, you can make one customized to your tastes with these easy tutorials.

Cute Phone Stands Materials
Stir Sticks for Mixing
Teal Glitter
Black Epoxy Dye (I used the one from this set)
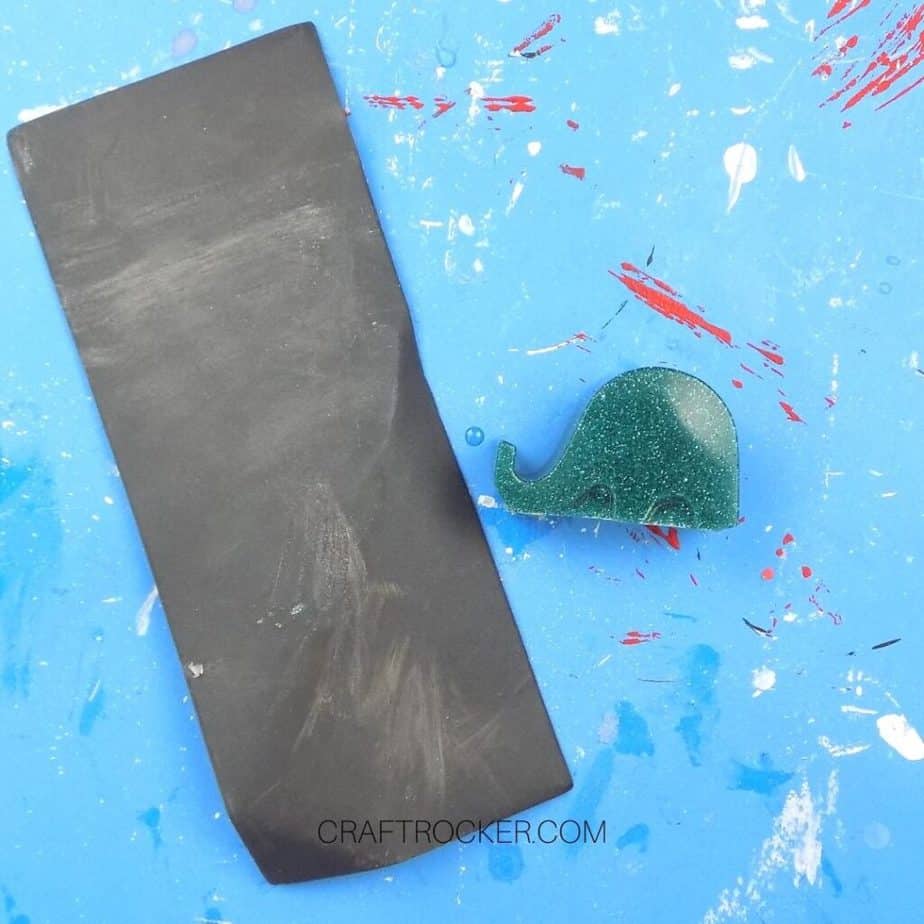
Fine Grit Sand Paper (400 grit or higher)
Note: Always wear protective gloves when working with resin.
Step 1
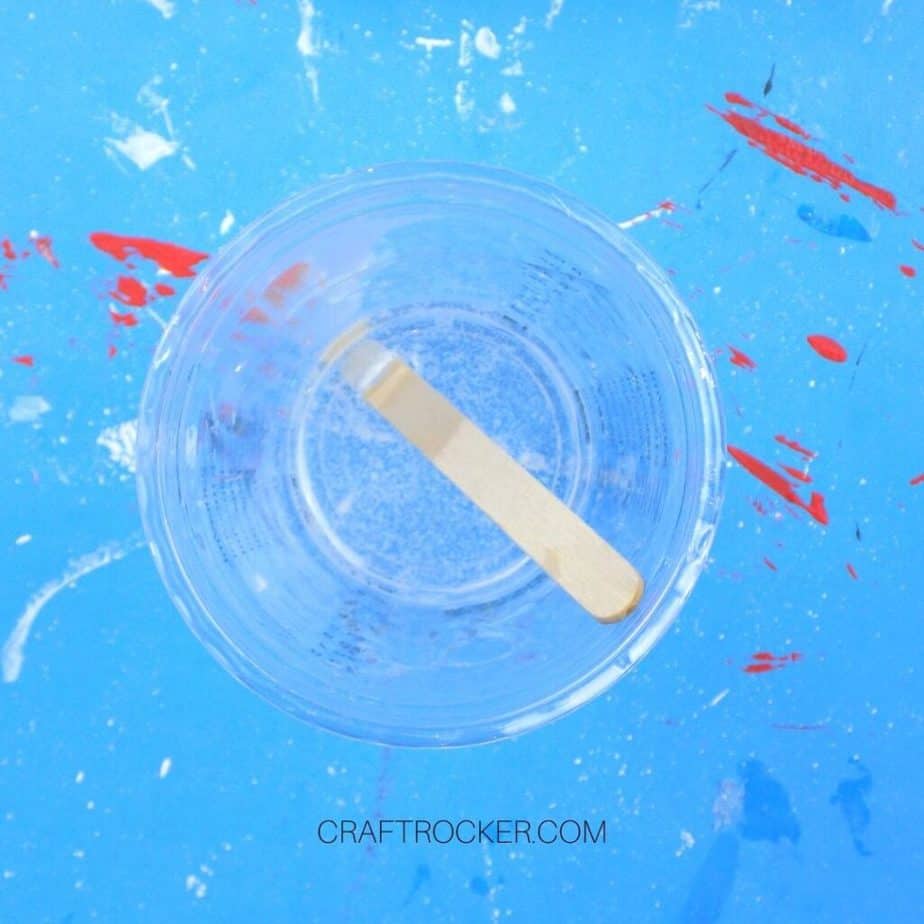
First, mix 2-3 ounces each of parts A and B of your casting resin. Then divide the mixed resin in half in separate cylinders.
Step 2
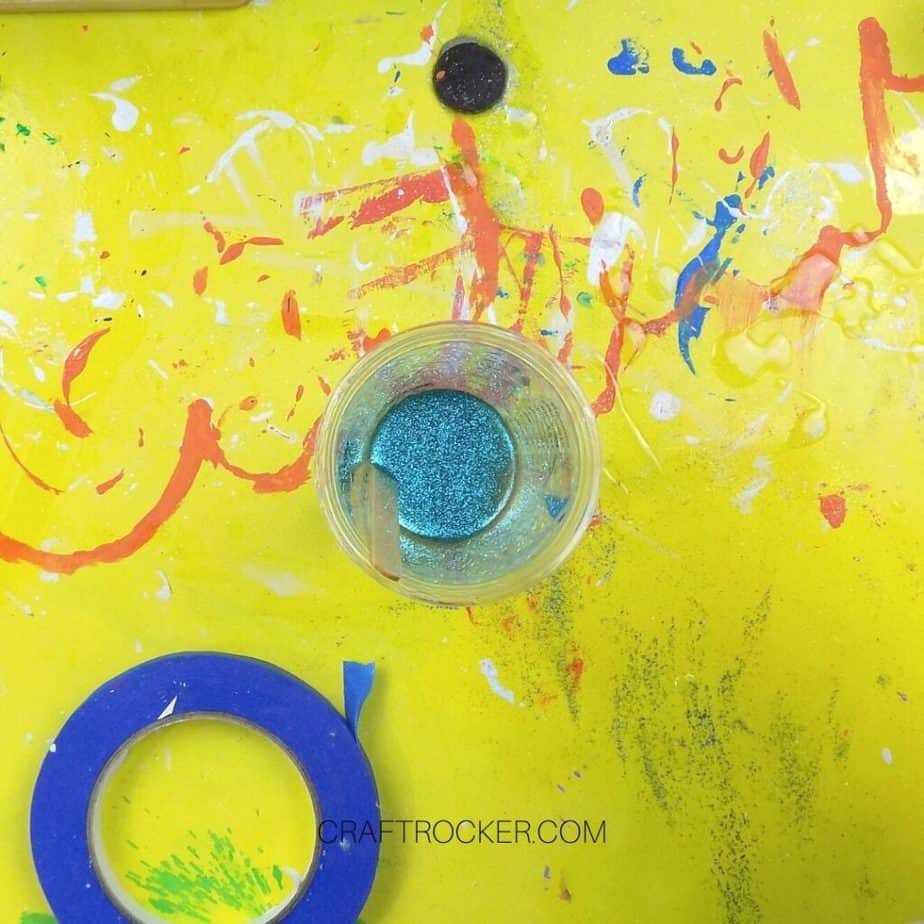
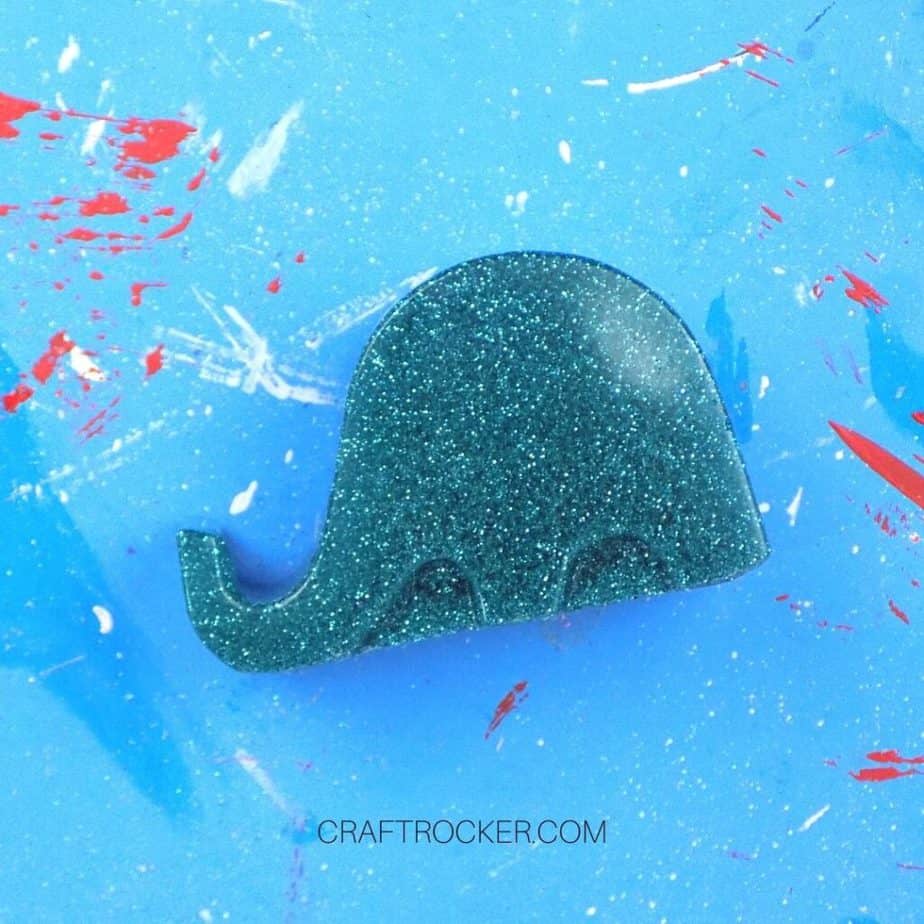
Next, add your desired amount of teal glitter to one of the cylinders of resin and stir to thoroughly combine it.
Step 3
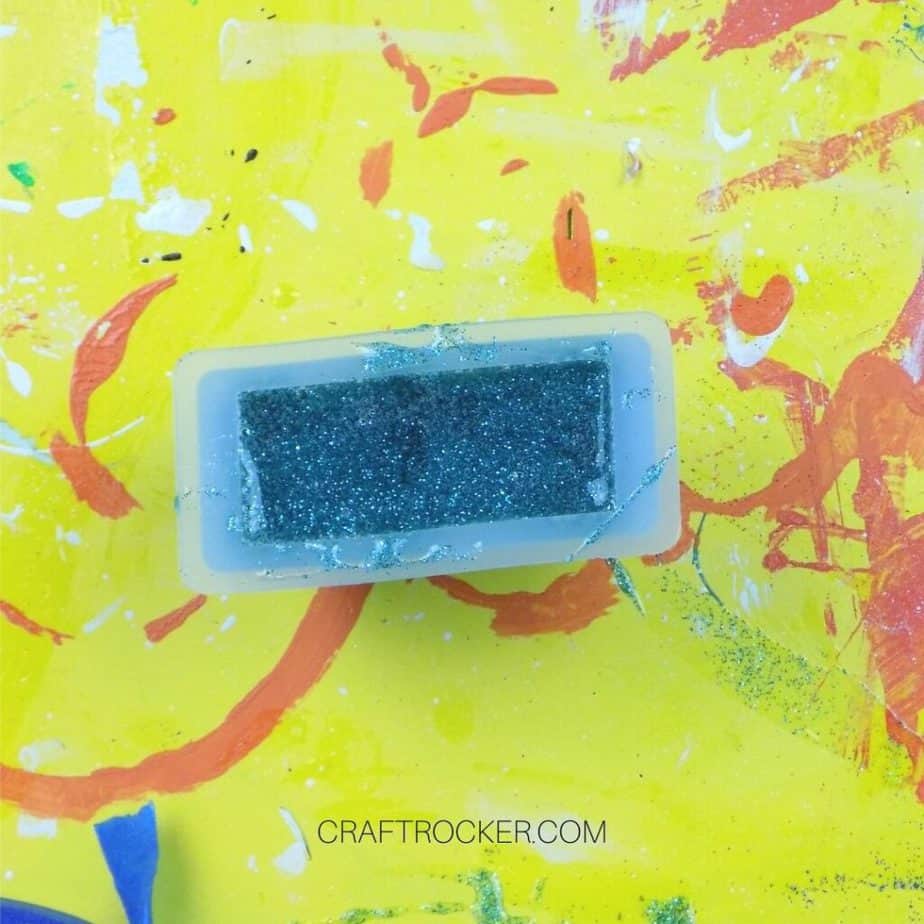
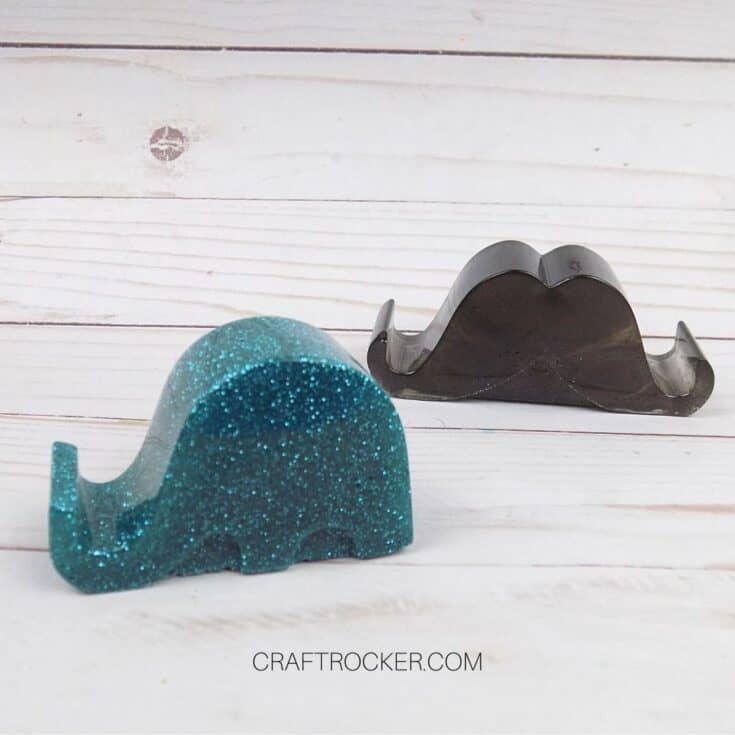
Then carefully pour your glitter resin into the elephant silicone mold. Be sure to fill it completely.
Step 4
Set the mold aside on a flat surface in a dry area to cure.
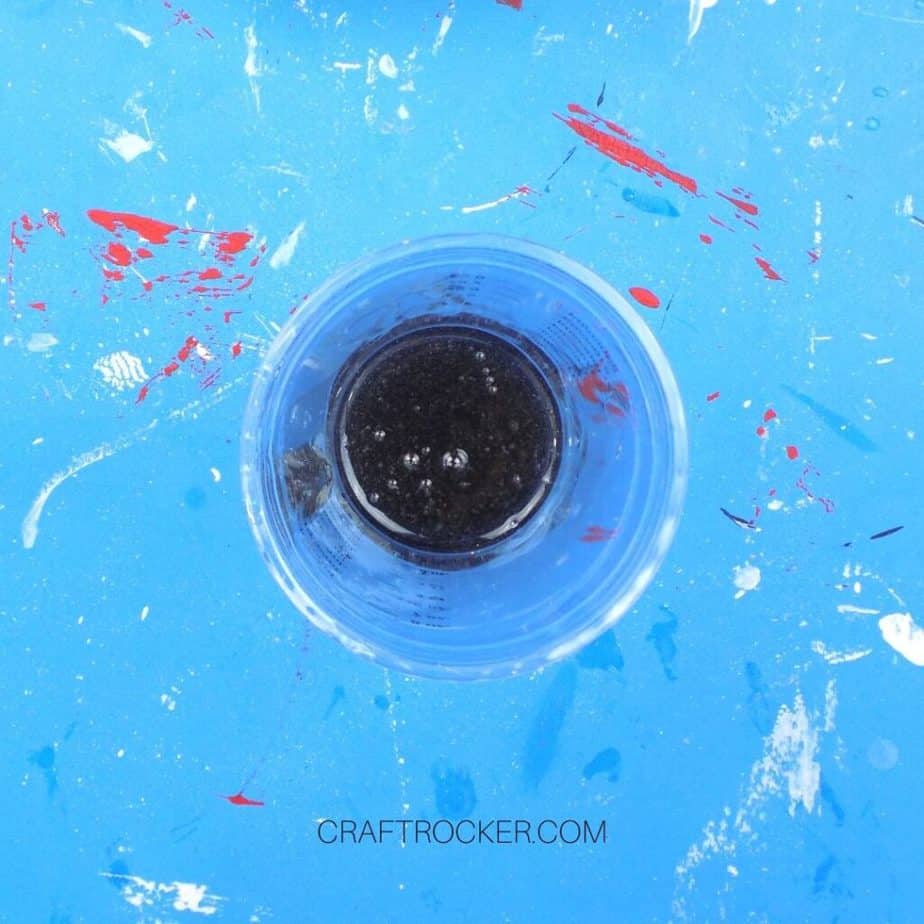
Step 5
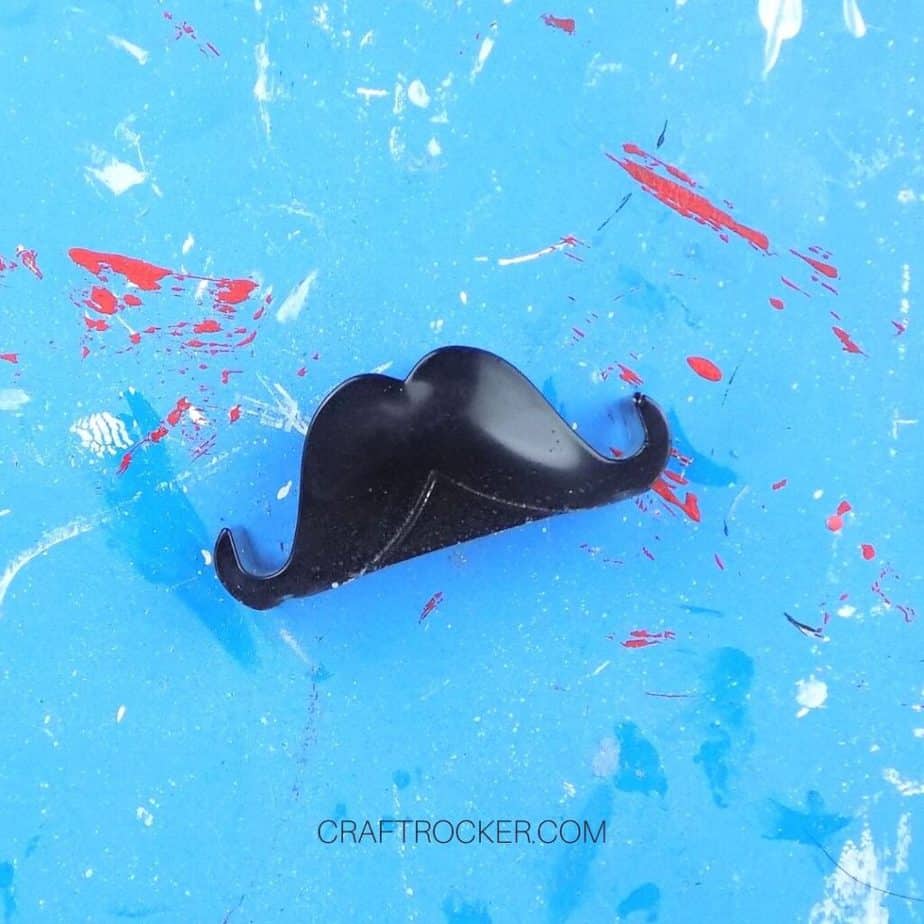
Now pull over your second cylinder of resin and add 4-5 drops of black resin dye. Mix the dye thoroughly into your resin.
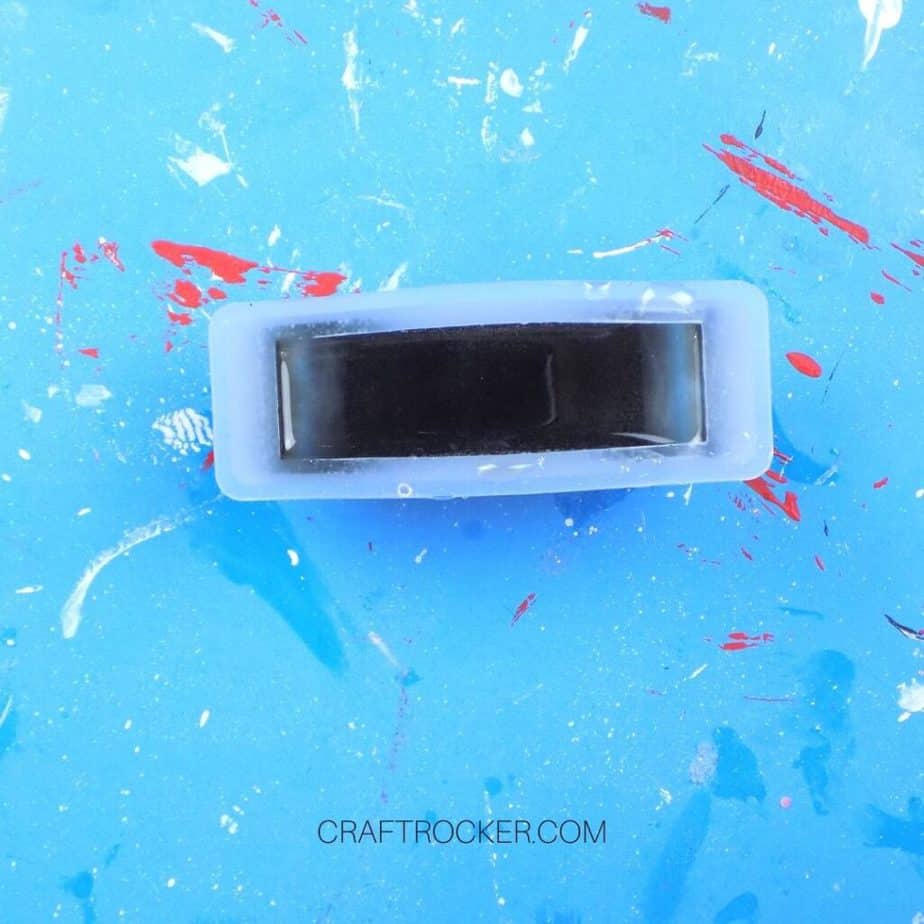
Step 6
Again, carefully pour your dyed resin into your silicone mustache mold and fill it completely.
Step 7
Set your resin-filled mold on a flat surface in a dry area to cure.
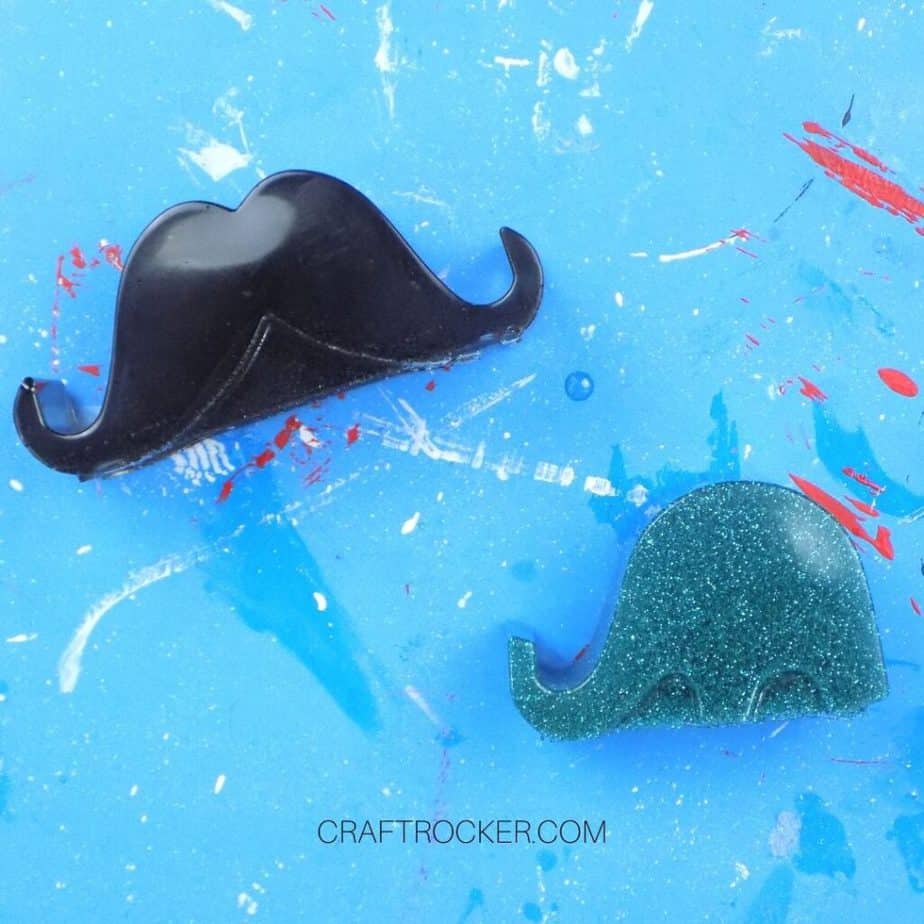
Step 8
After your molds have cured for 24 hours (or according to your package directions), remove the phone holders from the molds.

Step 9
Lastly, sand the bottoms of the phone holders to remove any jagged imperfections. Then wipe with a damp cloth.


Large Resin Phone Stand Materials
Stir Stick for Mixing
Epoxy Resin Dyes (I used blues and greens for mine)
Metal Epoxy Tool
Water Bottle Sticker of Choice (I used one from this set)
Note: Always wear protective gloves when working with resin.
Step 1
Start by mixing 1 ounce each of parts A and B of your casting resin.

Step 2
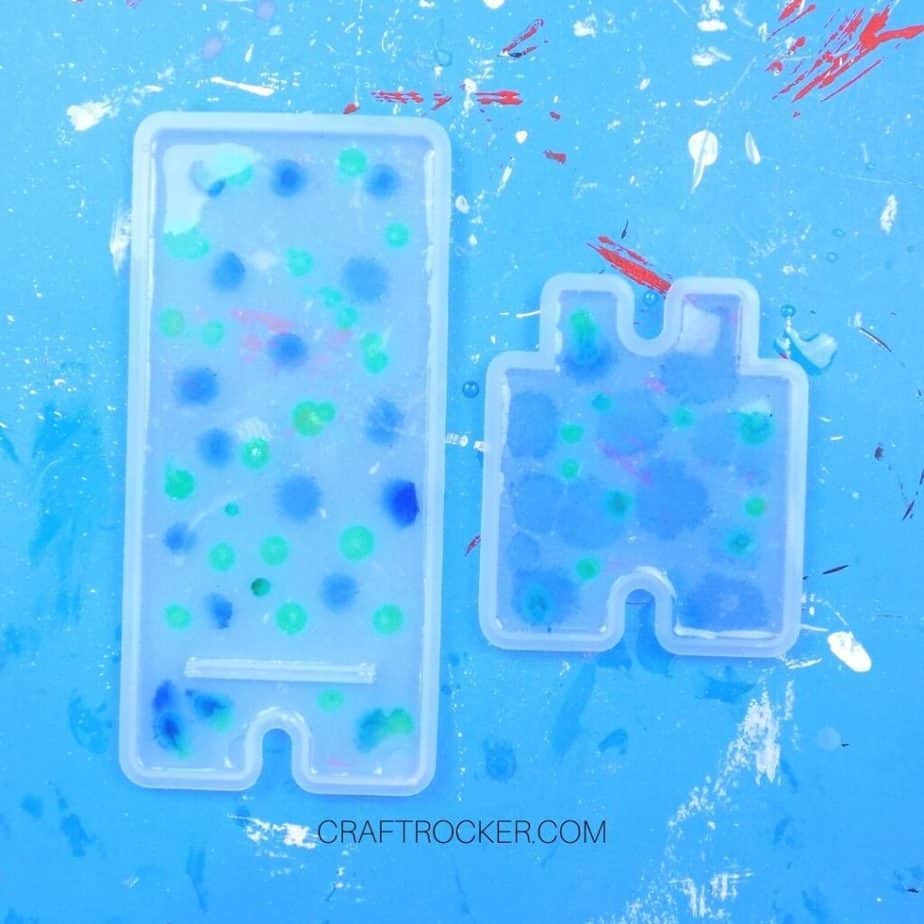
Then pour it into each of your silicone mold pieces. You only need to add enough resin to each to cover the bottom of the mold.
Don’t worry that it doesn’t fill your molds yet.
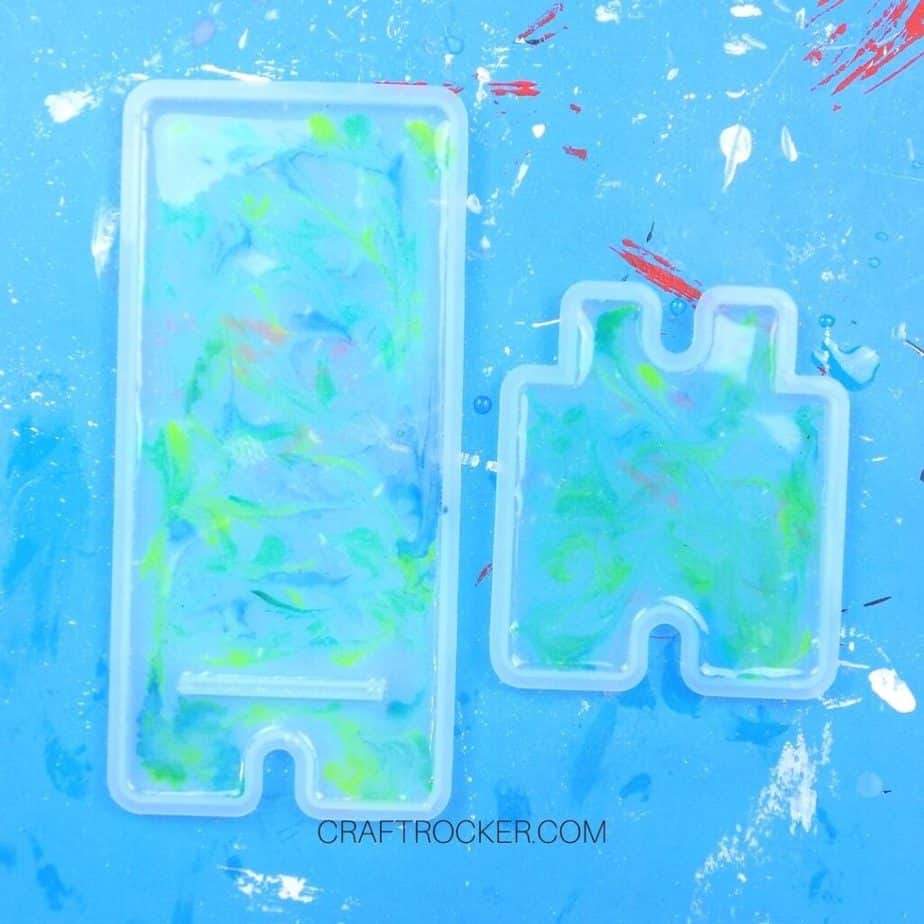
Step 3
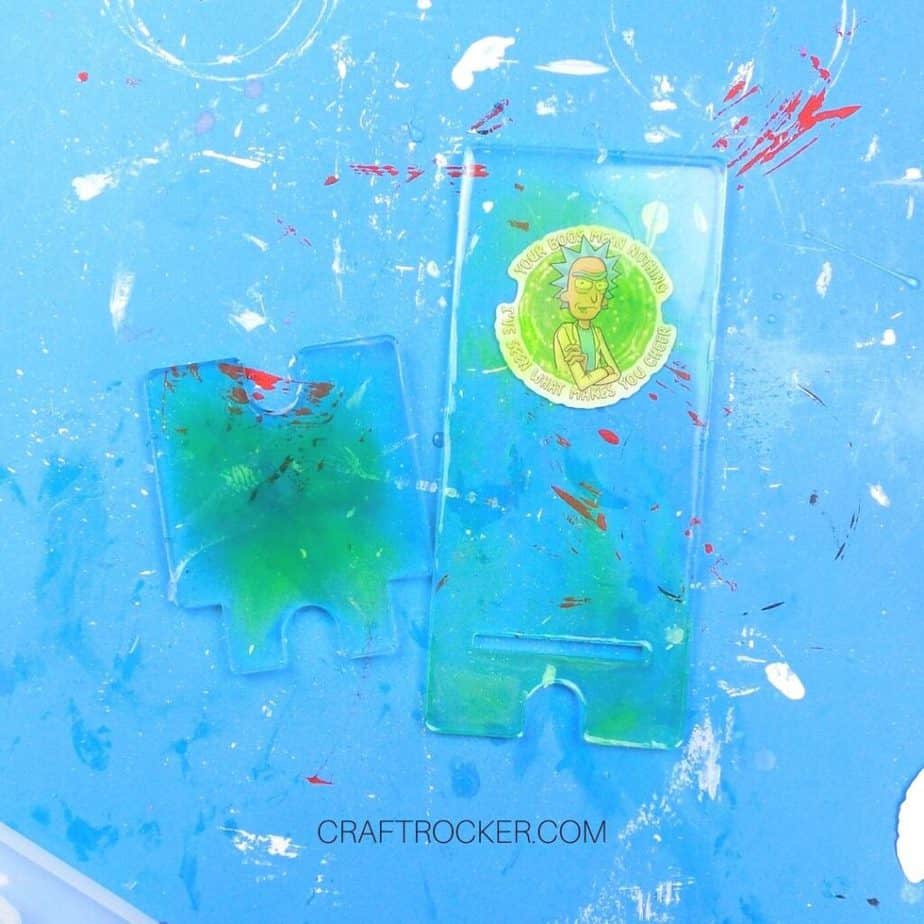
Next, add random drops of your resin dyes to the epoxy in your molds. Then use your metal epoxy tool to swirl the colors around.
Step 4
After your colors are swirled, set your molds aside to cure on a flat surface in a dry area for 24 hours.
Step 5
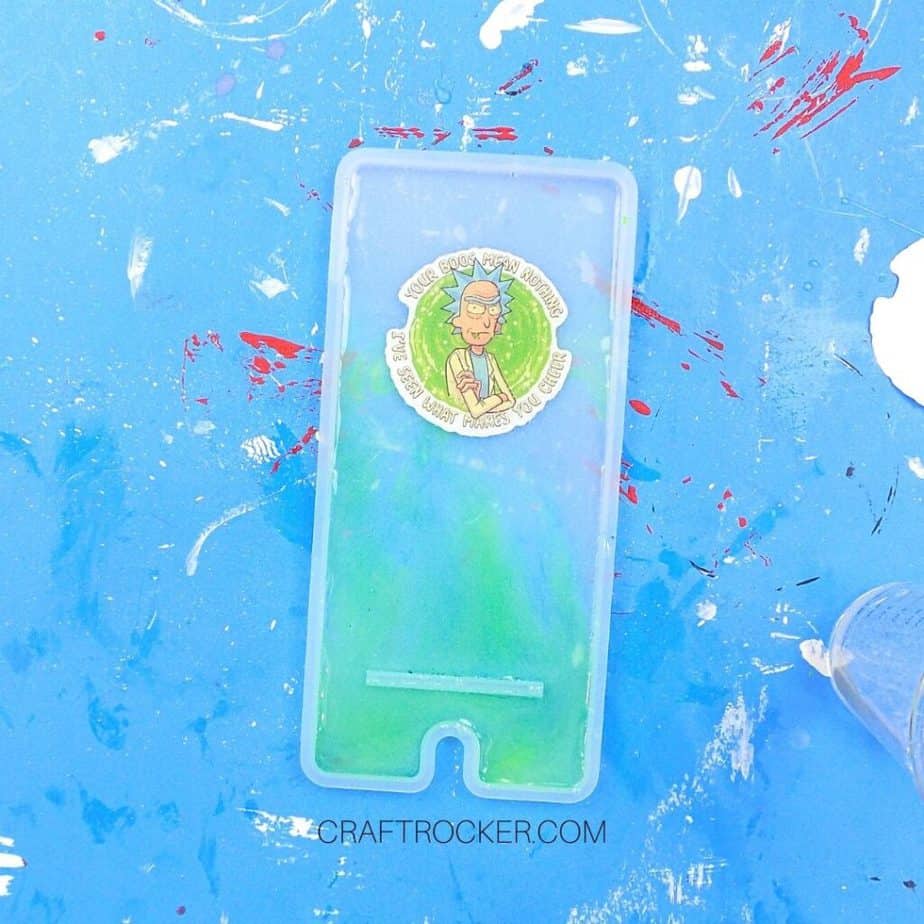
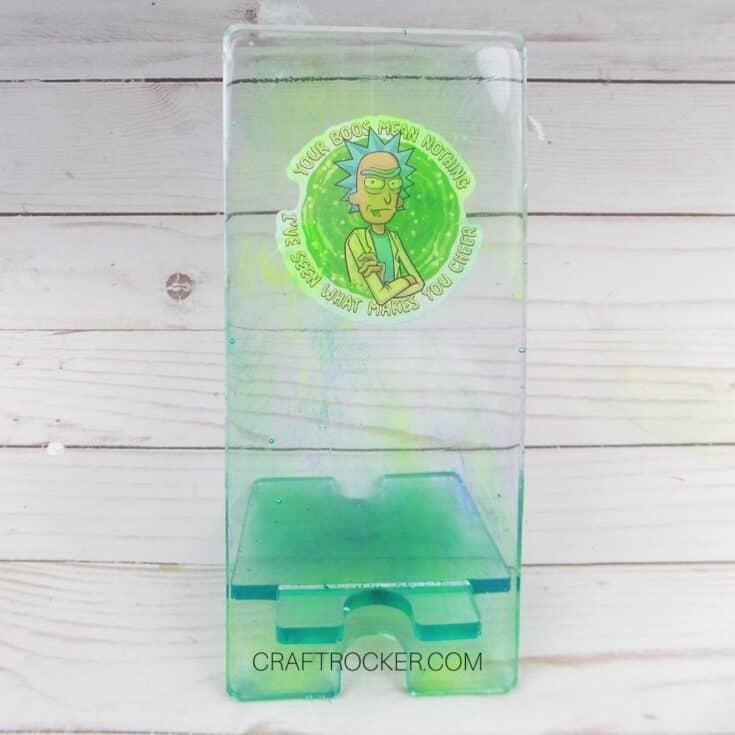
Once your resin is cured, attach your sticker of choice to the top of the cured resin in the larger mold.
Step 6
Next, mix up 2-3 more ounces each of parts A and B of your casting resin.
Step 7
Now fill each of your molds to the top with resin.
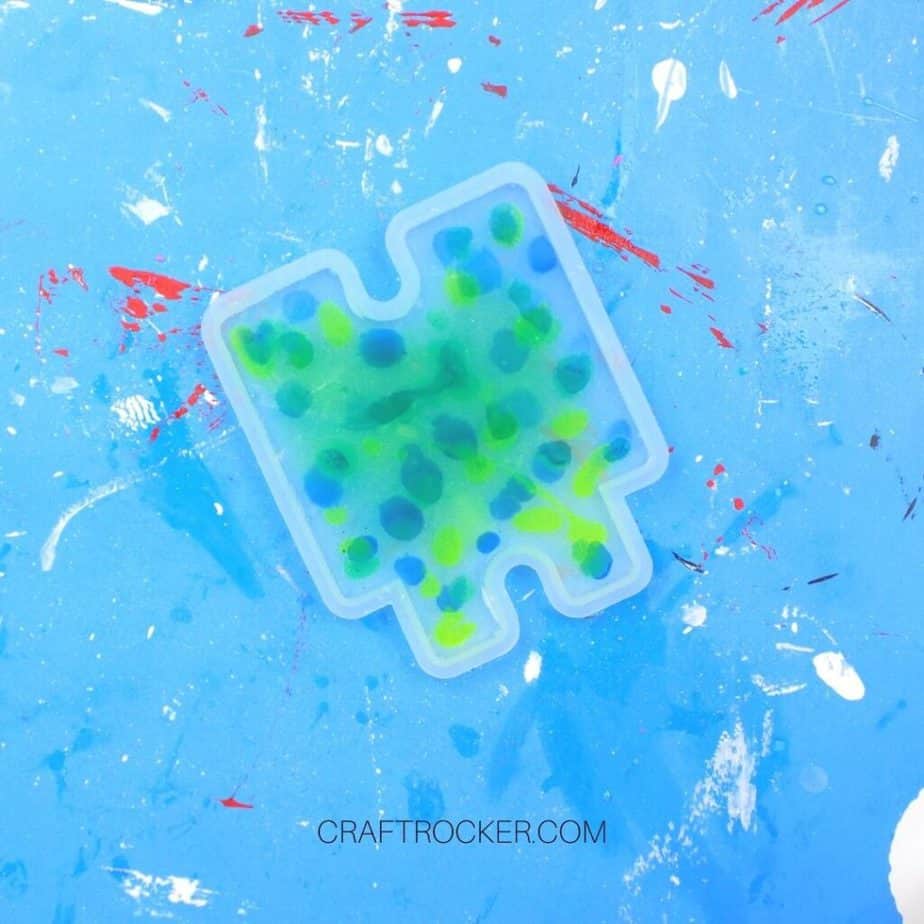


Step 8
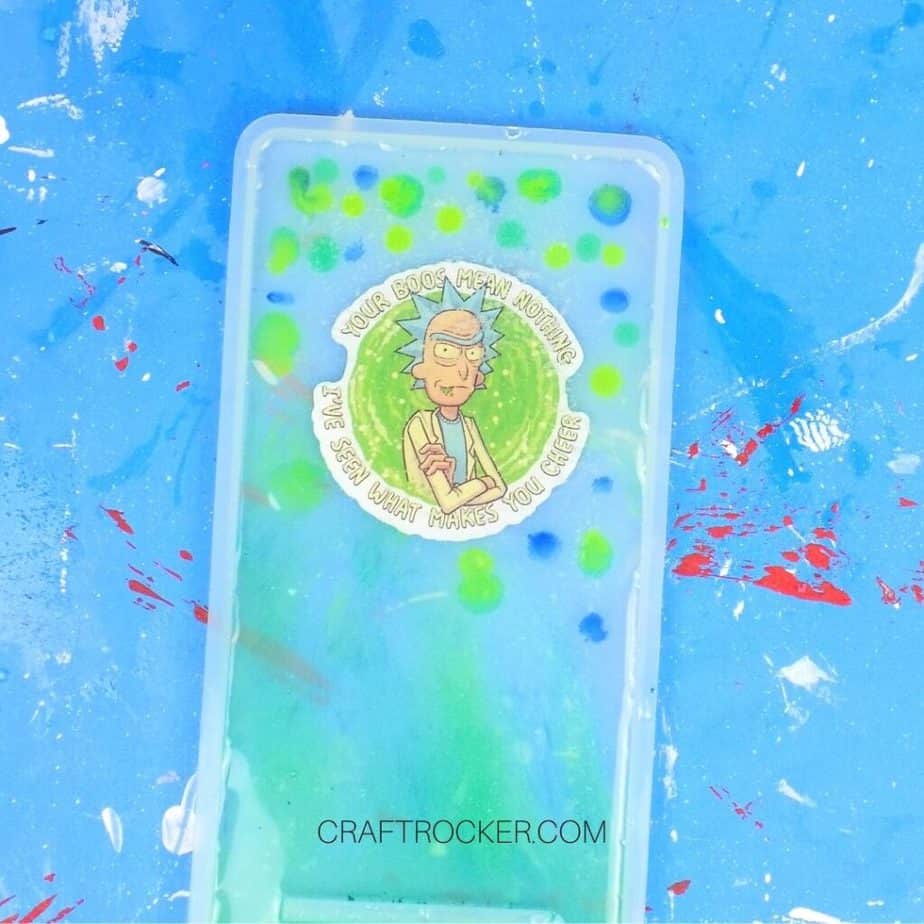
Again, add drops of dye to the resin and swirl it around with your tool.
Be careful not to swirl the colors too much over your sticker. You don’t want to cover it.
Step 9
Once your colors are again swirled, set your molds aside to cure again for 24 hours. Again be sure that they are on a flat surface in a dry area.
Step 10
After the resin is cured, remove your pieces from the molds and sand any rough edged with sand paper. Then wipe with a damp cloth.
Step 11
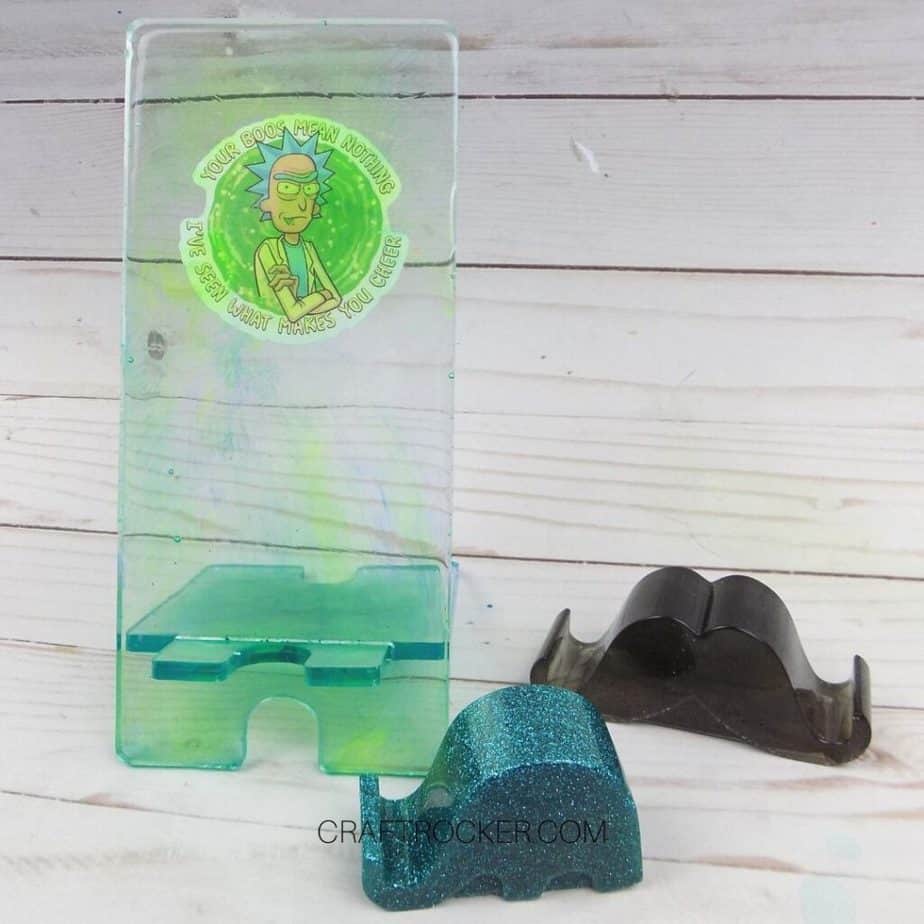
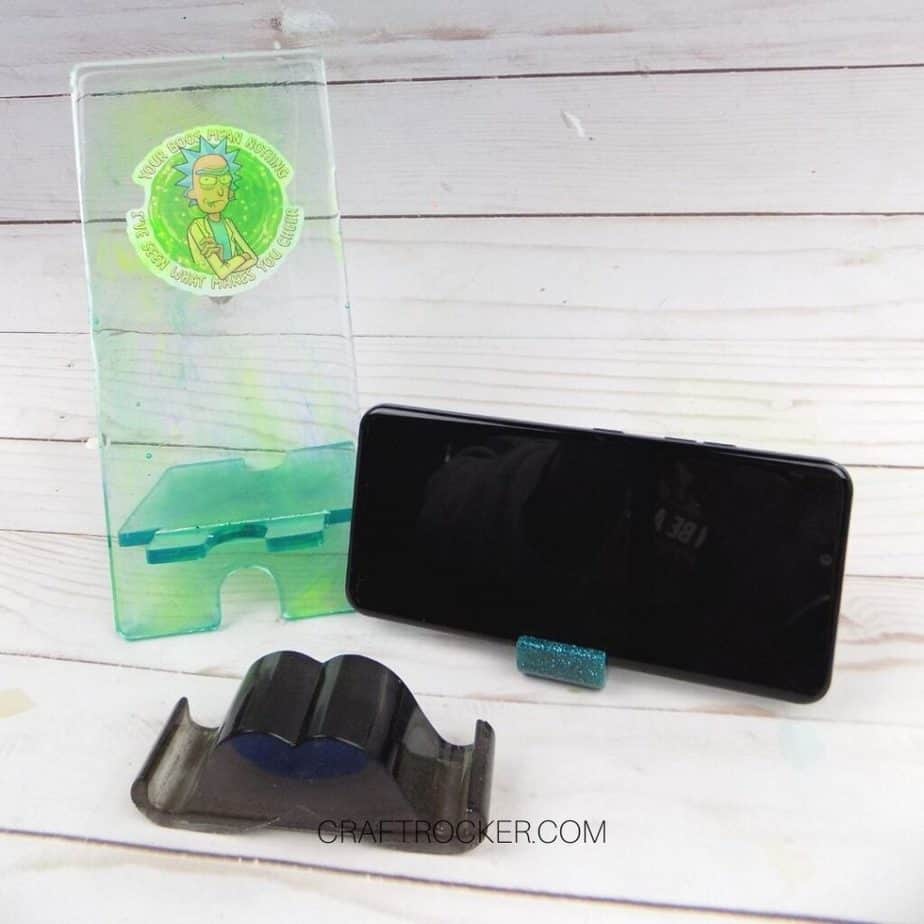
Lastly, put your pieces together so that the small arms on the smaller resin piece are exposed in the front of the tall resin piece.
Tips and Tricks
If you keep your phone in a case, the small phone holders likely won’t hold it. I recommend making the 2 piece phone holder in that instance.
The large phone holder also allows you to easily charge your phone while it is on it and can hold your phone both vertically and horizontally.
Be sure to fill the large molds completely to the top with resin. If you don’t, the finished product will not be as stable and could warp under the weight of your phone.
It is also important to make sure that your resin cures correctly so that it is strong enough.
Cute Phone Stands
The great thing about these resin phone holders is that you can toss one of them in your bag to have one on the go.
Materials
- Silicone Phone Stand Molds
- 2 Part Casting Resin
- 2 Graduated Cylinders for Measuring and Mixing
- Stir Sticks for Mixing
- Teal Glitter
- Black Epoxy Dye
- Fine Grit Sand Paper (400 grit or higher)
Instructions
- First, mix 2-3 ounces each of parts A and B of your casting resin. Then divide the mixed resin in half in separate cylinders.
- Next, add your desired amount of teal glitter to one of the cylinders of resin and stir to thoroughly combine it.
- Then carefully pour your glitter resin into the elephant silicone mold. Be sure to fill it completely.
- Set the mold aside on a flat surface in a dry area to cure.
- Now pull over your second cylinder of resin and add 4-5 drops of black resin dye. Mix the dye thoroughly into your resin.
- Again, carefully pour your dyed resin into your silicone mustache mold and fill it completely.
- Set your resin-filled mold on a flat surface in a dry area to cure.
- After your molds have cured for 24 hours (or according to your package directions), remove the phone holders from the molds.
- Lastly, sand the bottoms of the phone holders to remove any jagged imperfections. Then wipe with a damp cloth.
Notes
Always wear protective gloves when working with resin.
Large Resin Phone Stand
Keep this large resin phone stand at home for watching videos on your phone or following recipes in the kitchen while it’s charging.
Materials
- Silicone 2 Piece Resin Phone Stand Mold
- 2 Part Casting Resin
- Graduated Cylinder for Mixing
- Stir Stick for Mixing
- Epoxy Resin Dyes
- Metal Epoxy Tool
- Water Bottle Sticker of Choice
- Sand Paper
Instructions
- Start by mixing 1 ounce each of parts A and B of your casting resin.
- Then pour it into each of your silicone mold pieces. You only need to add enough resin to each to cover the bottom of the mold. Don’t worry that it doesn’t fill your molds yet.
- Next, add random drops of your resin dyes to the epoxy in your molds. Then use your metal epoxy tool to swirl the colors around.
- After your colors are swirled, set your molds aside to cure on a flat surface in a dry area for 24 hours.
- Once your resin is cured, attach your sticker of choice to the top of the cured resin in the larger mold.
- Next, mix up 2-3 more ounces each of parts A and B of your casting resin.
- Now fill each of your molds to the top with resin.
- Again, add drops of dye to the resin and swirl it around with your tool.
- Be careful not to swirl the colors too much over your sticker. You don’t want to cover it.
- Once your colors are again swirled, set your molds aside to cure again for 24 hours. Again be sure that they are on a flat surface in a dry area.
- After the resin is cured, remove your pieces from the molds and sand any rough edged with sand paper. Then wipe with a damp cloth.
- Lastly, put your pieces together so that the small arms on the smaller resin piece are exposed in the front of the tall resin piece.
Notes
Always wear protective gloves when working with resin.

Printable Resin Phone Holders Tutorials
The great thing about these resin phone holders is that you can toss one of the small ones in your bag to have one on the go.
Then keep the big one at home for watching videos on your phone or following recipes in the kitchen while it’s charging.
They’re both super easy to make and totally convenient.
Don’t Forget to Pin It!
More Resin Crafts to Check Out
DIY Resin Wood Table – Our Crafty Mom

Leave a Reply