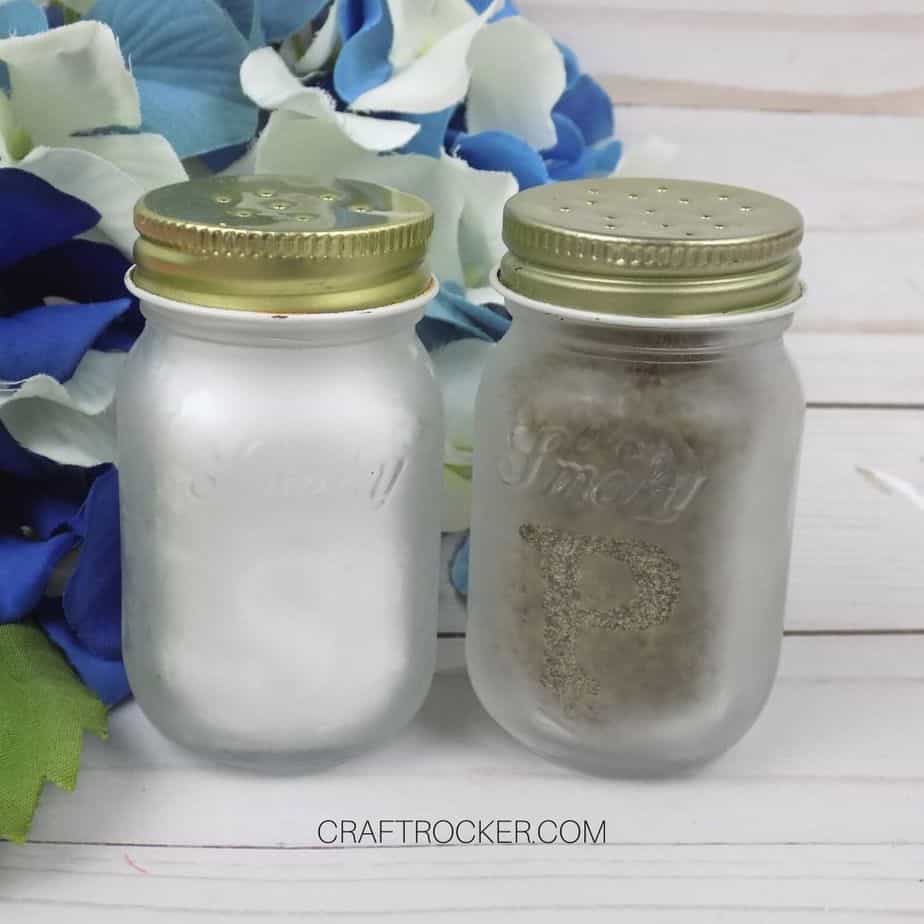
These mini mason jar salt and pepper shakers are an easy way to turn trash into treasure, or clear up some space in your craft room if you’re a craft supplies hoarder like me.
Affiliate links may be used in this post. Ordering a product through these links may result in a commission at no extra cost to you. Read the full disclosure here.

I’m a little obsessed with the mini liquor bottles at the store. For one, they are absolutely adorable. Secondly, when I look at them I see possibility for new projects.
It doesn’t even matter what is in them. If the bottle is fun or unique in some way, I’ll buy it.
That’s exactly what happened with these little jars. Although, I can’t take credit for this project idea. The guy who sold them to me knows I like to craft with the bottles and he gave me the idea to turn them into salt and pepper shakers.
Mini Mason Jar Salt and Pepper Shakers Materials
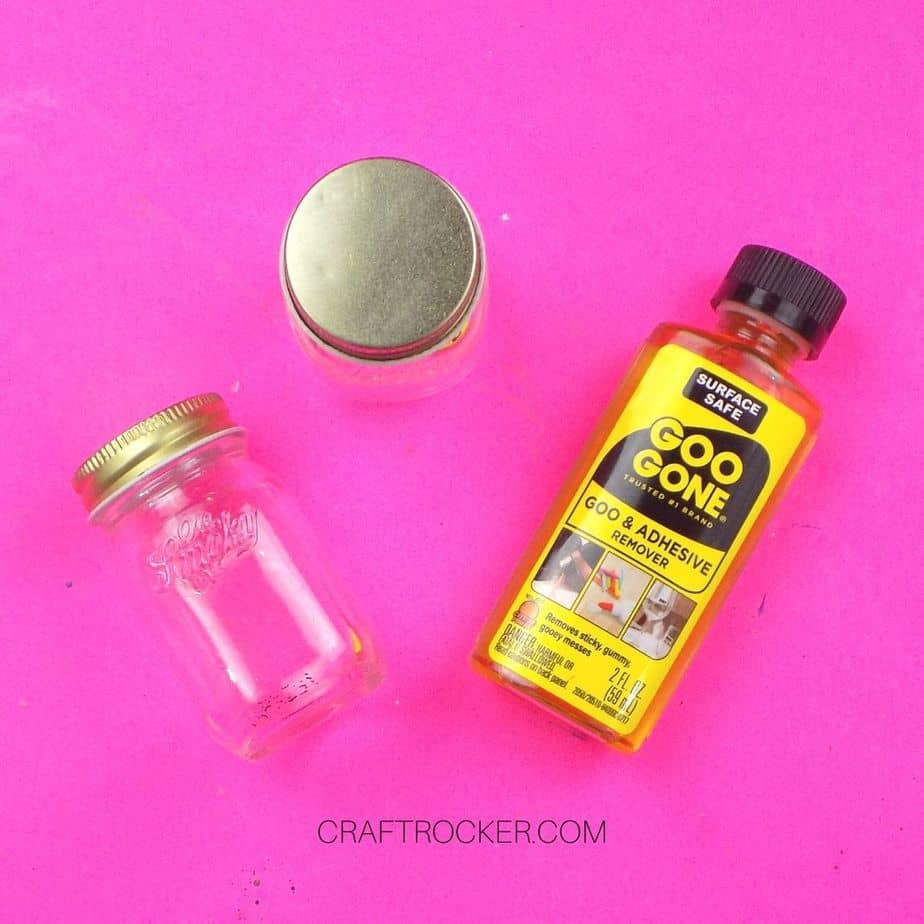
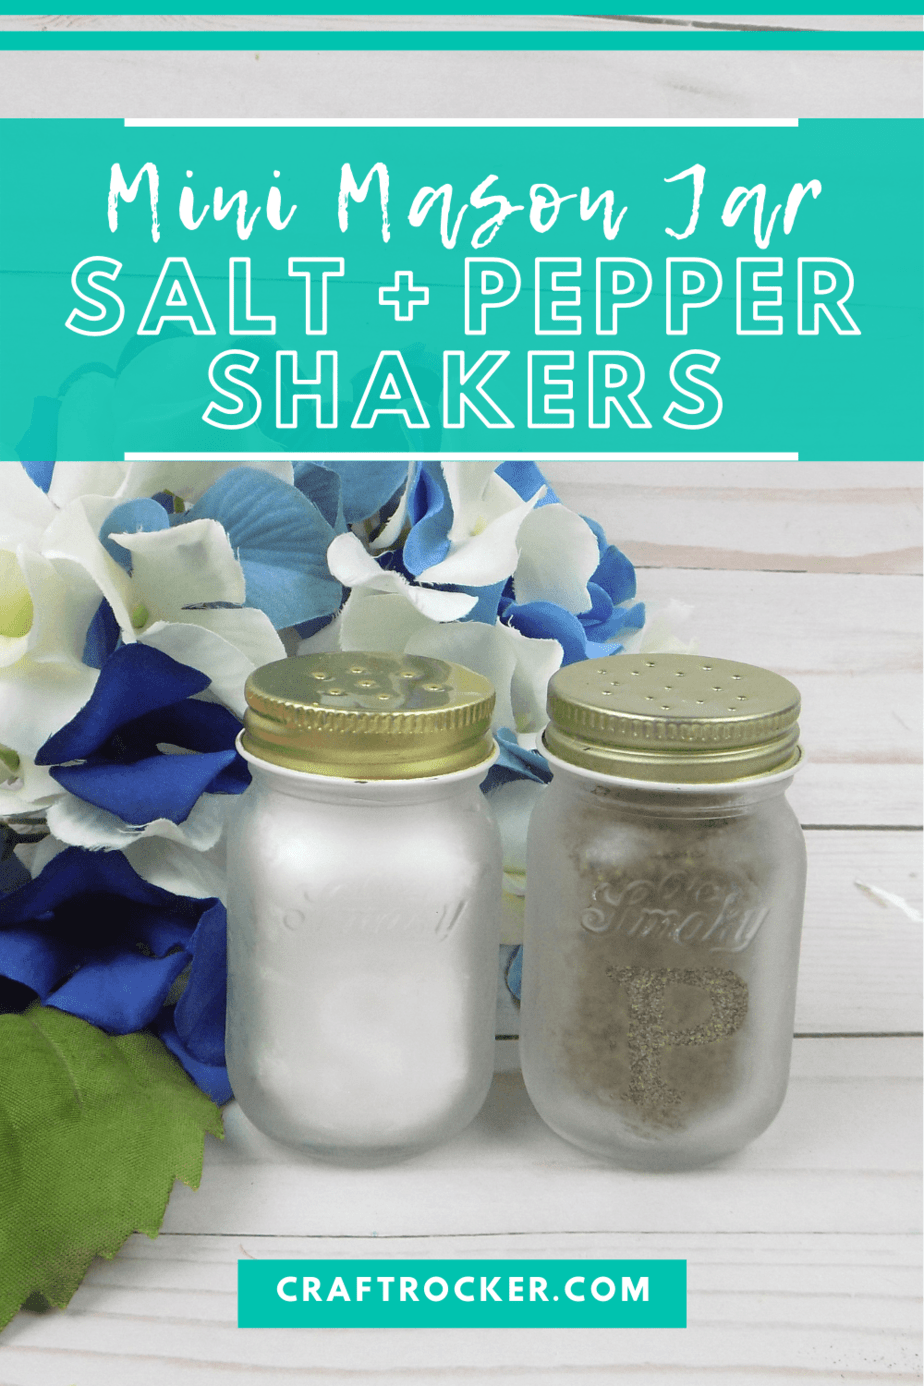
- 2 Mini Mason Jars
- Letter Stickers (about 1.5 inches tall)
- Glass Etching Solution
- Protective Gloves
- Small Paint Brush (any flat brush will work)
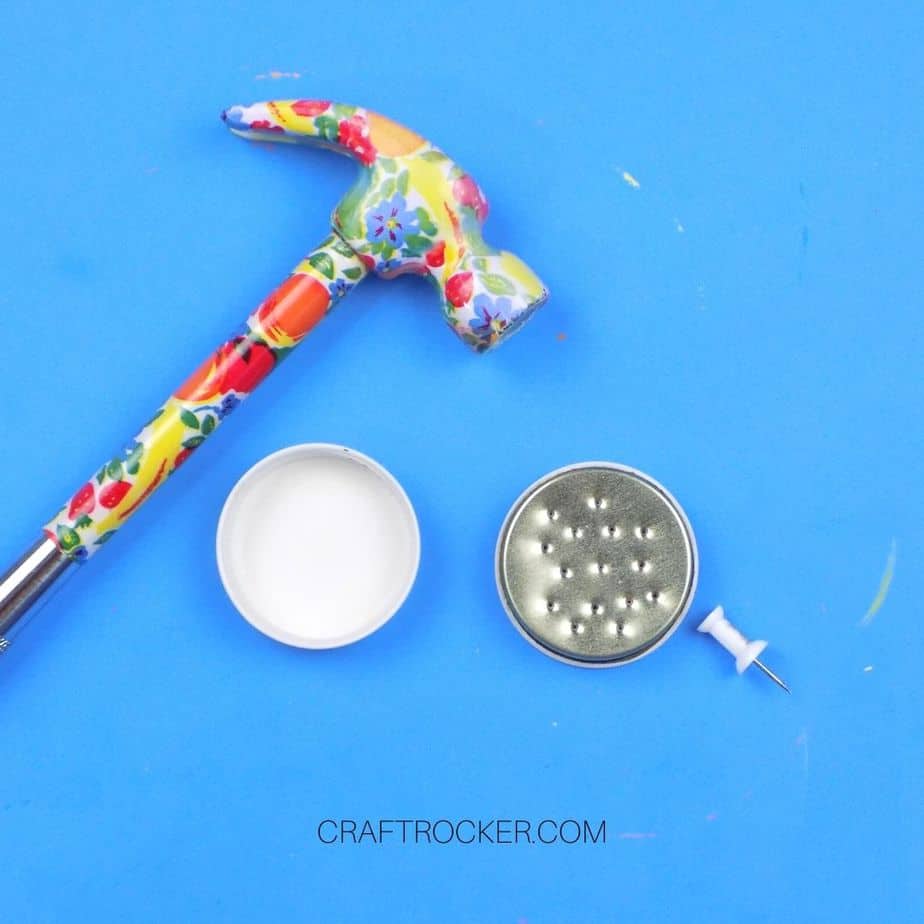
- Hammer
- Push Pin
Optional Additional Materials
- Goo Gone
- Rubbing Alcohol
- Fine Grit Sand Paper
Step 1
First, you need to remove any stickers or labels from your jars and clean them.
I used Goo Gone to get the sticky residue off of the jars. If you do the same, make sure that you wipe the jars down with rubbing alcohol afterward, otherwise your etching solution won’t work correctly.
Let the jars dry before moving on.
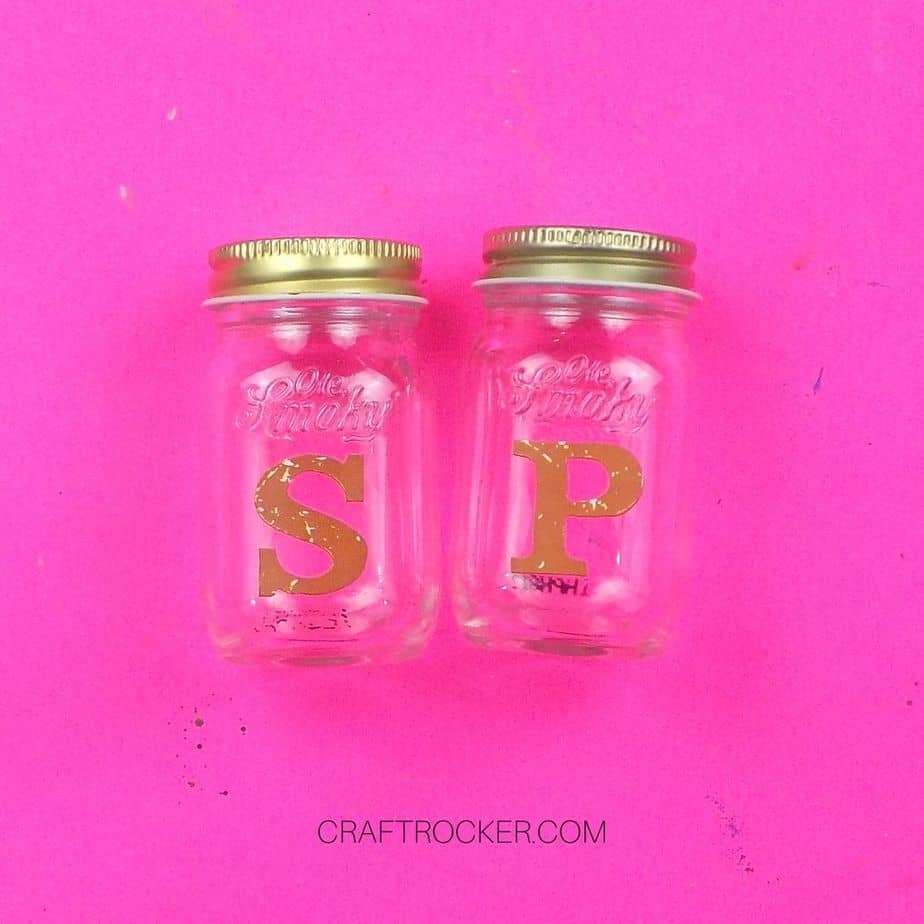
Step 2
After your cleaned jars are dry, put an “S” sticker on one and a “P” sticker on the second one.
Make sure your letter stickers are pressed firmly to the jars.
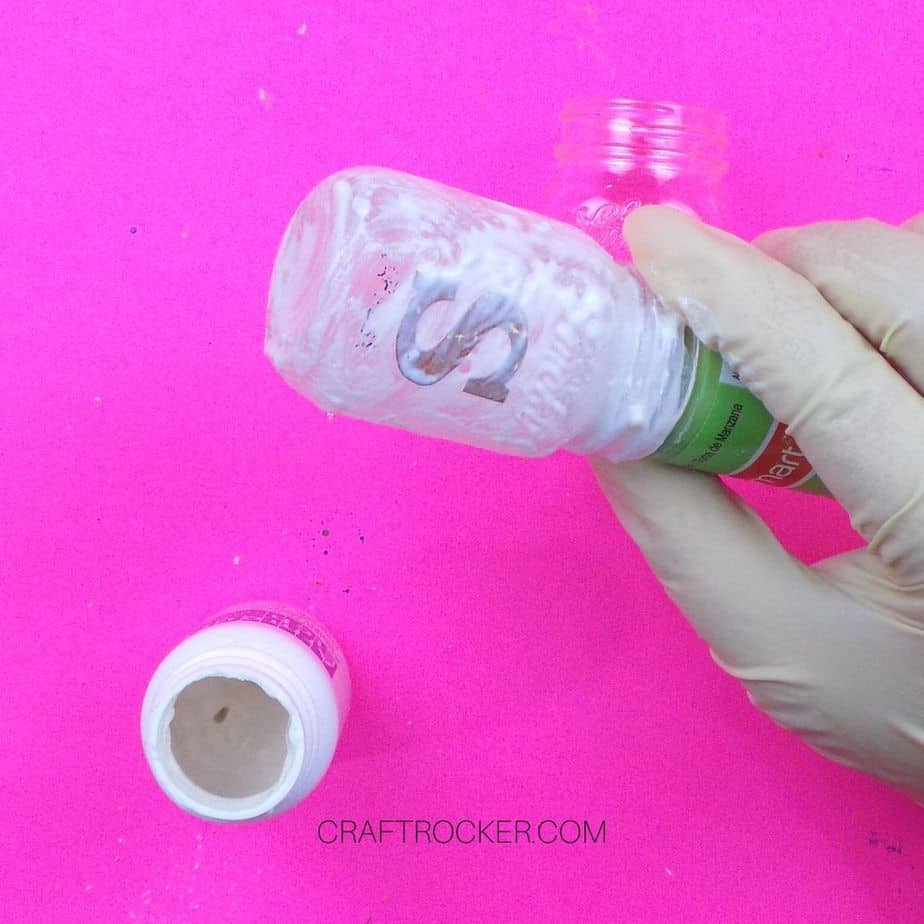
Step 3
Then, put on your protective gloves and coat the entire outside of each jar with etching solution.
Tip:
- I placed the jars upside down on the tops of acrylic paint containers and it made it so much easier to coat them. It also was a convenient place to let them sit while the etching solution did its magic.
Step 4
Let your jars sit covered in etching solution according to the package instructions.


Step 5
After the time is up, again put on protective glove and rinse off the etching solution on your jars. You also want to get the stickers off of your jars at this time.
Step 6
Then set your rinsed jars aside to dry and grab the lids, your hammer, and a thumb tack.
Step 7
Place one cap, lip side down, on your work surface. Place your thumb tack in the center of the lid and gently tap it with a hammer.
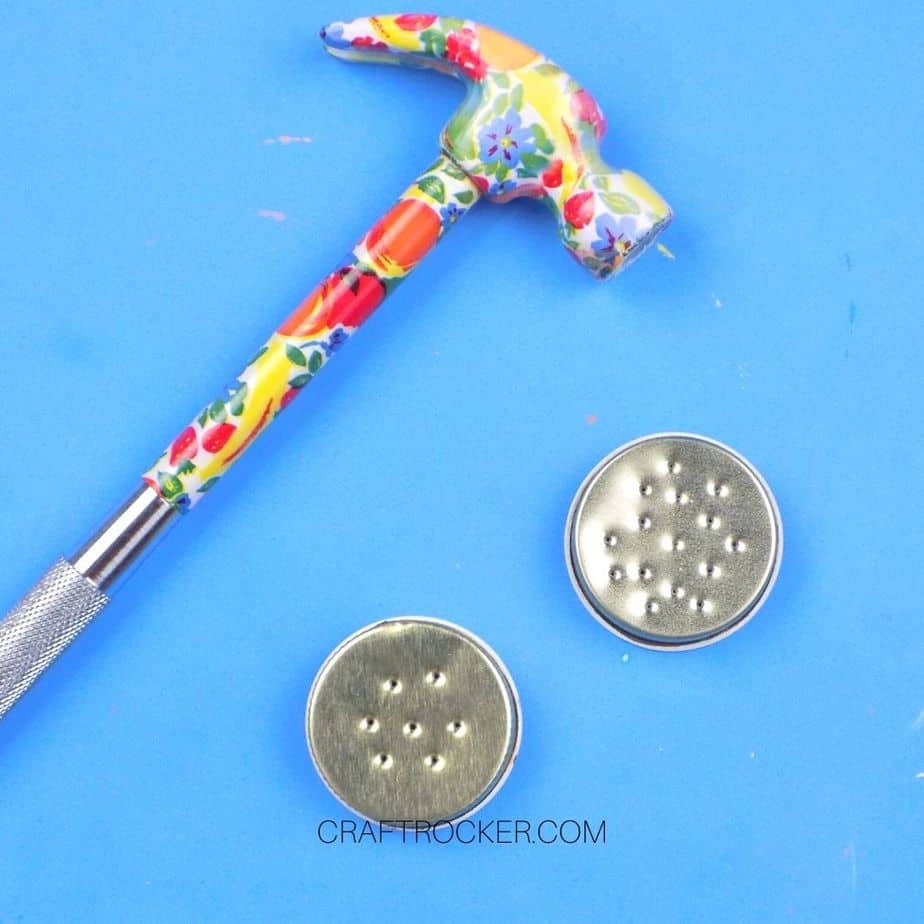
Step 8
Remove the thumb tack and repeat in different areas of the lid until you have the desired number of holes in each jar lid.
Step 9 (Optional)
If needed, sand the inside of your cap to smooth the holes. Mine did not need this because of the protective rubber coating on the inside of the lid.
If you jar lids do not have that coating, you need to sand the holes down.
Step 10
Lastly, clean your lids and jars again and allow to dry completely before filling with salt and pepper.
After your mini mason jar salt and pepper shakers are dry, fill them and you’re ready to go. This is a really simple and unique gift idea, especially for those hard to buy for guys.
You can also fill these with different seasonings and gift to the grill master in your life. So many great ideas, so few mini mason jars.
Don’t Forget to Pin It!
More Projects to Love:
- How to Sew a Pillow Easily
- Wood Burned Cutting Board
- Pressed Flower Resin Coasters
- DIY Mason Jar Vases – Domestically Creative

Leave a Reply